The tradition of making blanks for the winter - is unchanged for a Russian person. Even when moving to a high-rise building from a private house, many do not want to give up this event, since canned or stored at the right temperatures, vegetables and fruits have repeatedly rescued in different life situations. The cellar on the balcony can be made in different ways, depending on the floor on which the apartment is located.

Cellar on the balcony
In any cellar, wherever it is located, favorable conditions should be created for the preservation of various - products to maintain the optimum humidity and temperature.
How can I make a cellar on the balcony, and where can I place it? You can choose a fairly simple option, which is available for everyone. Well, if the apartment is located on the ground floor, and it has a balcony or loggia, then there is the possibility to build a real, full underground storage. In the latter case, of course, will have to use a lot of force to remove part of the concrete slab and shovel large volumes of soil.
There is yet one version of the cellar, which is located in the underground part of the balcony. It can be done on the balcony or balcony of any floor, but for this you need to carry out a series of rather complex activities.
To determine the choice and see the volume of work to be done, you need to consider all three options for building such a mini-cellar.
Thermo-container for storage of products
Contents of the article
- 1 Thermo-container for storage of products
- 1.1 Tools and materials
- 1.2 Assembling of a cellar
- 1.3 Video: convenient thermo-glass for storing vegetables
- 2 Cellar in the balcony's undercourt
- 2.1 Video: mini-cellar for home carpetsunder the balcony flooring
- 3 Cellar under the first floor balcony
- 3.1 Preparing for the work
- 3.2 What is needed for the construction of the
- 3.3 Building a cellar under the balcony
ermokonteyner - a special box, in which all the conditions inherent in this cellar.

One of the options is a thermolar for storing vegetables
Such a box can be mobile, that is it can be rearranged to a convenient place on the balcony , and can also be fixed , built between the walls.
Both versions are produced according to one principle, and the similar to looks like way:

Diagram of insulated container for vegetables
1 - This is the case of the box. It can be made from plywood, chipboard or boards.
2 - The second layer of comes insulation - as it is used foam or foamed polyethylene foam, laid in several layers .
3 - Additional insulation will be the air gap between the heater and the inner box.
4 - Vegetable box with ventilation holes.
5 - A secure, well insulated heater is installed between the inner drawer and the bottom of the enclosure.
Such a thermo container is designed, is mainly , for potatoes or other root crops. The optimum temperature for their storage is from 3 to 7 degrees Celsius, which is impossible to achieve in conditions of Russian winters on an unheated balcony without additional heating of the storage, so a heater with a moderate power is installed.
In the summer of the same heat insulation, on the contrary, keep the inside of the box cool temperature. If necessary, its can even be lowered by placing inside ice in a sealed container or package.
In the installation of such a cellar there is nothing complicated, and if the house has tools and material for its manufacture, then it can be collected in one day.
Tools and materials
For the manufacture of such a thermo-container, depending on the chosen design and dimensions, materials will be needed:
- Thick plywood or chipboard for the outer casing. If the cellar is stationary, then this material will be needed for the front wall and the top cover of the product.
- You can use not thick boards or plywood for the inner box.
- Wooden bars for the carcass structure, on which the is fastened is a sheathing material.
- Heater - foam , foam or other thick materials.
- Electric heater. As it is quite possible to use infrared film , because its power will be enough to achieve the desired temperature. For a small volume container can fit even a conventional light bulb of 40 or 60 watts, but in this case it is desirable to install the regulator of its incandescence.
- Thermo tr for and temperature control in the cellar.
- For the assembly of all materials in the general construction, it is necessary to purchase self-tapping screws, hinges for securing the lid, nails, anchoring fasteners for fixed construction, metal corners may be needed.
- Mounting foam for bonding foam sheets together. It can also serve as a heater, if you fill it with the space between two layers of plywood, making thus homemade sandwich panel.
- Tools needed to have jigsaw or hacksaw, pliers, screwdriver , screwdriver , hammer, drill and drill bits of different sizes for wood and, if required, for concrete.
Prepare in the se necessary, begin work on the production of a thermocarbox for storing vegetables.
Assembling the cellar

Sample installation scheme for the cellar
1. If the product is "mobile", then the skeleton of the box is assembled from the bar.
- Bars can be fastened together with metal corners.
- The bottom of the should be raised above the balcony floor, so two bars are fixed to it, closer to the middle, which will not only create an air cushion, but will also give rigidity to the rigidity.
- Next, a heater is installed. It is cut in size, which corresponds to the perimeter of the planes between the bars. The insulation must have a thickness equal to the size of the bar. To ensure that there are no cold bridges between the heater and the bars, the resulting slots are filled with mounting foam.
- At the bottom of the fastened plywood that will close the insulation. On top of the , is fitted with one of the heating devices. Due to its small thickness and operational safety, the is suitable for the infrared film. Create an " warm pillow" and with the help of light bulbs, but in this case decreases the volume of the box, since it is absolutely necessary to install on top of them one latticed bottom.
- Then all the internal planes of the will be not superfluous to peel with foamed polyethylene foam. If a light bulb is used for heating, the bottom grate does not close with polyethylene.
- The gap between the cover and the frame of the box, on the side where the hinges are to be installed, must also be covered with flexible polyethylene foam. After the lid is installed, the strip of insulation material is fastened with the clamps as the to the box and to the lid.

The wall and lid of the chest
- are closed with the foamed insulation. The inner box with ventilation holes along the side walls, in which the potatoes will be stored, is recommended to make the a removable . So it will be convenient to clean and dry it at a time when there will be no vegetables in the cellar. This element of mini-storage is best done from boards.
2. In the case where the cellar is planned to be stationary, first marking on the walls of the places where the bars will be fastened, that is, in this case the frame of the box will be completely fixed to the walls. Further work is carried out in exactly the same way as with the mobile container device.

The thermometer may well be stationary
The top cover of the cellar, by the way, can be used as a balcony sofa seat, if the design will be enough for this reliable .To do this, you need to put the top-matched -sized mattress on top of the .
Video: convenient thermolar for storing vegetables
Cellar in the balcony's undercourt
Many tenants, having received an apartment with a small balcony, are upset that on it can not arrange an additional insulated room. However, some particularly inventive owners of such apartments manage to use even this small space, having arranged on it not only lockers and a greenhouse, but also a cellar for canned billets.

Even on the smallest balcony it is possible to arrange a small cellar
Naturally, for this it is necessary to carry out considerable work, but this option can be implemented on the balcony of any floor.
- Before the can proceed with the , it is necessary to produce an exact calculation of the height, which is possible to raise the floor. Of course, three-liter bottles placed under the floor on the balcony are unlikely to work, because is too high to have to lift the deck, but liter and half-liter, or even 1.5 liter will be installed perfectly.

The floor of the balcony will require additional insulation
- The first step of the is the insulation of the concrete foundation of the balcony. In this case, a thicker non- is suitable for , since will have counting every millimeter of height. Therefore, it is possible to use foamed polyethylene foam on top of which the infrared film is assembled. If the balcony of the lower neighbors is insulated with , then it is possible to do only with heat insulation material.
- If the balcony is a narrow , then the flooring can be produced on the bars, fixed on the walls. If the width of the is large, will have to install brusks between the walls, raised on metal studs to the desired height. Usually the flooring is made at the balcony door threshold, and in most cases this height is about 200 mm.

Raising the floor level using adjustable racks
- If under the floor there are hidden cans with house preservation, then the flooring must be rigid , do not bend, so for the floor device take boards, 1.5 thickness - 20 mm thick.
- The hatch through which the cans will be loaded and removed from the underground can be sliding or folding.

The hatch can be swinging or sliding
- In addition to the cellar under the floor, on the balcony you can make built-in cabinets with shelves under the windows. The doors in this case it is better to arrange sliding, then it will be convenient to open them.

In addition, you can mount convenient cabinets or shelves
- If the balcony is narrow and long, then in one of its sides under the floor you can make, in addition to the cellar, a built-in wardrobe. He, too, can serve well in the storage of fresh and canned vegetables.
Video: mini-cellar for home carpets under the balcony deck
Cellar under the first floor balcony
If the apartment is on the first floor of the high-rise building, and it has a balcony - is a rare fortune for those accustomed to the to have the forstorage of blanks for the winter, because in these conditions it is quite possible to arrange a small cellar. Of course, in the arrangement of such a room there are certain difficulties, but they can be overcome.

Balcony on the ground floor - a find for those wishing to have their own cellar
The balcony can be located at different heights above the earth .If this distance is about one and a half meters, then even the will have to laz in the concrete slab, which is under the balcony. The main condition in this option is the erection and reliable wall insulation.
Preparation for work
It is unacceptable to start such work on your own because the work can be done in vain and the will have to pay a considerable fine. This will occur in the event that the controlling authorities determine such a construction impossible, and adversely affects the design or appearance of the entire house.
Therefore, , before purchasing the necessary materials, it is necessary to pass a number of conciliation procedures, which include the conclusions of experts on the safety of such a cellar for the entire building. This issue is solved in the managing organization, in which the creates an special commission, and according to the results of its work can be issued a permit or ban on the device of the cellar.
Work on the construction can begin only after the hand on the permissive documents.
What is needed for the construction of the
Having obtained permission, you can safely go to the building store for materials, the list of which will depend on the design of the cellar. For example, if this room is located between the balcony floor and the surface of a concrete slab playing the role of ebb, then you will need to work:
- Brick for erecting side walls.
- Cement mortar for masonry and plaster.
- Insulation material.
- Boards for the manufacture of boxes and ladders.
- Waterproofing material.
- Metal corner for framing the hatch.
- Ventilation grating .
If the cellar is deepened into the ground, the list of materials will expand somewhat, and, besides mentioned, you will need:
- Reinforcing mesh for floor screed, and for wall finishing is possible.
- Rubble and sand for cushions, arranged under the screed.
- Pipe made of plastic for ventilation( usually using a sewer with a diameter of 100 mm).
The tools should be prepared:
- Shovel, if the cellar is arranged below ground level.
- Hole punching punch for a hatch in a concrete slab.
- Electric saw or jigsaw for working with wood.
- Plastering tools for screed and brickwork.
- Kirk for softening the soil.
- Apparatus for welding reinforcement and other metal structures.
- Electric drill for drilling holes for fasteners.
In the course of work, you may need other tools, as each project has its own characteristics, which sometimes require additional materials and tools.
Construction of a cellar under a balcony
To work more fun and faster, it's good to have one or two assistants next to each other, as digging a pit to put the cellar alone will be difficult. Someone has to deal with the digger, and someone - extraction of soil out. So, the process of building goes in stages.
- The pit for the cellar room should have a depth just above human growth. If the distance between the floor and the soil surface is included in the height of the room, digging the will have a much smaller , but it will be necessary to remove most of the slab located under the balcony.
Provided that the distance between the floor and the plate is very small, then the hole in the floor and in the slab under the balcony is joined by walls into one "tunnel".

"Tunnel" for entering the cellar
If desired, , this distance can be used for the device in the it additional shelves.
When excavating a foundation pit under a balcony for a cellar, you can be certain that ground water is far from the surface, as when building high-rise buildings, exact calculations of are made.
It is more convenient to extract the ground from under the slab by making under the under it. Remove the in the and check the openings for the hatch in the floor plate and under the balcony, do not rush to close the tunnel. First it is better to arrange a coupler on the floor and strengthen the walls of the cellar with brickwork or reinforced concrete. The site of the subsoil can be used for the device of ventilation of the cellar, since without the it in any case can not be dispensed with.
- The hatch in the concrete slabs is cut with a perforator, and the with the grinder cuts the reinforcement located in the thickness of the concrete.

Cutting a hole in a concrete slab
The sanding machine with a stone cutting circle outlines the outline of a future hatch, and afterwards a puncher breaks in and removes concrete, arranging a through hole in the slab.
Holes in the slabs will also help in lighting the cellar while decorating it.
- At the bottom of the finished pit, it is necessary to make a waterproofing pillow made of sand, which is carefully tamped. On top of the it is poured with the gravel and is also well compacted.
The embossed base is covered with a reinforcing mesh, which is fixed to the ground with brackets made of thick and rigid wires.
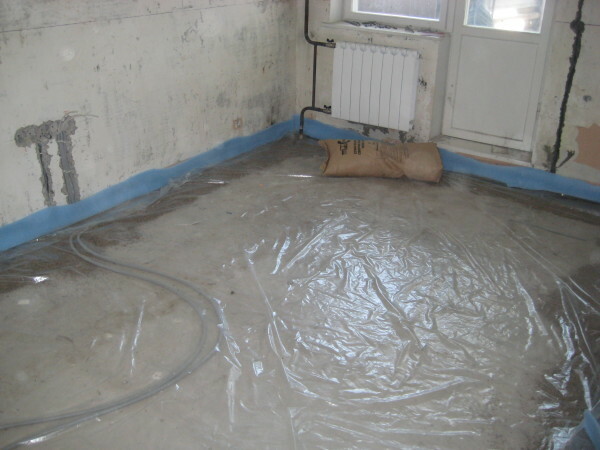
Next, pour the floor screed solution - it is leveled on the surface using the rule. The thickness of the concrete layer must be at least 80 - 100 mm. The filled floor is left until it is completely solidified.
- Further, brick walls are built in the cellar, half a brick thick, and the distance between the outer soil and the laying is recommended in the course of the of its erection to be filled with clay, ramming the of its .For the laying of bricks in the cellar is best to use a solution of sand and clay. The walls are raised to the plate, which in the this case will perform the role of the ceiling.

For brickwork use red brick and sand-clay solution
- In the upper part of the wall, where a tunnel was built, a ventilation pipe is installed, which should be raised above the ground by at least one and a half meters. On top of the , is fitted with a protective cover-fungus.
- After completing the laying, the floor screed must necessarily waterproof , so that the room does not have moisture below the ground. For this process, a burner, mastic and roofing material will be needed.

Waterproofing of the floor with roofing material
Mastic cover the floor and wall surface with 15 - 20 cm in height. Further, after grasping the mastic, , its is gradually heated, superimposing a roofing material on top, which tightly presses against the surface.
- If in the region where a cellar is arranged, the ground in winter freezes deep enough, then the cellar should be at least slightly insulated. For this, the perfectly fits foam t t with a thickness of 30 - 50 mm. It is fixed on the walls on the assembly foam, and then fixed with fixing fungi. Since the concrete slab of the ceiling is flat, on it will easily glue the foam onto special glue. If there are crevices at the joints of walls and ceiling, they can also be filled with mounting foam.
Special care should be taken when insulating the distance between the floor of the balcony and the slab below it, located on the surface of the ground. It will be slightly covered with a brick wall - it will be necessary to install foam on it with on the outside, then cover it with plaster or trim it with wood.
When all these measures are carried out, it will only be necessary to gently coat the or slab slab cut into the slab and install the insulated hatch.

The sunroof must also have a warming layer of
- . The space through which it will be necessary to descend into the cellar must be smooth, so that during descent it is impossible to injure the sticking reinforcement or sharp piece of concrete protruding from the wall. Therefore, the passage walls can be closed with neat boards extruded with expanded polystyrene or plaster - , this process will depend on the choice of the owner of the apartment.
- The hole itself is most often framed by a wide angle, with a size of 80 × 80 or 100 × 100 mm. He reliably will strengthen the opening of the hatch and will make it even, which is very important for the light entering the cover.

In the store you can buy a ready-made hatch
- On sale you can find ready-made versions of hatches, which will simply need to be insulated with foam. It's easy to make a hatch and yourself from the metal corner, which will serve as a frame for plating of boards. For easy opening, you need to install the hinges and handle.
- No less important element is the ladder leading down. The most important thing for its design - is reliability and security. The best material for the is the tree, as the steps from it almost do not slip, but this material will require the of serious treatment from the influence of penetrating dampness. In addition, the ladder should be fixed to the top and have a reliable fence on the cellar floor.
Another one, the purchase of a staircase for the cellar - is a model made of aluminum. In their design, all security measures are provided, and the main - they are insensitive to the influence of the moisture. But in any case, to fix this element is necessary.
- Shelves and boxes for storage of products will have to be collected inside the cellar by the , by lowering them in parts, so you need to take care of carrying down the electricity.
- It should be noted that if the floor on the balcony is insulated, then before the begins to decorate the hatch leading to the cellar, needs to lay the insulation material and raise the floor on the to the desired height. Around the entrance to the cellar you will need to make a slightly different design and lift the hatch to the height of the floor.

The entrance to the cellar should be neat, the ladder - reliable
Which of the proposed options for the cellar on the balcony to choose, will depend on many parameters, one of which can be considered financial opportunities. In order for the to build a cellar in a excavated trench under a balcony, a fairly large amount will be required, therefore , before proceeding to work, it is recommended to make an estimate, putting in it the average prices for a particular material. Such a planning document will help you to really assess your opportunities and make the right choice.