Warm floors are gaining popularity every year, which is absolutely justified. In this article we will look at the main types of warm floors, and also consider the installation of each type, in addition, we will consider in detail the process of installing tiles on the warm floor.
Hot water floor with own hands
This heating system is a circulating hot water or antifreeze pipe. Pipes( metal-plastic, copper, metal, etc.) are laid in the screed and connected to either a boiler or central heating. Such a system is applicable in private homes, as in a city apartment such a heating system is difficult to connect. Read more about the water-heated floor here.
How to mount a water-heated floor

Water-heated floor -
- scheme The first stage is the preparation and leveling of the surface. The rough floor is cleaned of debris and eliminates all misalignments to avoid further uneven warming of the floor.
- Next, we lay the polyethylene film, fixing its edges with adhesive tape.
- To reduce heat loss, lay a layer of thermal insulation material( cork, mineral wool, etc.) and reinforcing mesh.
- We are assembling. For this, we divide the whole building into sections( the area is no more than 40 square meters and the aspect ratio is not more than 1 to 2). We lay compensating seams made of foamed polyethylene and a damper tape between the boundaries of the sections and along the walls( joint height up to 20 cm).Next, we attach the pipes to the reinforcing mesh and install a collector cabinet.

Installation of the warm floor
- Pipes must be poured with a concrete screed. The thickness of the screed without reinforcing mesh - 5 cm, with that - 3 cm. Mix cement, sand, polypropylene fiber and water plasticizer solution.

Fill the pipes with concrete tie - photo
- Fill the solution between the installed "beacons", during pouring necessarily piercing the cement with wire to avoid the appearance of bubbles. After pouring the screed, we moisten it with water for three days, after three days, we moisten the screed again, cover it with foil and leave it for two weeks. When the screed is dry, it is possible to lay ceramic tiles.
Installation of a warm electric floor
Video - installation of a heated floor based on heating mats

Electrical floor installation - scheme
Electrical warm floor is available in three types: as a polymer film( infrared), in the form of mats or as a cable.

Cable for a warm electric floor
Infrared warm floors are produced in the form of thin square films with a side of 50 cm and a thickness of 3.3 mm. Electric heating elements are fixed on the films. Laying is made directly into the tile adhesive.

Floor mats
The warm floor mats are a reinforcing mesh with a cable that is heated by an electric current.

The warm floor in the form of mats - photo
Before laying out the warm floor, it should be noted on the diagram areas where there is furniture. There it is not advisable to install heating elements. We choose the place for the placement of temperature sensors and thermostat.
The perforator in the wall and on the floor cut through the channels for laying the cable. Separately, we cut through the recess for the thermostat( in case it is built-in).

Make a recess for the thermoregulator
The floor surface must be leveled. For this, for example, you can use self-leveling liquid floor mixes.
The cables of the temperature sensor and temperature controller must be passed through the corrugated pipes before laying in the channels.

Begin laying the cable
Then lay the heating mats on the floor. When laying it is allowed to cut the mesh, but the cable - in no event. You can glue the grid to the floor or fix it with any fasteners, without affecting the heating cable.

Floor heating of heating mats
We connect the wires and check the operation of the system.

We connect the wires of the electric underfloor heating and check the operation of the
After testing, it is possible to apply tile adhesive and tile to the mesh and cable. It is allowed to start the warm floor in the work not earlier than three weeks after laying the tile.

Laying of tiles on the warm floor
The infrared film floor is not recommended for ceramic tiles. A warm floor cable type can even be installed under the cement screed.
Selection of glue for laying tiles on a warm floor
The usual ceramic tile adhesive can begin to peel off after a few warmings. For laying tiles on a warm floor, an adhesive is needed that can withstand a large number of temperature changes during heating and cooling of the heating elements of the floor. Instead of glue, a mixture based on aluminate cement or epoxy resin is suitable.

tile adhesive The first way of laying tiles on a warm floor
Video - laying ceramic tiles on a warm floor
A diluted solution of glue with a thickness of 8-10 mm is applied over a laid warm floor( or screed, if it was poured over heating pipes) in small areas. Then, using a notched trowel, it is necessary to level the mortar and lay the ceramic tile, slightly pressing it.

Application of glue on the tile

For the alignment of the seams we install plastic struts
It is not recommended to mix a lot of glue immediately, the tile is stacked a maximum of 10 minutes after it has been treated with glue. Make adjustments can be no more than, 20 minutes after the ceramic tiles are laid.

We check the smoothness of the laying with the
level. You can clean the joints one day after the work, but it is recommended to use the warm floor not earlier than in 1 month.
The second way
We make the heating cables filled with filler floor. We make the priming of the base of the filling floor and then lay the ceramic tile.
Be sure to withstand the temperature regime from +5 to +25 degrees and beware of the appearance of drafts in the room.
Laying tiles on the warm floor - instruction + Video
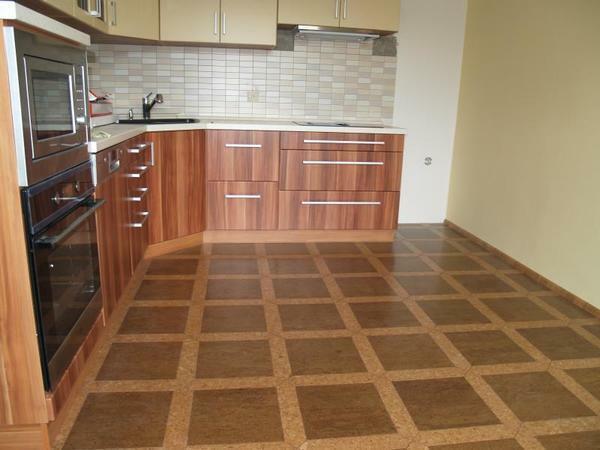
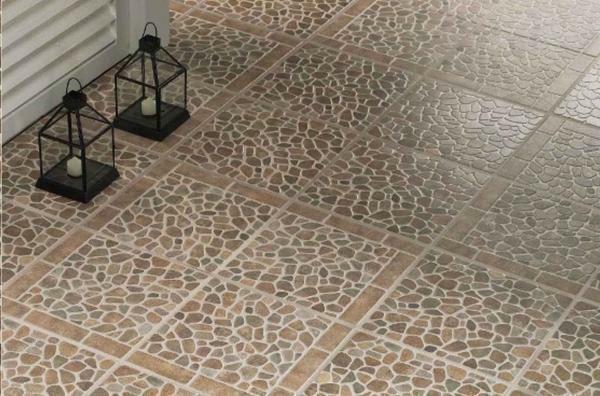
Ceramic tiles have a number of remarkable qualities, including: environmental friendliness, fire resistance and long life. There are types of tiles with a non-slip surface and increased impact resistance, best suited for the floor. The flooring of ceramic tiles is beautiful enough, and in combination with a warm floor the tile acquires even more advantages, because it is made of a material that is able to withstand the numerous changes in temperature, accumulate heat and save it. And thanks to the property of ceramic tiles quickly heat up, in the kitchen, bathroom or any other room when you turn on the warm floor immediately becomes warm.

Laying of tiles on the heated floor
Any of the types of the warm floor: water or electric( infrared, film or cable type) fits the tiles. And each of these types has its own nuances of editing.