How to reduce the width and height of the doorway

In order to reduce the width of the opening, it is necessary to increase the overlap from one or even two sides. At home, this can be done using such materials:
- Bricks.
- Sibit.
- Plasterboard sheets.
Depending on the thickness of the walls and the technology of laying, as well as the wishes of the landlord, the material is selected. In addition, make a plan and calculate how much consumables will be used. For reliability, you can ask for help from a specialist in any construction market, telling him the size of your door.
Accurate data on the size of the doorway can be obtained only by removing the doors and the door frame, and to cut the opening not crumpled, apply cement to the damaged areas.

Below we present to your attention two options for reducing the interior opening with the use of simple and well-known construction materials.
Narrowing of the interior passage with the help of sibit and brick
Sobit and brick are good materials in the installation for panel houses and apartments with large walls. Naturally, the coating is more durable than the plasterboard.

Certain construction materials are required for installation:
- Bucket for cement and water.
- Construction level and roulette.
- Mixer for building mixes( the usual wooden cane).
- Spatula( metal and rubber) and trowel.
- Rubber hammer.
- Iron fittings with a diameter of 4 cm.
- Metal hacksaw.
- Wooden bars for laying the top of the doorway.
- Putty.
Step 1: preparation and preparation of
solution First you need to prepare or buy a mortar to which you will attach the brick. If you can do it yourself, mix sand, cement and water to medium-weight consistency. The optimal ratio of materials is ¼ sand to ¾ of cement, however, if you are not sure of your strength, you better get a solution in the building market.

Step 2: reinforcing the working surface and the wall
The bricks and sobits are laid exclusively on level surfaces. Therefore, between the wall and the masonry often put the reinforcement for fastening, and to it - rods. The rods to the desired size are cut with a hacksaw.

Step 3: How to lay the brick
Begin to lay the brick using a spatula, hammer, trowel and level. Pre-prepared mortar is put trowel, the composition is taped with a rubber hammer so that it lies flat and tightly attached.

Step 4: placing the bars for fixing the reinforcement
If you are planning to reduce the height of the door with sobit and brick, you should install a wooden bar for the reinforcement, on which it actually will hold, but only after proceeding to laying the brick. If this is not done, the masonry may fall off.

Step 5: Grouting and fixing the seams on the wall
It is natural that the joints from the laying of bricks and sobita will be very visible, so they should be treated with putty and plaster. As soon as it dries up - we eliminate the bars and install the door frame in the opening.

After viewing the video, using the example of a window, you will learn how to lay a brick in the doorway.
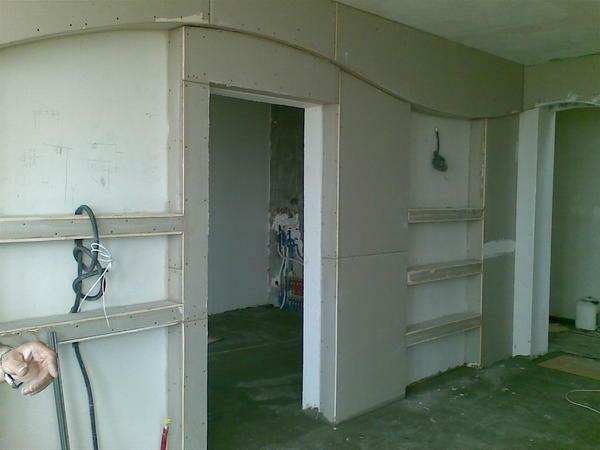
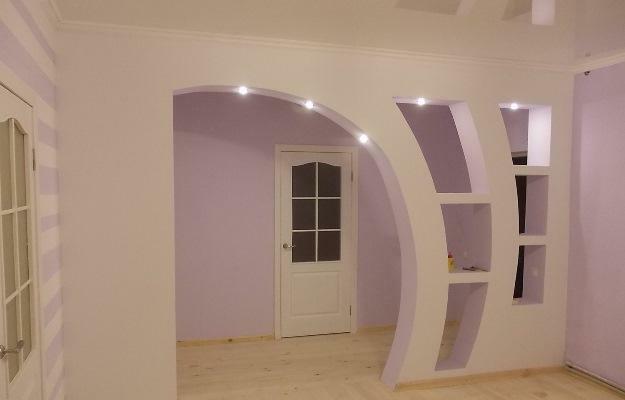
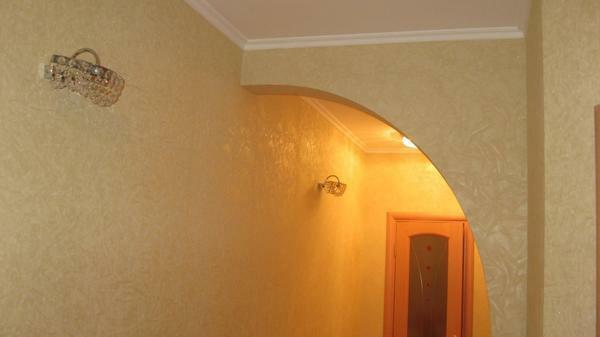
How to reduce the passage in the door with plasterboard
This technique is considered to be the easiest to implement and suitable for wooden and concrete walkways. In addition, the material is cheap and accessible to every visitor of the building market.
In addition to the material, such tools are needed:
- Building level.
- Drill, perforator and self-tapping screws.
- Roulette.
- Adhesive.
- Metal hacksaw.
- Cutter
- Priming mortar and putty.
Step 1: marking the future opening and fixing the profile
The marking is carried out with a building level, a tape measure and a pencil. A very important point, since the marked opening must correspond to the bought door. Then a profile is attached to this marking using a drill and screws on top and bottom.
Step 2: Extension of the
gypsum plaster board This is done by installing a sheet of drywall on each side of the wall. But first you need to measure and cut the desired piece with a cutter. And the sheet is fastened to the wall with the help of glue( silicone or torque).To the floor and ceiling along the opening should be installed two profiles, to which also attach a sheet of drywall, but already with the help of self-tapping screws. Then the structure is primed and putty putty.

Step 3: Decrease the height of the
opening For the height of the passage, two profiles should be installed at the place where the door box should be located, on both sides of the wall. Then screw the two profiles to the ceiling and above the door, and then to these profiles with the help of screws to install gypsum cardboard sheets.
Below you can see the video on which the master deftly creates a drywall construction to reduce the doorway.
Good luck with the repair!