Content
- Why exactly plywood?
- Some cons of plywood sheets
- What grade of plywood to choose?
- Inspection and surface preparation
- Cutting plywood sheets
- Sheet stacking
Due to its practicality, affordable price and ease of installation linoleum is one of the most popular materials used in the reconstruction of the floor. It is not difficult to lay it, but a perfectly even surface of the base is required, otherwise even through a rather thick coating layer all defects of old floors will appear: height differences and crevices between the floorboards. Laying plywood on a wooden floor under linoleum is the easiest, fastest and cheapest way to prepare the base for this material.

Why exactly plywood?
Of course, there are other decent ways to get perfectly flat surface under linoleum instead of a cracked and uneven old wooden floor. But laying plywood under linoleum has a number of undeniable advantages:
- It is not necessary to dismantle the old coating, and this is a significant savings in both time and money.
- Plywood sheets will help to more evenly distribute the load across the floor. This will avoid sagging and creaking floorboards when walking, such a coating is able to withstand solid loads for a long time without deformation or other undesirable consequences.

- If the old floors are uneven, then plywood will allow them to be leveled without much effort and expense.
- There is no fear that after a certain period of time, the floors will acquire relief, which will ultimately appear on linoleum.
- In parallel with the direct tasks, laying plywood will increase the heat and noise insulation of the floor.
- Plywood installation work is available to almost any layman, the most minimal construction skills and watching a training video are enough. In addition, these works will not require the purchase of any special tool. The only exception is a floor grinder, but you can do without it if you cannot borrow it from friends or rent it.
- This is the most cost-effective way to quality lay linoleum on a wooden floor.

Some cons of plywood sheets
Despite the impressive list of advantages, plywood is far from ideal material and has quite significant drawbacks that must be taken into account when using it:
- It is quite easily flammable. This disadvantage can be eliminated by soaking the sheets with a flame retardant solution.
- Hygroscopic, that is, subject to moisture. Therefore, it is extremely undesirable to use plywood in rooms where the humidity exceeds 68% for a long time. If there is no other way, then in the bathroom or kitchen you need to use a special moisture-proof plywood. A little help in this case, and do-it-yourself impregnation of ordinary sheets with a special composition.
- It is mandatory to impregnate with an antiseptic, since plywood is a favorable environment for the reproduction of various microorganisms and fungi.
- Due to changes in temperature and humidity, the material will experience certain deformations, so it is imperative that there are technological gaps between the joints and around the entire perimeter of the coating.
USEFUL INFORMATION:Soundproofing rooms in an apartment in a new building

What grade of plywood to choose?
The right choice of material is the key to preparing a quality base for linoleum. What can be guided by?
- For any room, not only for the bathroom or kitchen, preference should be given to moisture-proof plywood. It is better to protect yourself from possible liquid penetration under linoleum, and this can happen in any room: moisture may leak when cleaning floors inaccurately, leakage from radiators is possible, or simply something spill. Saving on material, you can then spend big money, replacing swollen floors. Moisture-resistant plywood is marked “FC”.
[smartcontrol_youtube_shortcode key = "choose plywood on the floor" cnt = "4 ″ col =" 2 ″ shls = "true"]
- The thickness of the plywood sheets should not be less than 12 mm if the rough coating is laid in one layer. The greater the expected load on the floors, the thicker it is necessary to take a sheet of plywood. But it should be borne in mind that this layer, albeit slightly, will reduce the dimensions of the room.
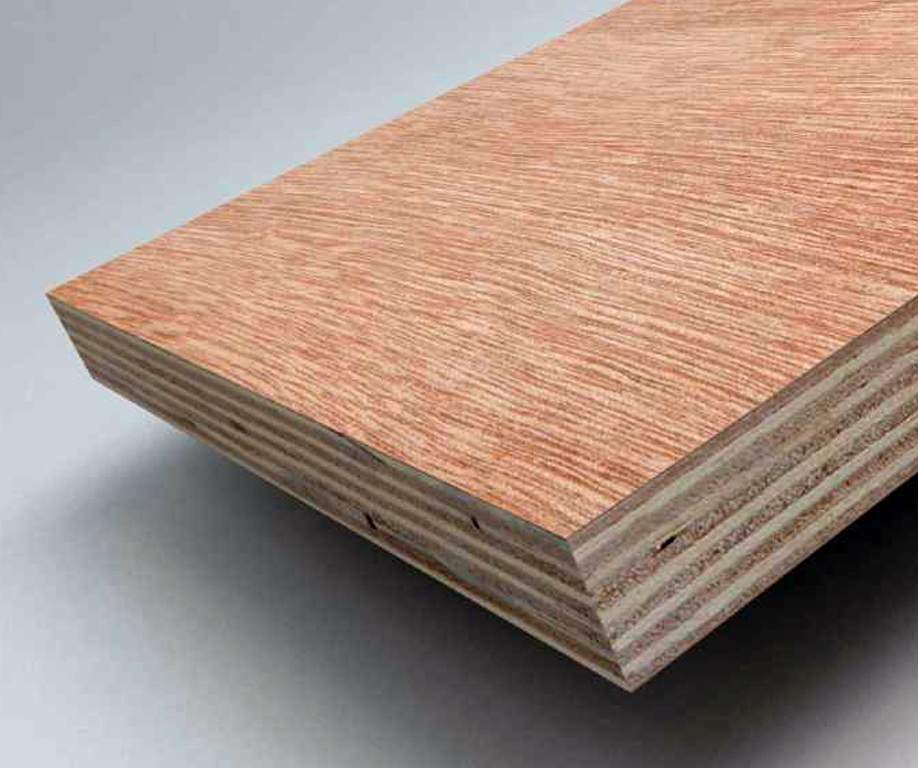
- The hardwood veneer in plywood sheets allows the latter to carry higher loads compared to material made from coniferous species.
- Preference should be given to polished material on both sides. You can use unpolished plywood marked "NS", but it will have to be processed with sanding paper.

Materials such as MDF or OSB significantly surpass ordinary plywood in terms of quality, but they also cost much more. With a sufficient budget, it is recommended that they be used, financial costs will more than be compensated by the strength and durability of the coating.
- If you doubt that you can independently impregnate the sheets with the desired composition, it is better not to risk it and buy factory-impregnated plywood, even if it will cost a little more.
USEFUL INFORMATION:How to calculate the thickness of a concrete screed over a water heated floor
Inspection and surface preparation
Any surface requires preparation before reconstruction, and wooden floors are no exception:
- Skirting boards are removed if they are present on old floors.
- The waterproofing and the presence of moisture sources are checked. Without eliminating the latter, it makes no sense to lay plywood, they will fail in a fairly short period of time.

- Replace rotten or sunken elements.
- In old floors, gaps up to 5 cm are permissible. If there are more gaps between the boards, then they must be eliminated.
- With significant differences in height between the floorboards, it will be necessary to perform grinding, otherwise such relief will subsequently necessarily appear on the surface of linoleum. To do this, you need to rent a grinding machine.
Before grinding, all metal elements are removed or recessed so as not to damage the abrasive. Reeling floorboards are fixed with wedges, nails or self-tapping screws. Sand the floors diagonally, lapping the strip and not holding the device in one place.
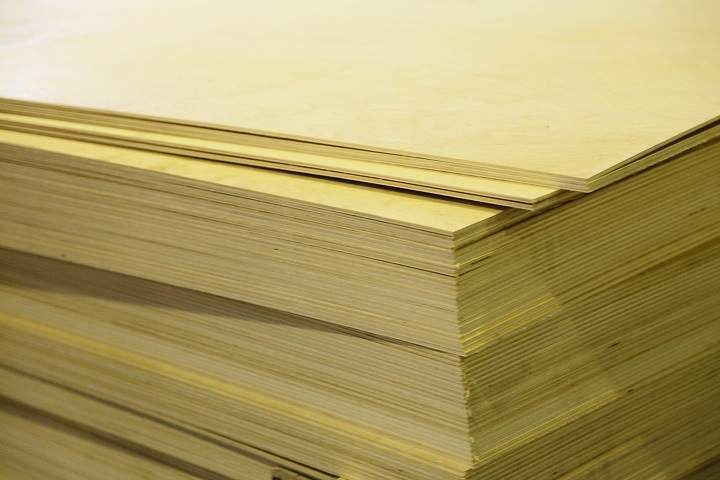
In addition to the base, it is required to prepare the plywood sheets themselves. First of all, you need to let them mature in the room for at least three days. If it is planned to impregnate plywood, then it is necessary to provide time for it to dry.

Impregnation of plywood with polyvinyl acetate putty has become widespread as a relatively cheap but reliable way to protect plywood sheets. Also, do not forget to treat the material with an antiseptic.
Cutting plywood sheets
At many construction forums, you can find recommendations for laying plywood, having previously cut the sheets into identical square elements. This is not necessary at all, it is possible to produce installation of whole sheets, if the dimensions of the room allow. It is important to observe the following rules:
- The boundaries of the joining of plywood sheets should not coincide with the cracks in the old coating.
- Elements should be staggered so that the seams between sheets of adjacent rows are displaced by at least 20-30 cm.
- A compensation gap of 2-3 mm must also be left between the sheets, and about 10 mm between the plywood and the wall. This is necessary so that the coating does not swell due to thermal expansion of the material. Subsequently, the joints between the sheets are sealed with special putty on wood, and the gap around the perimeter of the room will be covered with a plinth.
USEFUL INFORMATION:Waterproofing floors in the apartment under the screed

Cutting sheets is most conveniently done with an electric jigsaw. The resulting seizures on plywood are removed with fine sandpaper.
Sheet stacking
Cut sheets are laid out on the floor for fitting. It is better to number them and make a simple diagram of their location, so as not to be tormented later, choosing the right element.
- Before applying glue, the surface is cleaned of dust and degreased with white spirit. An adhesive layer is evenly applied on the floor surface with a thickness of no more than 2-3 cm.
You can use special glue for wood or self-made mastic: PVA is mixed with gypsum to the consistency of thick sour cream. The adhesive solution should try to smooth out irregularities and fill the cracks.

- The plywood sheets are glued according to the laying pattern, their level is controlled, after which it is necessary to let the adhesive solution set. This will take 1-2 days.
- After the glue dries, an additional fixation is performed with self-tapping screws. They should be placed no closer than 20 cm from the edge of the sheet in increments of 15–25 cm. So that the self-tapping hats do not appear after laying linoleum, they should be drowned, for which it is better to pre-drill the holes.
- At the final stage, all joints are ground and smooth putty on wood. You can use PVA glue mixed with gypsum or fine wood chips. And also holes are putty in the sheets where the heads of the screws are located.
In more detail and clearly, the process of laying plywood sheets is shown in the video.
After the putty is dried, the surface is cleaned of the resulting debris and linoleum is laid on it.

EXPERT SITE
Tsugunov Anton Valerevich
Master Station Wagon
- Since 2003, I have been engaged in the repair and decoration of premises.
- Over 100 completed objects.
- I appreciate the quality, more than the quantity!
Personal page >>>
Friends!
I offer you the service "Friend Builder"
As this site develops, subscribers and visitors turn to me more and more often asking for help with advice on various issues of repair and decoration.
Questions are sometimes asked very complex and interesting. You can’t write an article for each situation, so I decided to advise you individually.
Thanks to you, friends, a new direction of my favorite work has been born - share your experience and benefit everyone who is undergoing repairs!
Get a one-time consultation from me >>>
Order full apartment repair support >>>


