Content
- Choose putty
- Instruments
- Prepare the surface
- A few words about the primer
- Ceiling Putty Technology
- Puttying process
- Grinding
It is possible to do without leveling the ceiling with putty only if you decide to use new-fashioned stretch, suspended or slat ceilings as the ceiling coating. If you opted for the classic version of a painted or wallpapered ceiling or for a suspended plasterboard design, there are no options: putty is absolutely necessary. Understand how the ceiling is putty done by yourself, with detailed instructions and a master class.

Choose putty
First, find out what putty putty ceiling.
Putty mixture can be:
- cement (moisture resistant, evens well);
- gypsum (easy to use, easy to sand, only for dry rooms, freezes quickly);
- polymer (for finishing leveling, has a long setting time, suitable for inexperienced masters).
Also putties are divided into:
- starting - for leveling the surface with differences from 0.5 to 5 cm;
- finishing - applied with a thin layer, allow you to get a flat and smooth surface;
- universal - can replace the first two mixtures when decorating the ceiling with minimal irregularities.

Instead of starting putty, some experts recommend using Knauf “Rotband”, a dry stucco mixture with excellent adhesive properties. Using "Rotband", it is possible not only to putty problem surfaces, for example painted ones, but also to combine plastering and starting puttying of the ceiling with serious flaws.
To understand which putty is better for the ceiling, when choosing, pay attention to the following characteristics:
- Hardening time - the longer, the better, especially if you have no putty experience.
- Drying time - if each coat dries for a long time, the repair may be delayed.
- Moisture resistance parameters - if you are going to putty the ceiling in the bathroom or in the kitchen, choose moisture resistant putty.
- Elasticity - for easy application.
- Strength indicators.

USEFUL INFORMATION:Glue wallpaper for painting on the ceiling
Instruments
The set of tools with which the putty of the ceiling is performed is quite simple and includes:
- 3 spatulas (the first up to 60 cm wide, the second 10-12 cm, the third narrow for hard-to-reach spots);
- roller and tank for primer;
- 15–20 liter bucket for solution preparation;
- a drill with a nozzle for kneading a putty mixture;
- sandpaper or sanding mesh.

Prepare the surface
Puttying the ceiling will allow you to get a good result only with high-quality surface preparation, which is as follows:
- The old finish is removed from the ceiling. Whitewashing and wallpaper - with water, paint - with a wash and a spatula or drill with a nozzle.
Tip: old putty, as well as paint, is not necessary to remove. If you hear a dull sound when tapping the surface with the handle of a spatula, this area must be cleaned of putty, a loud sound indicates good adhesion.
- The surface is cleaned of any contaminants, including mold. Use a disinfectant solution: copper sulfate or a special preparation.
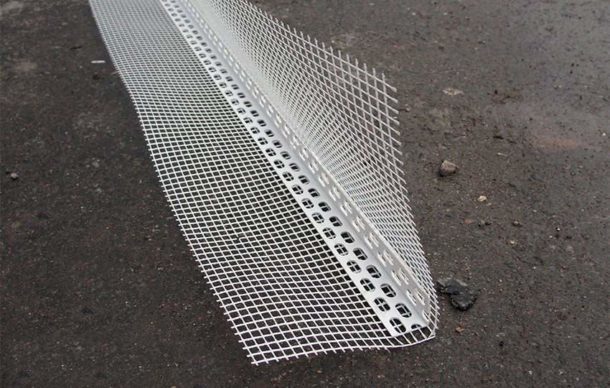
- The surface condition is evaluated. Necessary close cracks and gaps between platespotholes. To do this, they need to be expanded, treated with a deep penetration primer, and then filled with plaster or putty, preferably based on latex. After drying, the seams or damaged areas are reinforced with a sickle.

Important! Be sure to wait for the surface to dry before each subsequent step.
- If there are large differences, the ceiling is putty only after leveling with plaster.
- A primer for a deep penetration ceiling is applied in two layers on the surface. The second layer should be passed after the drying of the first, working with a roller in the perpendicular direction.
A few words about the primer
The primer of the ceiling is the most important stage of preparation for puttying, which should be treated with due attention. A primer for a deep penetration ceiling will not only reduce the consumption of putty, but also strengthen the base and enhance adhesion, which is especially important for a horizontal ceiling surface.
USEFUL INFORMATION:How to putty the ceiling of gypsum board with your own hands
For the ceiling in the bathroom, antibacterial and moisture resistant primers of deep penetration are suitable, such as:
- Ceresit CT 99;
- Olympic Grundierung;
- Milkill.

The primer of the gypsum plasterboard ceiling can be made with quick-drying compositions of the following grades:
- Bolars
- "Optimist";
- Knauf;
- Unis.
Primers for concrete floor slabs that protect against moisture penetration:
- "Ceresite";
- "Optimist";
- Bolars
- Axton.

Instead of these compounds, you can use a blocking primer consisting of white spirit and acrylic copolymers. It provides excellent adhesion even on smooth surfaces, is water resistant and not saponified.
Ceiling Putty Technology
How to putty the ceiling so that it turns out perfectly flat?
For work, you will need two types of mixture: start and finish, although you can use universal.
- For the base layer, a coarse starting composition is used, which copes well with various defects.
- The final layer is performed using the composition for the finishing work.
Note! There can be several layers of putty of each type, their number depends on the degree of unevenness of the ceiling and on the required quality of the final coating.
Mixture preparation
If a dry mixture is used, the putty must be closed, i.e. to cook. If you do not go into details, mentioning everything putty kneading tricksyou need to do the following:
- Pour the required amount of water into the container (see the instructions on the packaging).
- Pour putty into the water.
- Wait about 5 minutes, then mix the putty with a mixer.
- Make sure that the consistency resembles liquid sour cream, if necessary, adjust the density.
- After 15-20 minutes, mix the infused solution and use as directed.

Puttying process
Do-it-yourself puttying of the ceiling using the following technique.
- With a narrow trowel, putty is drawn from the container and distributed in the center of the large trowel with a sliding movement.
- A large spatula is attached to the surface and stretches toward you until the mixture remains on the ceiling. The optimal tilt angle of the spatula is 20-30 degrees. Some time after the start of work, you will understand how to properly putty the ceiling and can handle the spatula more confidently.
- Repeat the same steps further, keeping identical pressure on the pallet. The narrow strips remaining after the spatula should be rubbed off immediately with the following movement.
USEFUL INFORMATION:Soundproofing for the ceiling of the apartment: how to make soundproofing with your own hands?
To putty quickly dried after application, and subsequently did not crack, the layer should not be thicker than 5 mm.
Important points:
- In order to putty on the ceiling surface as evenly as possible, start from the area adjacent to the window: it will be easier to immediately see your flaws.
- To understand how to putty the ceiling from GKL, you need to familiarize yourself with the general gypsum plastering technology - There are no special differences from surface treatment of the walls in this case.
- Putty plasterboard ceiling for wallpaper also required, and should be fully implemented, not limited to the processing of joints and attachment points.

If you are wondering “how to putty the ceiling for painting", Keep in mind that the technique for applying the mixture will be the same. The difference is as follows:
- in the thoroughness and accuracy of the work;
- in the number of putty layers: at least 2 layers of starting and finishing mixes are required;
- as a grinding.
Grinding
12 hours after the putty ceiling has dried, you can begin to grind it. You can do this with sandpaper, or better yet - properly selected grout mesh. After finishing the grinding procedure, apply another primer to the surface.

Do not forget that the grinding procedure is very dusty - protect your eyes, respiratory organs, as well as the floors and furniture in the room.
You can get a visual representation of the process of filling the ceiling by familiarizing yourself with the detailed workshop in the video.

EXPERT SITE
Tsugunov Anton Valerevich
Master Station Wagon
- Since 2003, I have been engaged in the repair and decoration of premises.
- Over 100 completed objects.
- I appreciate the quality, more than the quantity!
Personal page >>>
Friends!
I offer you the service "Friend Builder"
As this site develops, subscribers and visitors are turning to me more and more often asking for help with advice on various issues of repair and decoration.
Questions are sometimes asked very complex and interesting. You can’t write an article for each situation, so I decided to advise you individually.
Thanks to you, friends, a new direction of my favorite work has been born - share your experience and benefit everyone who is undergoing repairs!
Get a one-time consultation from me >>>
Order full apartment repair support >>>