Content
- Putty selection
- Primer selection
- Preparatory Activities
- Sealing joints and grooves from self-tapping screws
- Corner processing
- Putty Stages
- The final stage
The use of special technology will help to avoid mistakes during decoration and to prepare the ceiling of drywall for painting qualitatively. The absence of flaws and irregularities after the putty will not only allow you to enjoy a perfectly smooth ceiling, but also prevent subsequently peeling paint. Let's find out how to putty the plasterboard ceiling according to all the rules.

Putty selection
From the right choice of putty the quality and general appearance of the base depend. When selecting it, the following criteria should be used:
- By the degree of readiness for use. Putties are available in dry and ready condition. The former pleases with low cost, long storage time in the package and resistance to temperature changes. The second ones require thorough mixing at the beginning of work; in a hermetically sealed container they keep their working condition for a long time.
- In composition. Plaster types are used for decorating the ceiling in dry rooms, they are affordable and successfully cope with any flaws. Cement types are used to level the ceiling in bathrooms, in kitchens, indoor pools and in rooms without heating. Polymer varieties are universal and are used in any conditions, regardless of humidity and temperature changes.
- By appointment. Starting putties are designed for roughing the ceiling, hiding large flaws, cracks and joints. Finishing types are used for puttying the ceiling from drywall for painting at the final stage of finishing.

Universal putty can be used at any stage of work. When choosing, you need to pay attention to the drying time and the level of environmental safety. Preference should be given to options with the highest parameters, even if they are more expensive than others.
USEFUL INFORMATION:Walls and partitions made of drywall using Knauf technology
Primer selection
Before filling the ceiling, it must be primed. At the primed surface, the adhesive properties increase and the moisture resistance increases.
For priming drywall, significantly less primer is required than for surfaces made of other materials. The average consumption is 1 l / 10-15 square meters. m when applied in two layers. It should be borne in mind that the primer consumption before painting is 2 times more than before puttying.
The most suitable option for a drywall ceiling is an acrylic primer. At low cost, it is very economically consumed.

Preparatory Activities
The question of how to properly putty the ceiling of drywall must be decided at the preparation stage.
Before the putty begins, you need to align the sheets of drywall: get rid of the protruding hats of screws and indentations from them and close up the joints.
The self-tapping screws are tightened so that their heads do not protrude on the surface, but not deep from it, the optimum depth is 1 mm. If during installation they were twisted so that cavities appeared around them, they must be removed. Then cover the holes from them with putty and tighten new screws next to them.

Sealing joints and grooves from self-tapping screws
After completing work with screws, you can begin joint repair in the following sequence:
- first you need to brush off the dust from the ceiling with a brush;
- the edges of the contacting sheets, on which there are no factory or bevels made in advance with a special plane, cut with a paint knife at an angle of 45 °;
- carefully primed seams, dry them;
- prepare putty;
- qualitatively fill the seams between the sheets of drywall;
- putty seamsby gluing them with a sickle or reinforcing with special paper tape;
- cover the hats of screws with cruciform movements;
- after the putty compound has dried, re-putty the joints;
- polish all processed areas.
USEFUL INFORMATION:Dimensions and characteristics of a sheet of moisture-proof drywall

A usual starting putty is suitable for sealing joints, but the best choice would be a special mixture for joints - Fugen or Uniflott from Knauf.
Corner processing
Plasterboard ceiling decoration may involve the manufacture of multi-tiered structures that have internal and external corners. To strengthen them, metal or plastic corners with perforation and a sickle or paper tape specially designed for these purposes are used.
Internal corners are processed in the following order:
- a serpyanka is placed in the center of the corner or a paper tape is glued to the putty layer;
- the entire area of the sickle or tape is covered with putty;
- An angle trowel is used to align the angle.
To process external corners, you need:
- Primer the entire surface of the corner, after drying, putty. Until it has dried, apply a corner and press it to the desired depth.
- Excess putty squeezed out through the holes in the corner should be removed with a spatula.
- After drying, apply a putty coat on the entire surface of the corner with movements from top to bottom.
- To completely equalize the angle, apply the required number of layers, each time waiting for the previous to dry completely.

Putty Stages
The surface of the gypsum board does not have large irregularities, but to get the perfect ceiling, it is recommended not to be limited to one layer of putty.
To putty the ceiling of drywall, you need:
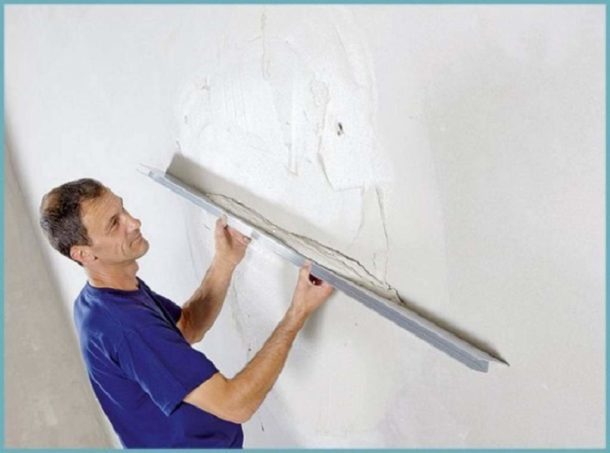
- using a wide spatula, put putty on the ceiling and smooth it with a layer no thicker than 2 mm;
- then clean the putty knife from putty residues and, having applied another portion next to the treated area, repeat the operation;
- if it was not immediately possible to create a smooth layer, you need to add more putties on it and smooth it to the desired condition, and remove excess with a cleaned spatula.
USEFUL INFORMATION:Cassette ceiling made of aluminum panels
The thickness of the layer is formed depending on the inclination of the spatula. With a smaller slope, the layer thickness increases. The mixture is applied at a slope of 60 °. For final alignment, the angle is reduced to 15 °, and the process is carried out with the capture of part of the neighboring area.
In total, 2–4 layers of putty may be required. For the former, you can use the starting mixture, for one or two of the latter - the finishing mixture.

A few nuances:
- The putty cycle of work should be carried out at a positive temperature in the room, from +5 to + 30 ° C.
- During alignment, exclude direct sunlight on the surface, as it will distort the perspective.
- You should not take any measures to accelerate the drying of the putty, this can cause cracking.
- To get a perfectly flat ceiling surface, you can use the building rule.
The final stage
The ceiling of drywall before painting should not have even the slightest roughness, since after painting they will be striking. To eliminate all the shortcomings, the entire surface is polished. This finish at the same time will ensure the adhesion of the paint to the base.

Grinding is carried out using a special grater and an emery cloth or grinder. To ensure personal safety during work, use a respirator and glasses.
Upon completion of the elimination of visible roughnesses, it is necessary to identify hidden irregularities with a flashlight or lamp and eliminate them.
At the last stage, the surface is primed. Now the drywall ceiling is ready for painting.

EXPERT SITE
Tsugunov Anton Valerevich
Master Station Wagon
- Since 2003, I have been engaged in the repair and decoration of premises.
- Over 100 completed objects.
- I appreciate the quality, more than the quantity!
Personal page >>>
Friends!
I offer you the service "Friend Builder"
As this site develops, subscribers and visitors are turning to me more and more often asking for help with advice on various issues of repair and decoration.
Questions are sometimes asked very complex and interesting. You can’t write an article for each situation, so I decided to advise you individually.
Thanks to you, friends, a new direction of my favorite work has been born - share your experience and benefit everyone who is undergoing repairs!
Get a one-time consultation from me >>>
Order full apartment repair support >>>