Roof gutters, metal - mounting with their hands, the subtleties of calculation and installation
Table of contents
-
1 Correct preparation is the key to success
- 1.1 A few words about the choice of the system
- 1.2 How to calculate the tides
- 2 How to mount a metal gutter with his own hands
- 3 helpful hints
- 4 Output
This article is for house masters who want to understand how to install gutters on the roof, not to pay to employees for what they can do themselves well. After all, by and large mounted metal gutters real challenge. But there are nuances, which are known only to the master, and I am ready to disclose them.
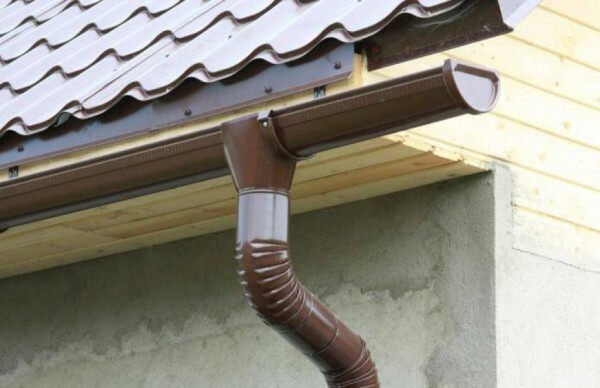
Metallic sheen to the modern roofing.
Correct preparation is the key to success
Installation of the drain with his own hands, however, like any other work always begins with careful preparation. In professional it is tested at the level of instincts, but the handyman is better to take a sheet of paper and make yourself a small plan.
Agree, shame would be if in the midst of the work suddenly it turns out that not enough of some trifles. Or worse, you've missed an important stage of the installation and will need something to take to correct the errors.
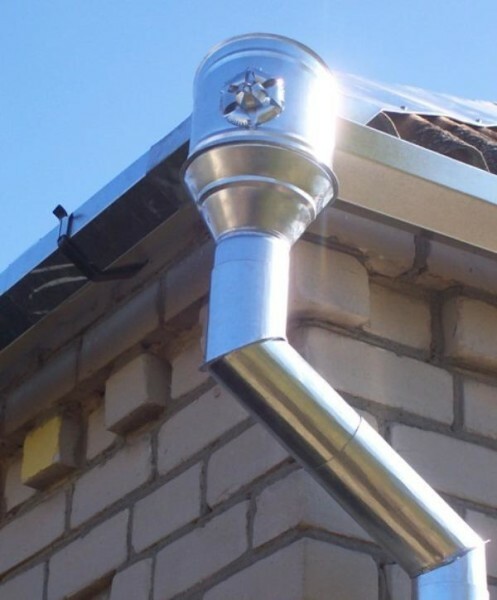
Decorative tides of metal.
A few words about the choice of the system
Since we are talking about how to install metal roofing it flows, it is worth saying a few words about what they are:
- The most widespread in this area are considered to gutters made of galvanized steel roof.
These tides come in 2 types:
- Naked galvanized steel, i.e. of the metal coated only zinc plating;
- Galvanized steel coated.
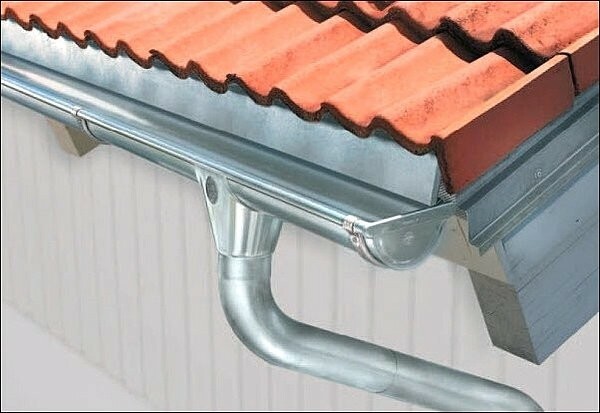
Ebb of galvanized steel without a polymeric dye.
The price of these tides is different at least 2 times. If naked galvanizing will cost you about 150 rubles per meter, the cost of drainage with additional high-quality plastic protection starts already with 320rub m / n;
When you are determined to keep in mind: the bare galvanized in large cities do not last for more than 10 years, since acid rain it simply eaten. Therefore, it is suitable only for the countryside and country cottages.
- Installation of aluminum pipes and gutters in popularity is second. These systems all come with a polymer coloring. Plus they weigh much less than steel. In a normal producer price starts at about 700rub m / n;
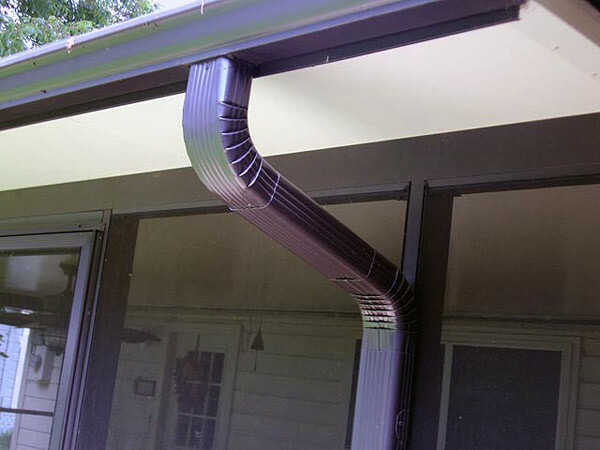
Aluminum gutters irregular shape.
- There are still copper flow. But to be honest I have not yet met anyone to perform their own installation of copper gutters for roofs. It's not that it's hard or difficult, they just stand there for a minimum of 900rub 1m / n, and those people who have the funds often can not afford to hire craftsmen.
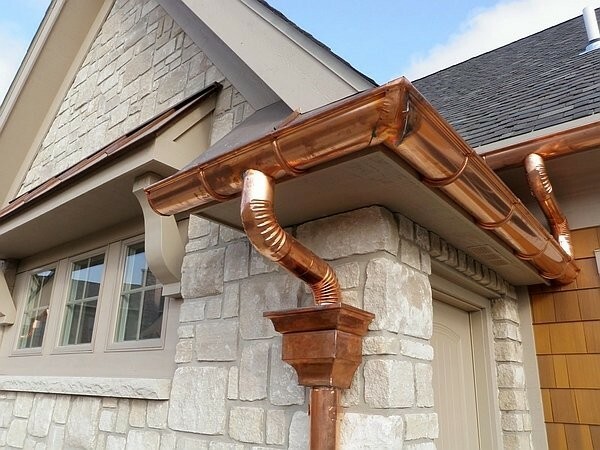
Ebb of copper.
How to calculate the tides
Before making a gutter from the roof, we must also calculate what kind of gutter needed in your case personally. A case in point is a sectional pipes and gutters.
BUY-section with the largest margin is also not an option:
- Firstly, on the roof of a small modest house huge trough will look to put it mildly, ridiculous;
- And secondly, the price they are much higher.
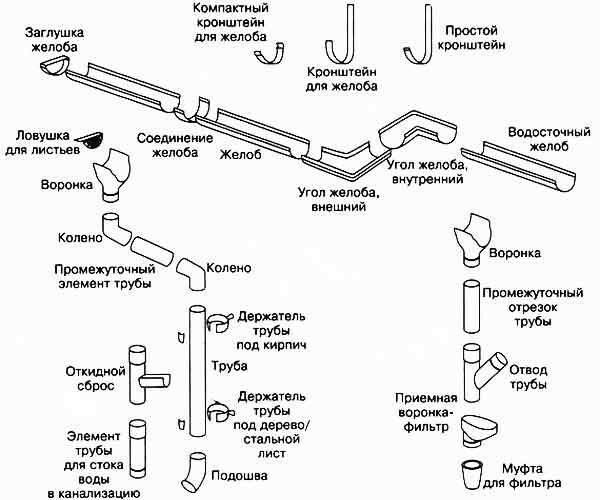
The names of the components of drainage system.
First of all we need to find an effective and useful area of the roof. Here most of the house masters, like me at the time, stepping on the same rake.
We all went to school, and we know that in order to calculate the area of a plane figure you need to multiply the length by the width. But this formula to calculate the slope of the roof of the effective area is not necessary. After all, we are dealing with an inclined plane.
The effective area of the roof with his hands is calculated by another formula (shown in the scheme below).
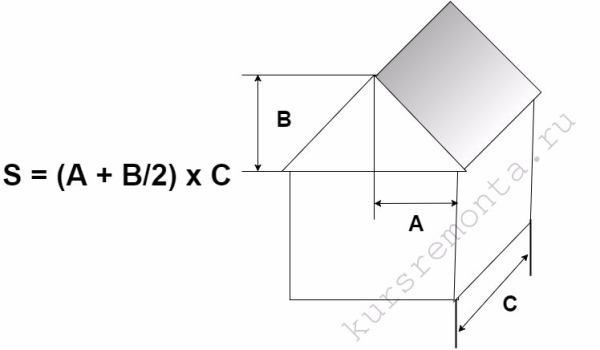
The formula for calculating the effective area of the roof.
There is a small caveat. If your roof has an inclination angle of up to 10º, then its useful area is calculated according to the formula A * C = S.
Having the useful area of your roof, you can already look to the table and find out what pipes and gutters are more suited to you. But there also is not simple, you need to consider at what point you want to install gutters drain outlet with drain pipe.
| The effective area of the cross section of the roof pipes and gutters | ||||||
| Chutes | downspouts | |||||
| section | 100 mm | 125 mm | 150 mm | 75 mm | 90 mm | 110 mm |
| Chute with a funnel in the middle | 77m² | 235m² | 380m² | 217m² | 355m² | 614m² |
| Trough with funnel offset from the center | 111m² | 147m² | 238m² | 166m² | 273m² | 471m² |
| Chute with a funnel located at the edge | 89m² | 118m² | 190m² | 149m² | 245m² | 423m² |
Keep in mind that the calculation of the effective area of the roof does not need to consider fully the entire area of your roof, it is enough data on the biggest plane.
Now let us consider the example of how the count of the number of elements of drainage system. Suppose we have a hipped roof 12h6m, gable extension 6h2m the center of the building.
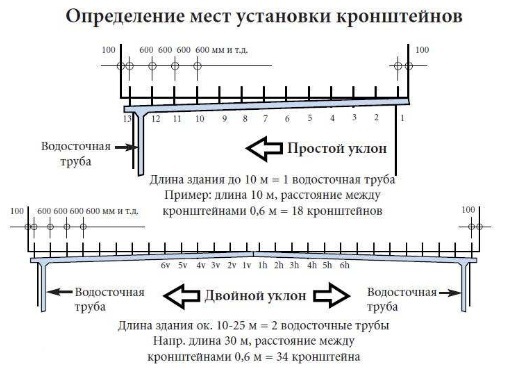
Compliance with the drain bias.
Installation of gutters should be done at an angle. The average tilt angle ranges between 1-3 mm per 1 linear meter of the trough. Naturally, the bias is towards the drain funnel. But if the gutter length exceeds 10 meters in a straight line, the slope needs to be done from the center to both sides and on the edges of the drain installed 2.
As a rule, most reputable manufacturers make the gutter length of 3m and 4m. We have a large length of the slope 12m, respectively, it should be installed at the edges of the funnel 2, therefore, to go home at least 4 of the funnel with a set of drain pipes and elbows.
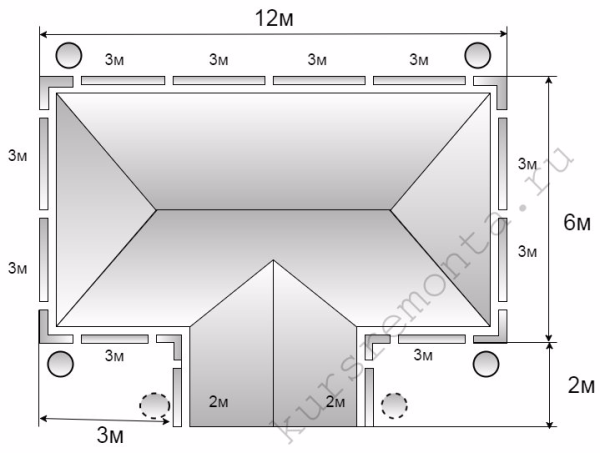
Calculation of materials for the drainage system.
According to the rules on a house quite 4 sinks.
But, from my own experience, I have found a couple of drains on both sides of the central extension (in the diagram are shown by the dotted line).
- As a result, it is necessary to take 10 pieces of gutter length of 3m and 4m long trough 1, it will cut in half, and later established on both sides of the extension;
- Exterior angles on such a system would go 4 units, plus 2 internal furnishing turns the gutter next to the extension;
- The whole structure will be based on the suspension, according to the rules, they are mounted at intervals of about half a meter, which means that the entire perimeter of the leaves 68 of brackets;
- Joints troughs and connected to the outer and inner corners of the brackets are fixed with sealing rubber gaskets, in this case, you will need 17 of such staples;
- drainage system for the roof we go around the perimeter of the gap is only in the extension area, therefore we need to plug 2;
- Drainage pipe length also sold by 3m and 4m. The number of tubes varies from removal of the roof (the distance from the wall to the edge of the roof) of the roof and the height above the ground, when calculating the necessary rounding upwards;
- But in any case, for the installation of each drain will need 3 transient knee;
- Wall gutters are fastened with special brackets, they are for wood, and stone walls. The distance between the arms varies in the range of 1.5 - 2m.
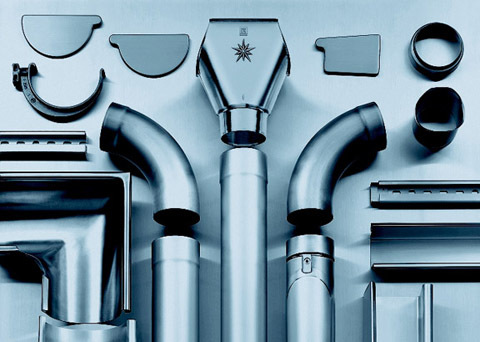
Metal elements for roof gutter system.
How to mount a metal gutter with his own hands
Not so important, from what it is made of metal your system, all metal gutters are mounted on one and the same principle. In the models, of course, there are small differences, but they are not so great to talk about the different ways of installation.
Naturally gutter installation on the roof is not conceivable without a minimum set of tools, in particular the need to:
- Nylon thread in order to discourage the level of the horizon;
- Gidrouroven;
- screwdriver;
- Roulette;
- Hammer;
- pliers;
- Knife;
- Bulgarian;
- Hacksaw;
- Shears for cutting metal, right and left;
- Roofing sealant and construction pistol to him.
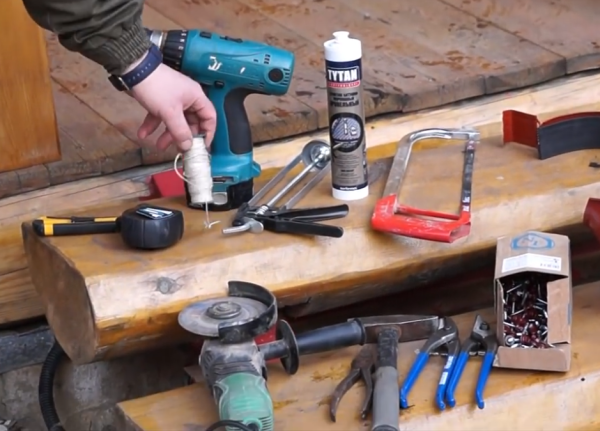
The minimum set of tools for the mounting tide.
Before you mount the gutter to the roof, you need to consider some important details:
- Ramp roof should overhang the edge of the gutter is not more than a quarter, or water for large showers will go past the trough;
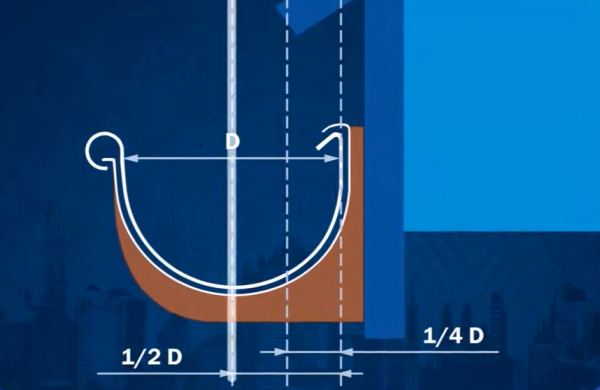
Location relative to the tide of the roof.
- If we continue along the imaginary line of the roof slope, this line should not cross the outer edge of the gutter. This option is dangerous because when the snow melts the winter snow mass can simply break your gutter.
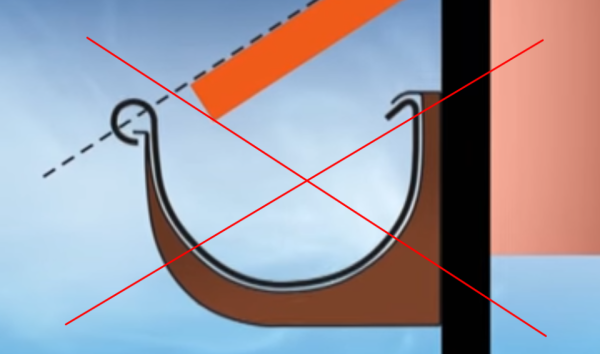
The edge of the gutter should be lower than the parallels drawn from the slope of the roof.
We now turn to the question of how to mount the gutter to the roof.
There are 2 options for installing the brackets:
- According to the first embodiment of hangers fixed directly to the roof rafters or kontrobreshetke these rafters;
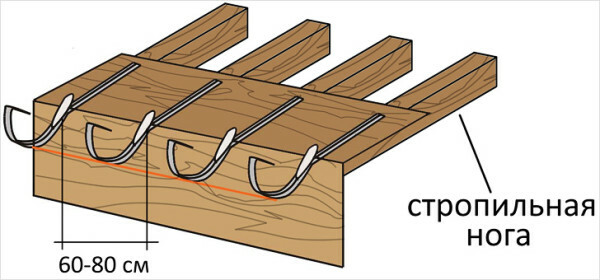
Attaching the brackets to the roof rafters.
- The second option is more practical, it involves the installation of brackets directly to the front board.
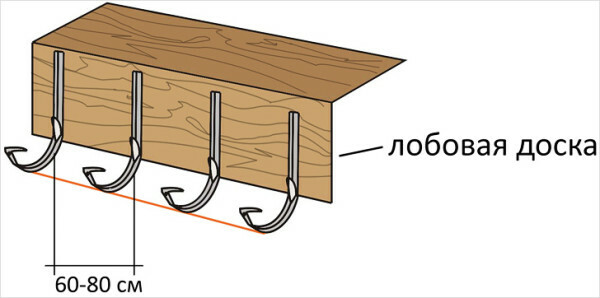
Attaching the brackets to the front board.
Personally, I like installation of drains on the frontal board. In this case, you are not "tied" to the roof. If the brackets are fixed to the rafters, even for repairs you have to dismantle the roof covering at the edge, otherwise you will not get to the bracket.
Plus truss hangers expensive.
But this is my personal opinion, the same who have decided to strengthen the suspensions to the rafters, I'll give a few tips on installation:
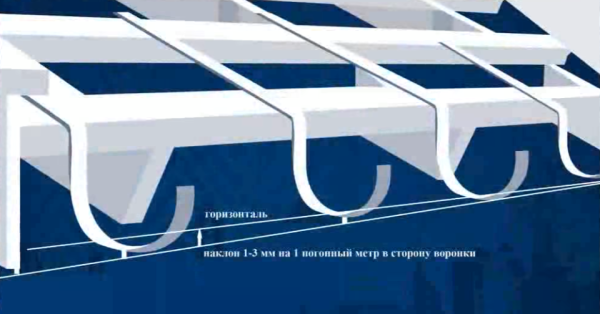
Compliance chute angle mounting brackets to the rafters.
- For bending hangers at the right angle, you will need polosogib;
- To sustain the desired slope of the gutter, before bending the brackets should be marked. To do this, add them together and spend a horizontal line of 10 mm above the edge of the trough of the future;
- Suspensions are installed at intervals of half a meter, if we have in the package 10 suspensions, the measured from the edge of 20 mm and hold it denotes a diagonal inflection point.
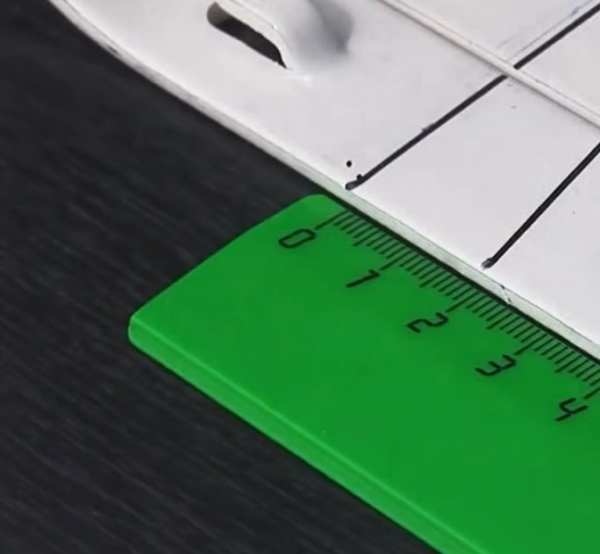
Marking points bending brackets.
If bent brackets will need to consider yet another subtlety: the outer edge of the gutter should be lower than the inner approximately 2 mm relative to the horizon.
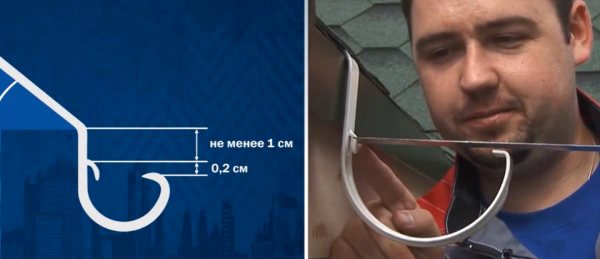
Tilt control outer edge of the gutter.
When mounting brackets on the front board to measure and bend do not need anything, all of this is taken into account already at the factory. But we still have to maintain the right angle, so the first 2 are mounted on the edges of the suspension front board at a distance of 150 mm from the roof edge.
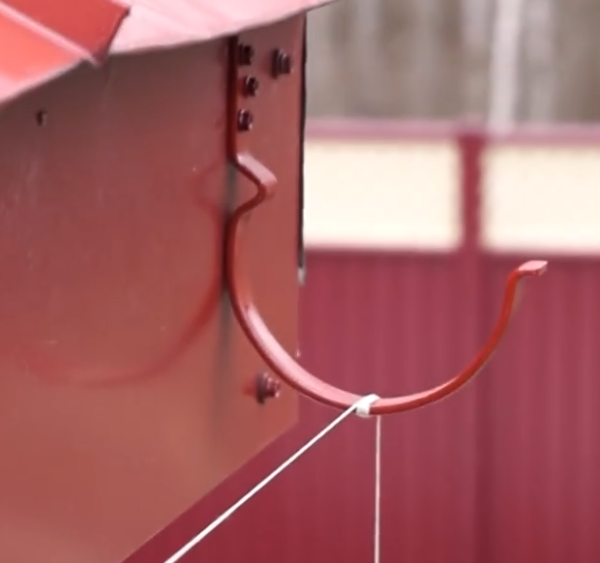
Mounting bracket cornice.
Between these arms stretched monofilament thread.
In this embodiment, the inclination angle is more convenient to measure in using gidrourovnya:
- first secured the upper end of the suspension;
- thereafter gidrourovnya pointed lower fixing point of the suspension;
- We secured it and pulled the cord between the two suspensions. This cord and become a benchmark for fixing the intermediate hangers.
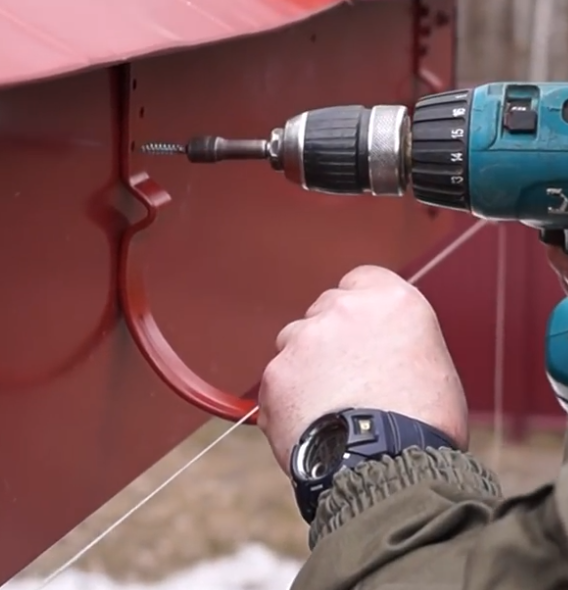
Mounting the intermediate hangers on the cord.
Next we will need to have to collect gutter system, and we'll start the assembly with fixing plugs. They are in most systems used universal - suitable for both right- and left-hand side.
First, in the groove itself plugs inserted into the rubber gasket, after which it is put on the edge of the chute until it clicks.
But a rubber gasket is often small, and therefore the joint will need to be more fluff roof sealant on a bitumen basis. Note, do not use silicone, namely a roofing sealant.
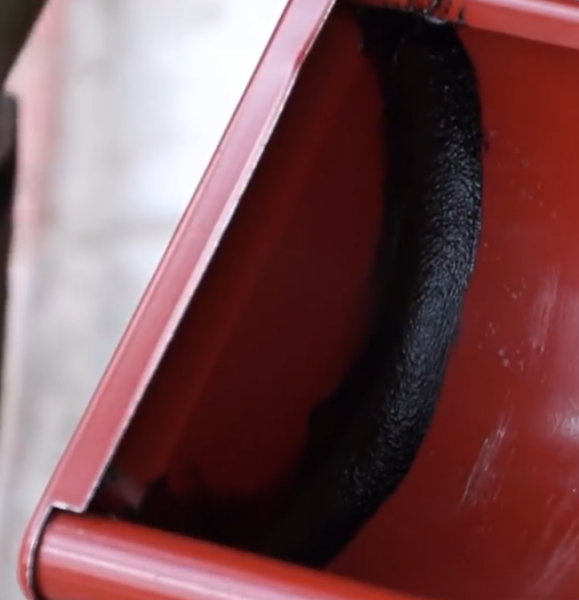
Roofing sealant inside the plug.
Then you can set the gutter with a plug in the suspensions. Make it simple, there's important to get into the groove, and then the trough is pressed and after it clicks gets in his seat.
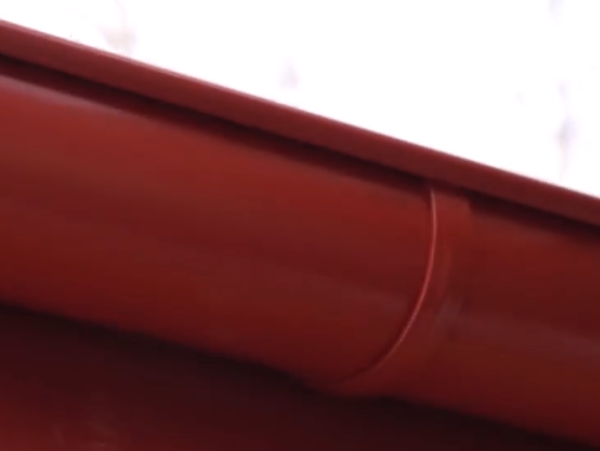
Planting gutters on brackets.
Now we need to cut a hole in the gutter drainpipe under the funnel and slightly bend the edge of the hole, making the so-called drip. The hole is better to do in advance, even on the ground.
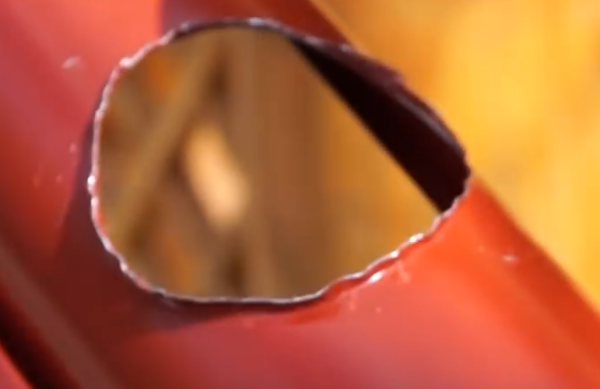
Hole curved edges funnel under drainpipe.
Such an opening can be cut are inserted into special crown electric drill. But most of the masters do it using a hacksaw for metal. First is tried and tube chute is marked, and then cut with a hacksaw sector in the groove.
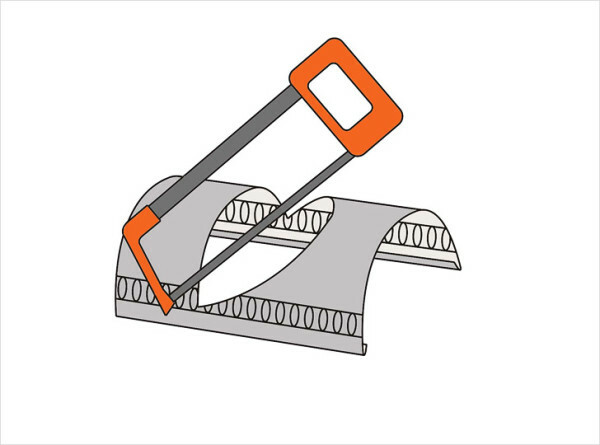
The simplest technique for tapping the funnel in the chute.
To connect the gutters on the straight sections of the track used by special seals. Before you fix the gasket on the groove, the rubber seal is inserted into it. Note pad is inserted into the relief party to the chute.

Installing the sealing rubber bands to the castle for the gutter.
Himself a metal seal with a rubber gasket initially engages with the far edge of the gutter, and then bracket It puts on a proximal end, and then the lock on the seal clicks and locks in the metal tongue. When the system is assembled, we need to go through all the joints of the inside roof sealant.
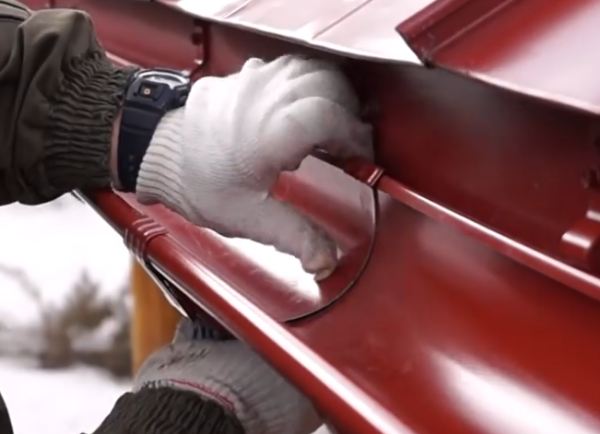
Don and latches the connector gutter.
Metal funnel drainpipe on one side has a hook, and the other on it there are several tabs. We need to engage the bottom of the funnel over the edge of the gutter, press it against the gutter and bend those few tabs inward.
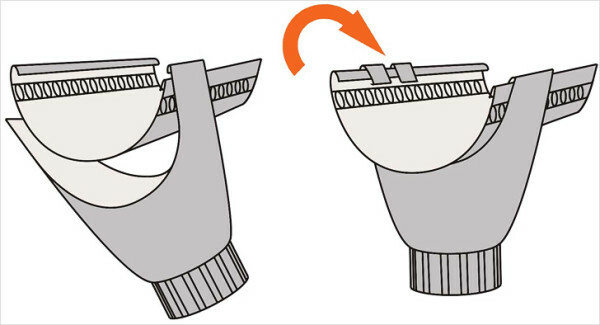
Scheme lock hopper on the chute.
Installation of the drain pipe is a separate issue. Under the rules of the vertical pipe will run in 5 - 7 cm from the wall. Closer can not be mounted, because of the support wall brackets may get wet. And if you push on the pipe, then it will not be pretty.
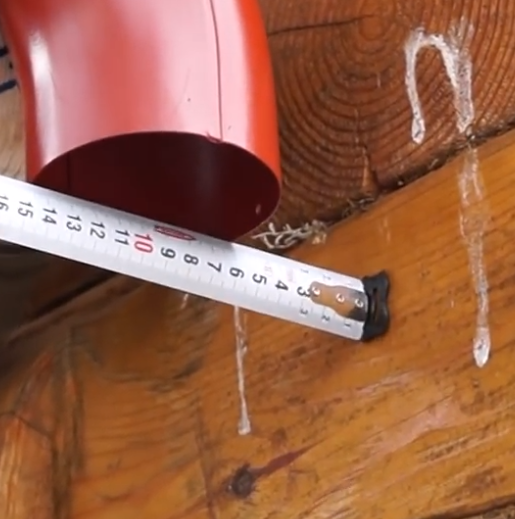
The distance from the drain pipe to the house wall 5 - 7 cm.
In the photo below is placed another table used to calculate the length of the pipe, as well as set the knee and adapters.
Many home master "stumble" on one detail: immediately above the first and second drain knee is usually necessary to insert a small sector of the inclined pipe. So, when you measure the sector, do not forget to make allowance for those parts of the pipe, which will drop to the knee, it is about 4 cm on each side.
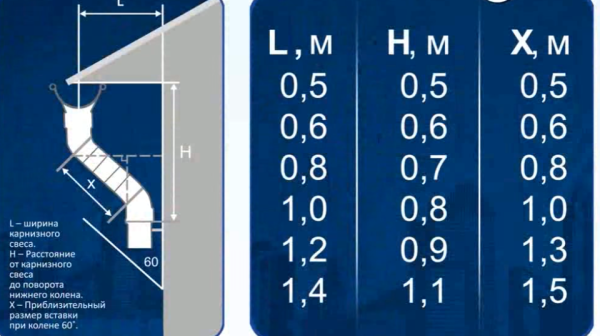
Parameters for setting the downspout.
In general, our metal gutter system is mounted. Now you only have to install the pipe below another tribe, it is necessary to compensate for the high water pressure. Under the rules of the tribe should be 20 cm from the ground, but in practice it is set, as you like.
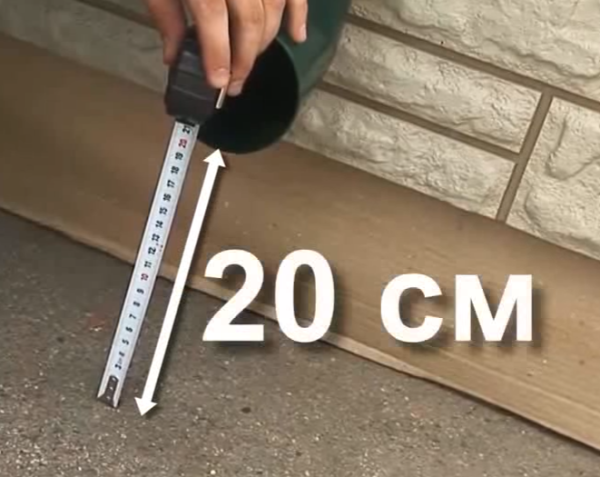
Rules of installation of the lower knee.
helpful hints
To install upper inclined drainpipe sector sold meter adapter in which one side is equipped with an expander. Convenient thing, but it's worth the meter pipe 600 rubles, and in most cases up to half, and the rest is stored in a closet until better times.
There is a small trick: to stretch the end of the cropping and make the same expander we can not, it needs equipment. But little Sause pipe so that it went into the knee, we are quite capable. To do this, we take the pliers and the perimeter of doing bends, as in the photo below.
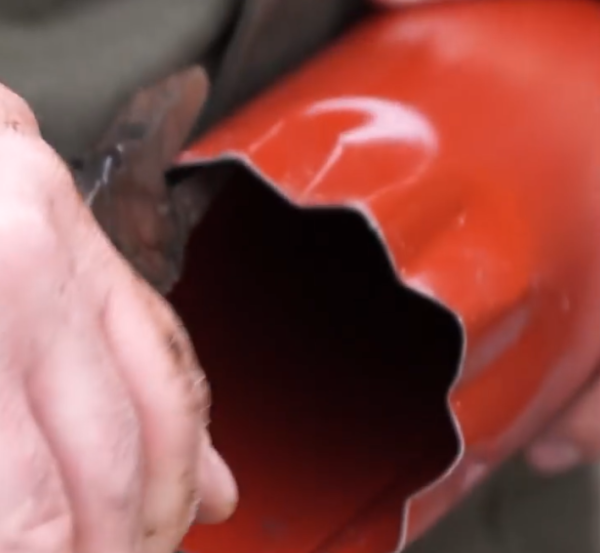
Narrowed pipe pliers.
In the snowy winter is great enough risk to disrupt or at least bend the hangers on the gutters. After such an accident to restore the correct slope of the gutter is more complicated than to install new gutters.
One skilled master I borrowed a good reception: each bracket is suspended from the edge of the roof by a metal strip. To do this, make a hole in the suspension and the roof edge, puts the strip and fix it with screws or rivets.
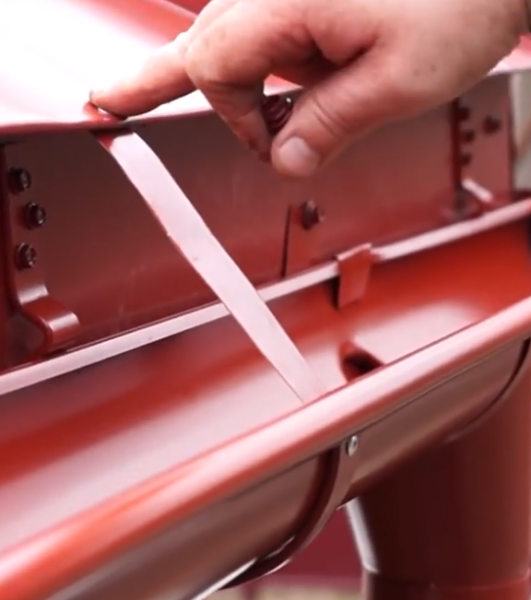
Strengthening hangers for gutters.
The biggest problem is absolutely in all trenches is clogged with dirt and leaves. With the mud we can not cope, but to protect themselves from large debris is realistic.
Now on sale for this special plastic mesh to protect the gutters of debris. You cut off the desired length, fold the mesh in roll and fix it in this position with plastic collars. Then you will just have to put the roll in the gutter.
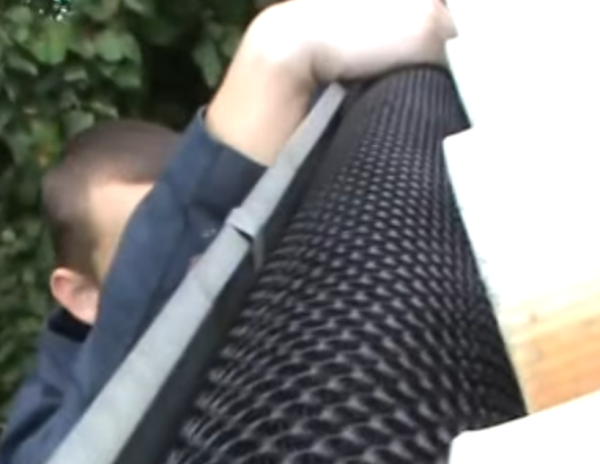
Laying the protective grid in a metal trough.
Output
Handyman special attention should be paid to two steps is a detailed calculation and the actual system installation itself, in this material, these steps are painted in detail. The photo and video in this article you will find a number of professional nuances. And if you still have questions, please write them in the comments, I'll try to help.
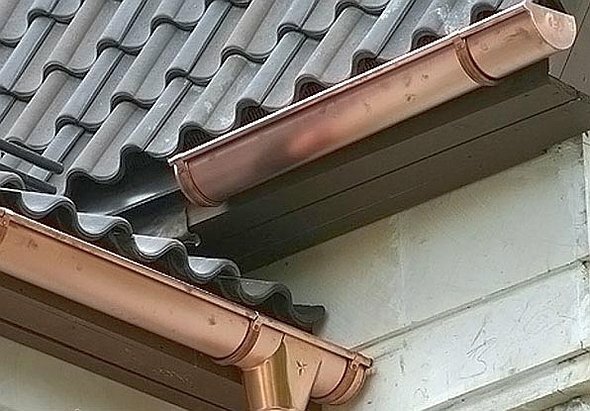
Mounting Option tide on roofs with different heights.
