How to cover the roof with his hands Bent - more fotoinstruktsiya
Table of contents
-
1 mount technology
- 1.1 Step 1: Calculation and preparation of materials
- 1.2 Step 2: installation of lathing
- 1.3 Step 3: installation of profiled sheet
- 2 A few important rules and recommendations
- 3 Output
Is it possible to qualitatively cover the roof trapezoidal sheet, while not having any skills? My experience has shown that it is possible. Below, I'll detail how to do it, and step by step instructions visually confirm my words.

Procrit roof floorings under the force of each handyman - just need to comply with the technology
mount technology
The process of installation of corrugated board with your hands can be divided into three stages:

Next, in order, consider how to cover the roof.
Step 1: Calculation and preparation of materials
First it is necessary to count the number of sheets of material. To do this, first measure the area of the roof.
Calculation of corrugated board is done by a simple formula K = Skr / Sl + 10%, where..:
- K - the number of sheets of corrugated board;
- Skr. - the roof area;
- Sl. - the area of a single sheet of corrugated board.
Steel sheet can be of different sizes
The stock material (10-15 percent of total amount) is required since during installation will necessarily remain corrugated waste. In addition, the need to ensure an overlap of the width and length.
If the ramp length corresponds to the width of the sheeting, then count the number of sheets even easier - the length of the ramp should be divided by the width of the sheet, and then multiply the resulting value by the number of rays and add 10% of the total sheets.

The durability of the roof depends on the compliance of waterproofing and installation of lathing technology
In addition to the roofing material you will need these materials:
| Illustration | materials |
 |
|
The calculation of the required number of strips for kontrobreshetki very simple. Count the total length of the rafters (length of one rafter multiply their number). Such should be the total length of the strips (split length trusses on one rail length).
Boards are mounted along the length of the ramp. Step battens should be 500-600 mm. If the angle of inclination of the ramp does not exceed 15 degrees, it is necessary to reduce the step crates up to 300-400 mm, as the roof load will increase.
Step 2: installation of lathing
Before you cover the roof floorings, it is necessary to seal the crate and perform correctly. This operation is carried out as follows:
| illustrations | Description of work |
 |
roof waterproofing:
|
 |
Installation kontrobreshetki:
|
 |
Mounting battens:
In the process of mounting battens may require alignment, since drops more than 10 mm is unacceptable. To align the sheet under the bars of the board. In places stingrays interface, which will be installed the valley, as well as around the perimeter of the passage of chimney and ventilation ducts need to do a solid crate, ie with zero pitch. |
 |
Construction of gable overhangs:
|
By lowering the temperature waterproofing film is strongly stretched. Therefore, during its installation, be sure the sagging between the rafters at the centimeter and a half.
Step 3: installation of profiled sheet
Roof trapezoidal sheet roofs is carried out as follows:
| illustrations | Description of the action performed |
 |
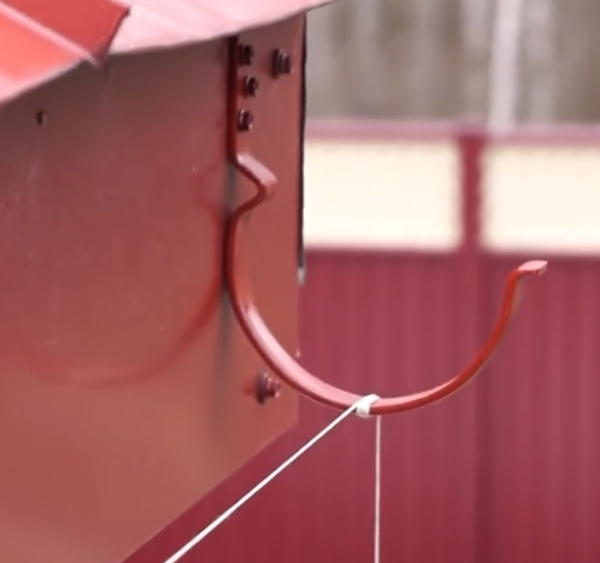
Installation of curtain elements. First of all, secure the edge of the ramp Cornice strip and mount the drain. |
 |
Assembling first sheet:
If the width of the ramp will be installed a few sheets, perform works from the bottom up. |
 |
Mounting the second sheet:
Thus, mounted entire first (bottom) row of sheets. |
 |
Laying the second series of sheets:
|
 |
Installation of the valley:
|
 |
Installation of junction strips. If the square chimney passes through the roof, the work is done as follows:
If a round tube, it is necessary to use a special member and communicating corresponding diameter, which fits over the pipe. |
 |
Mounting the ridge plates:
|
 |
Installation of additional elements. Once the roof is made of corrugated board, perform the following actions will be mounted:
|
 |
Tint sheeting. Areas in which during installation damage the protective coating, it is necessary to tint. To do this, use polymer paint in the can. You can also use a special repair enamel and metal sheeting, although its price will be slightly higher. |
In this installation of the roof is completed.
A few important rules and recommendations
Finally, to share with you some important rules and tips that will help to cover the roof floorings without too much difficulty:
- Work in calm weather. Decking is lightweight, so in the wind sheet is hard to keep even two people;

Two lags significantly simplify the process of raising the profile sheets to the roof
- Gently lift the sheets. To lift the sheeting to the roof, set two boards or two boards on which the decking can slide on rails. In this case the reduced the likelihood that you drop the material;
- Carefully navigate through the roof covering. Use soft shoes, and try when traveling on the roof of the tread on the bottom of the wave;

The screws should be arranged in a staggered manner
- Properly install the screws. Clamps are screwed into the bottom of the wave, except in places compound sheets to each other.
On the edge of the screws must be screwed into each wave. Further, they are installed in a staggered manner over a wave. Vertical position them through the crates step.
Try to screw positioned exactly perpendicular to the crate;

In the process of cutting corrugated grinder melted polymeric coating - this reduces the life of the material
- Properly cut material. For these purposes can be used for metal cutting shears, jigsaw or hacksaw. But grinder to cut the prohibited lists, as it damages the protective coating.
To increase durability of the material sheet sections must paint.
Another important point - it is a cross-Lap, which, as I mentioned above, depends on the angle of slope of the ramp:
- Up to 15 degrees - 20 cm;
- In the range of 20-30 degrees - 15 cm;
- More than 30 cm - 10-15 cm.
Here, actually, and all the information on how to properly cover the roof floorings with their hands, which I wanted to share with you.
Output
Now that you know how to cover the roof of corrugated roofing sheets, and can handle the job without specialists. View additional videos in this article. If you have any questions, please write in comments and I will gladly answer.