Plastering of walls on beacons - technology from "A" to "Z"
Table of contents
-
1 plastering technique
- 1.1 Step 1 and 2: preparation of materials and wall surfaces
- 1.2 Step 3: installation of beacons
- 1.3 Step 4: Stucco
What is plaster walls on beacons? Let's find out how this complex process, and whether you want to hire professionals for the job. Sharing my experience, I will try to tell and show in the photo all the nuances that are new and with all figured out.

Plaster beacons - a simple and effective way to align the walls, which can be mastered by anyone
plastering technique

Technology beacons plaster walls includes four steps:
For dry Improvement better use plaster with addition of lime, because it possesses antiseptic properties. Because of this you do not run into the problem of mold on the walls.
Step 1 and 2: preparation of materials and wall surfaces
plastering process begins with the preparation. We will need:
| illustrations | Description of the action performed |
 |
materials:
Selecting the stucco mixture depends on the type of room:
|
 |
Removing old plaster:
|
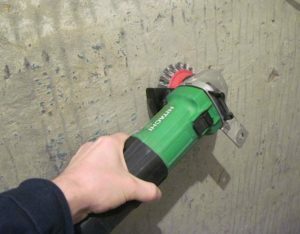 |
Removing the remnants of plaster. Need their own hands to treat the wall with a wire brush or sander. |
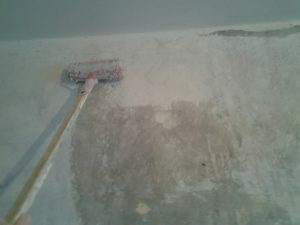 |
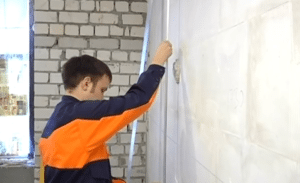
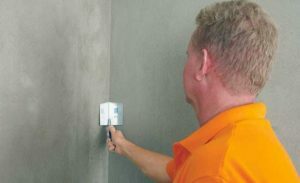
Priming the walls:
Apply the primer may be by brush or paint roller. Be sure to double, making a break between applications. |
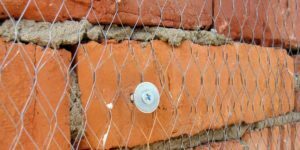 |
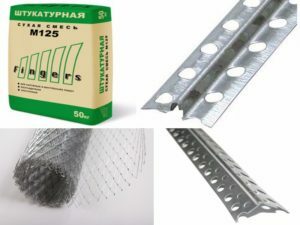
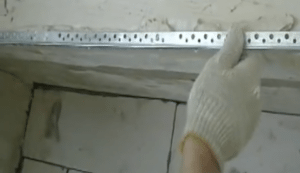
Mounting grid. If the thickness of the plaster layer is greater than 1 cm, the wall plastering secure net. To do this, use the dowel-nails with large washers. When mounting the mesh provide an overlap of about 15 cm. |
Before plaster brick or block wall is necessary to deepen the masonry joints 10 mm to further engages with the plaster surface.
Step 3: installation of beacons
The next step is the installation of lighthouses:
| illustrations | Description of the action performed |
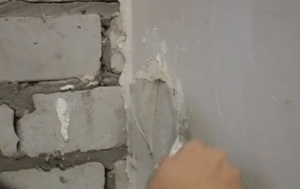 |
Plastering lumps on the wall. Turn from an angle of about 15-20 centimeters, and on the same vertical line, apply the plaster lumps in increments of 30-40 cm. |
 |
Bonding lighthouse. Apply the solution to the lighthouse profile lumps and a little utopia. The distance from the wall to the rack determines the thickness of the plaster layer. |
 |
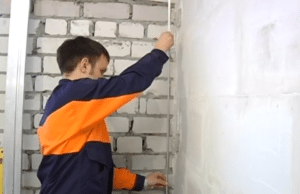
Alignment of the lighthouse. Apply the rule to the lighthouse and the building level. If there is a deviation from the vertical wall to press down one or the other side of the beacon to align it. The profile must be installed vertically. By the same principle, set a lighthouse near the opposite corner. |
 |
Pulling the thread. Between the extreme beacons need to pull a thread.
|
 |
Installation of intermediate beacons. Working follow the scheme described above. In this case, be sure to align the level of beacons, as well as on the stretched filaments. Step beacons should be 40-50 centimeters smaller than the width of the rules to which you will work. |
If necessary to provide accurate thickness of the plaster layer before sticking beacon screw with two opposite sides thereof screws. The distance from the caps and the wall thickness should correspond. Then, the profile is applied to hats screws and glued to the wall plaster solution.
According to this principle is carried mount beacons to all the walls, you're going to be plastered. After mounting rails wait until the solution has dried, they are glued to the wall.
Step 4: Stucco
Now you can start leveling walls:
| illustrations | The order of execution of works |
 |
Preparation of plaster.
The first layer of plaster must be sufficiently fluid - creamy consistency. |
 |
Application. Plastering of walls under the lighthouse begins with the rendering:
|
 |
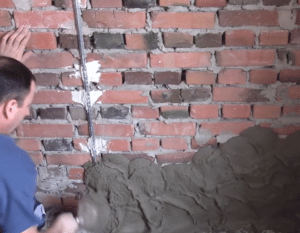
The application of the basic layer:
If necessary, the soil can be applied in several layers. Each subsequent layer after setting the previous snaps. However, the total thickness of the plaster layer should not exceed 5-7 cm. |
 |
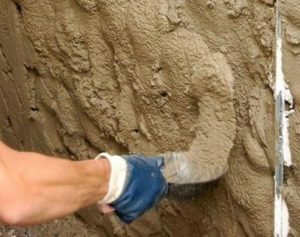
Alignment surface. When the solution is to go beyond the lighthouse, the surface you want to align:
|
 |
Dismantling lighthouses. After the plaster beacons will be completed, it is necessary to dismantle the rails podkovyrnuv their trowel. If the guides are made of aluminum, they can be left in the wall. |
 |
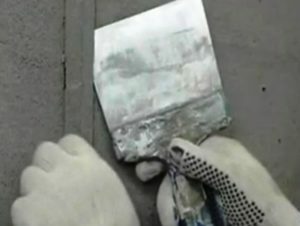
Smearing marks lighthouses. The slots must be filled plaster solution. Instruction is simple - type solution on a spatula, and slide it along the seam. |
 |
Leveling plaster in the corners. To do this, use the special angled spatula. Slide it along the corner as shown in the photo. The price of this instrument is not high, but the benefits are considerable. I advise you to buy it before the start of work. |
 |
Installation perforated corners. All outside corners, including the slopes, you need to stick perforated plaster corners. In the process of installation, always use the level that they are arranged vertically or horizontally. |
 |
The application of finish coat.
|
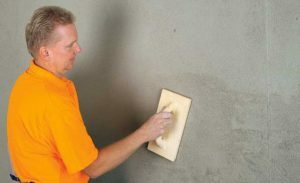 |
Grout plaster. When the finish coat starts to set, it is necessary to wipe Malaucene. To do this work out tool circular motion with uniform light pressure. |
Gypsum plaster must be used within 20-30 minutes. Therefore, it is not necessary to mix the solution a lot. If he started to set in the bucket, they can not be plastering the walls.
- The technology described plastering walls on beacons is improved, since it allows to achieve almost perfectly smooth surface. On top of this rough finish can be applied decorative plaster, liquid wallpaper and other such interior materials;
- There is also a simplified technology of plaster works on beacons. From the above it is characterized in that the smoothing is carried out after application of the base layer, i.e., no finish coat.
After each coat of plaster machine thoroughly wash to dried lumps solution is not left on the walls of the groove.
A simplified technique can be used for subsequent Shpatlevanie walls or, for example, if the ceramic tile is used as a finishing material. Here, perhaps, and all the information about how to plaster walls on beacons.
Also recommended for viewing video in this article. If you have any questions, ask them in the comments and I will gladly answer.