Skirting MDF: mounting and docking angles
Table of contents
-
1 Installation of baseboards: What is the MDF
- 1.1 Klyaymery and profiles: Method 1
- 1.2 Glue, dowels: Method 2
- 2 docking angles
- 3 conclusion
Edging the floor in the room are always given special attention, as it serves as a finishing touch to the interior. Here, for example, white plinth made of MDF, as in the top photo, perfect for all shades. He is achromatic, while with the other colors should be more selective. But my purpose today is not to disclose the secrets of design and installation techniques, and I also want to provide you with the video in this article.
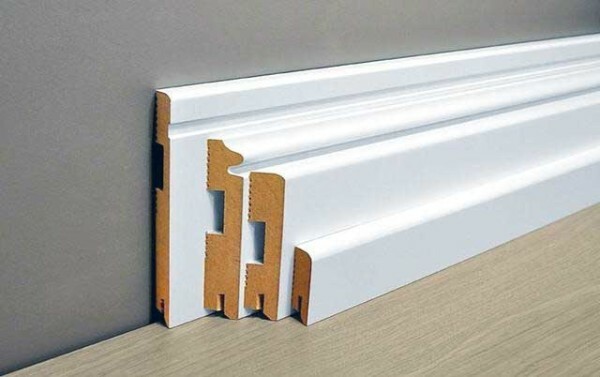
White MDF plinth of varying heights
Installation of baseboards: What is the MDF
In any case, low, medium or high plinth of MDF will be different from a wooden, plastic or polyurethane by way of installation - all its nuances. However, the scope of the installation will still be the same - it is, above all, edging floor.
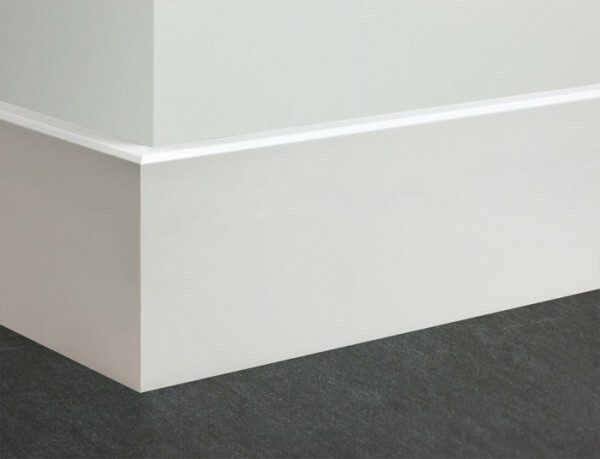
White high floor MDF plinth - a joint outer corner
Let's understand first, what material we have to deal:
- MDF or fine fraction is not decoding, and a transliteration of the English abbreviation MDF (Medium Density Fibreboard). Which translates as medium density fiberboard;
- but even transliteration has a solid foundation to refer to the material - the fact that MDF is made of fine wood chips (Sawdust) and pressed on the machines at high pressure with a high temperature;
- chipboard material is very similar (chipboard) or chipboard (laminated)But the main distinguishing feature here is not a fraction of the material, and a binder;
- lignin (lignum Latin for wood) which connects the fine fraction is a natural substanceWhich is present in plant cells to vascular sokoobrascheniem and some algae. Consequently, the adhesive composition of the product is completely safe for the human body, it is not dangerous no smell, no fumes, no contact with the skin;
- if we talk about the baseboards made of this material, they have perhaps the highest price among similar. But the coverage of natural or synthetic veneer makes them extremely beautiful.
Klyaymery and profiles: Method 1
Explanation. Klyaymerom called metal clip with perforations for fixing profiles and panels.
Such plates performed under numbered №1 to №6 - it depends on the distance between the pressing plate and the tongue.
metal klyaymery
Whether it's black, charcoal or white MDF floor plinth, it in any way necessary as that attach to the wall. One way is its fixation on metal klyaymery, which are usually sold complete with trim.
The point of the installation is as follows - on the back side of the plinth has a special groove for fasteners, overlapping configuration with the springy clip device with which occurs latching.
Klyaymery fastened to the wall by screws and plugs, and the maximum distance between them should not exceed 30-40 cm. While it is best that it is 30 cm, as required instruction.
Most importantly, the height of the console from the floor corresponded exactly to the groove in the floor. Therefore, before you fasten fasteners, labels should be put in the corners of the room at the desired height and the approximate line to repel choklaynom (masking cord).
Then strictly on the line at the desired distance screwed klyaymery (they also must be on each side and near the joint inner or outer corners).
The photo - Plastic profile
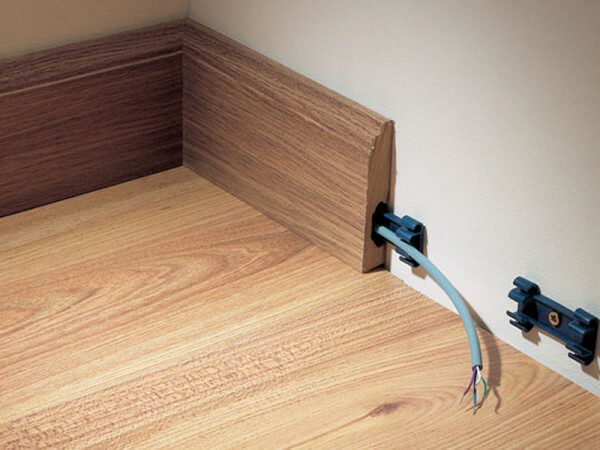
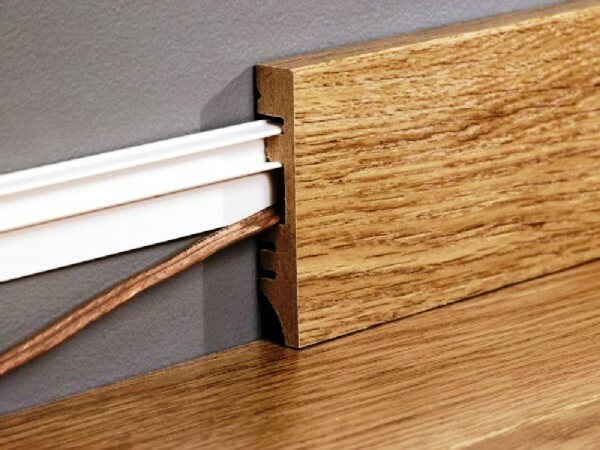
Also, installation of decorative moldings made of MDF can be produced on the plastic profile, as shown in photo above, although in Russia this method of mounting is extremely rare due to the absence of the products.
Installation The bottom line here is the same as that for klyaymerov: on the wall at the desired height choklaynom bounces approximate line and the plastic section is mounted on it. Then, after the installation of plastic profile on him just latched plinth.
With this method of installation, as is evident in both the photographs, there is the possibility of field wiring. On the back side of the skirting board, in addition to the slots for fastening the present cable duct.
Glue, dowels: Method 2
Mounting adhesive
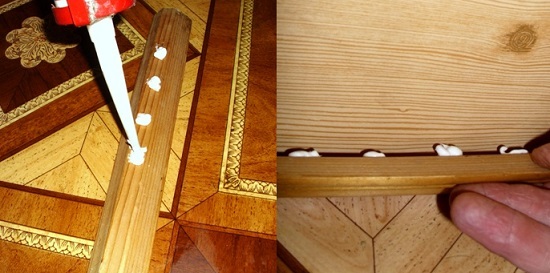
On wooden or shpaklovannye wall mounting adhesive is often used, where the adhesive, tend to use "liquid nails" - is the most effective composition (as far as I know).
For example, in this way it is very convenient to fix floor wide MDF plinth, causing the point of the tube with nails, at a distance of 5 cm from each other, only then you need a very tight squeeze profile to the floor and the wall, holding it for a while before pour. Sometimes this method is combined with the screws (dowels) - this allows you to do a pause in the work to keep the profile of the composition before curing.
Installation on the screws with plugs
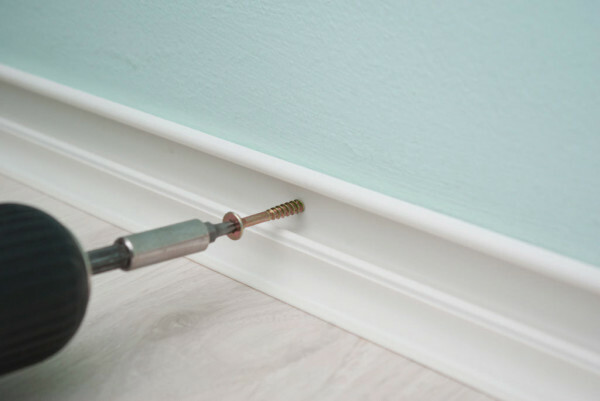
Of course, all the methods described above are good, but they are possible only when there is a perfectly flat wall, and how to fix MDF plinth to the wall, if it is uneven (wavy)? Of course, the best and most correct option here is the alignment of the plane itself, but this is unfortunately not always possible. Therefore, in such cases, the best solution is to screws with dowels.
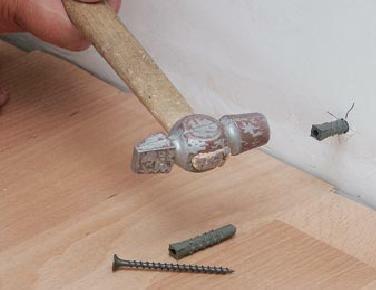
With this fixture floor plinth made of MDF requires the same parameters of the distance, that is 30-40 cm between the points of fixation, but this is only for orientation. In fact, you will need to press the bar at each point, where will the gap between it and the wall. To do this, apply the baseboard over the site and immediately, "hot" drill holes in the right places and through them, put marks on the wall.
Insert the plugs in the right places
Then everything is simple - on labels make holes for dowels and insert them, finishing off with a hammer, that they entered into the wall flush with the surface. Then apply the stick skirting to the installation site and pulls it with screws. screw head for the scenery is best to close in furniture pads - they can always pick up on a certain color.
docking angles
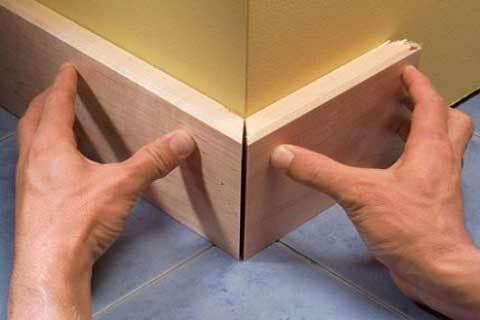
Docking outer corner
Whether it's for painting moldings MDF or veneer, you, in any case, will have to join them in the inner and outer corners. If the angle between the walls of the conjugate has 90⁰, then it is very easy - you can use the carpenter's miter box, but the angles are not always.
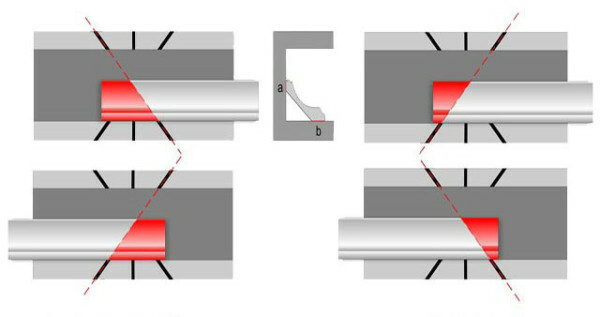
Trimming for joining angle: left - for internal, right - outdoor
If the plinth is flat and is applied to the wall over its entire surface, then everything is clear. But if the lower part a bit more, or it is set at an angle, then trim the edges there are certain nuances.
In fact, these details are shown in the top image, the main thing is not to confuse with the angle at which you are working. In the case of a flat profile, you just need to press tightly against the plinth of neighbor you to a side profile and cut it to the desired angle.
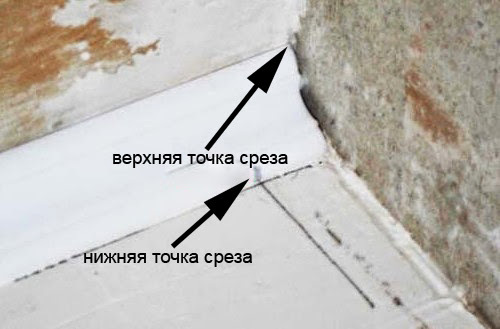
cutting angle without principle stuslo
Now let us consider the situation when the outer or inner corner between the walls is not equal to 90⁰. To do this, we will focus on the top image.
Applies the profile to the installation site and on the floor beneath him draw a line, and then the same operation is made with the opposite side. the cut line will be between the points of intersection of these lines and the external or internal wall joints.
conclusion
Many would agree with me, install skirting from MDF own hands simply because this material having optimum geometric parameters and has no mechanical defects as a solid piece tree. If you have any questions or you still know some of the nuances - write in the comments!
