Door frame made of MDF: light, beautiful, tech
Table of contents
-
1 What kind of design?
- 1.1 product Features
- 1.2 Advantages and disadvantages
-
2 mount technology
- 2.1 Tools and materials
- 2.2 The assembly of the box
- 2.3 Door hinges
- 2.4 Installation box into the opening
- 3 conclusion
Installing the door frame from MDF is often seen as an alternative to installation of products from natural wood. In principle, both options have their place: and the wood, and composite-based molded fiber not bad enough to cope with their responsibilities, so that for the majority of structures MDF is fine.
However, the technology of installation of these boxes has its own characteristics, and article I will talk about them, based not only on the opinions of experts, but also on their own experience.
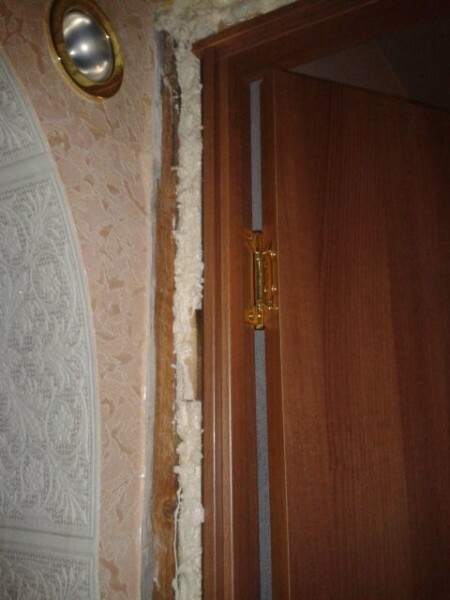
The use of MDF instead of solid wood in this situation is completely justified
What kind of design?
product Features
Door frame - a design profile, which is set in the opening and serves as a basis for fixing the door hinges, lock response plates and other items. The main function of the box is to keep the shape of the doors to the free movement of the door leaf, so it is very important that the product has sufficient rigidity and stability.
The main elements of the door trim
Important!
Sometimes there are bezkorobochnye doors - design, in which the hinge pins using recessed directly into the opening.
However, this solution is realized only in a space shortage, for example, the regeneration of toilets and bathrooms in the model homes.
The standard material for the manufacture of boxes is the wooden beam, but it is increasingly replaced panels made of MDF or composite versions recently.
They are characterized by such a design:
- The basis of the product strips of extruded cellulose fibers impregnated with an adhesive composition. For this material is characterized by high density and considerable uniformity that provides the necessary strength and density.
- In the production of preforms for door frames profiled strips, Ie they are given a form required for a snug fit of the door leaf.
- On the surface of the decorative coating material is appliedWhich not only ensures the product an attractive appearance, but also protects the foundation from moisture.
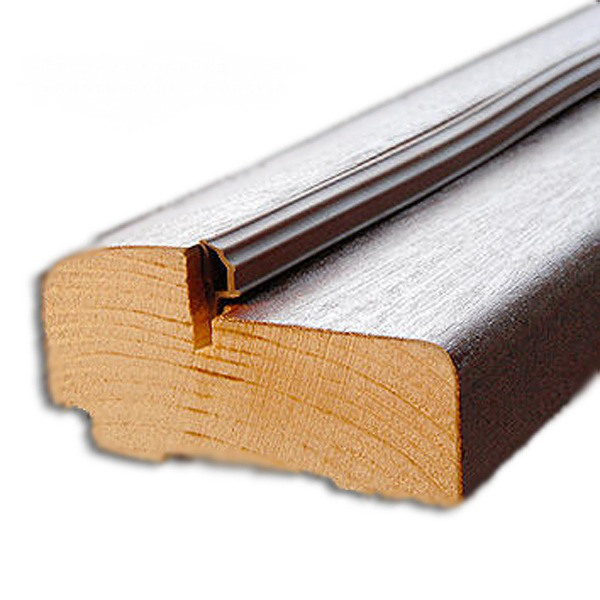
veneered product
To date, the market offers door frames with different types of coatings:
| decorative material | Features |
| Melamine paper | MDF coated paper refers to Economy segment. In the production of shaped parts are pasted thick paper with printed pattern (sometimes with the texture), and then covered with several layers of protective lacquer. In spite of the lacquering, with a paper coating products do not differ durability: the friction paper layer quickly loses strength, and when wet - swells and gradually degrades. |
| PVC film | Products, laminated PVC film, cover about 70% of the market. They are characterized by attractive appearance combined with good performance: film used for decoration is different moisture resistance, and for a long time keeps the brightness shade. |
| Veneer | Natural wood veneer - the most expensive, but it is the most beautiful coat. Externally, these products are virtually indistinguishable from an array made of, but they are not so long. The thing is that even high quality veneer glued with regular moisture and temperature changes can flake off. |
It is also worth noting that in addition to the door frames made of MDF only, there are teams of options: the basis of their wooden block, which is mounted on extruded profile part.
Several times I have used these details, and I must admit: they are quite technological, and composite structure does provide a balance between lightness and mechanical strength.
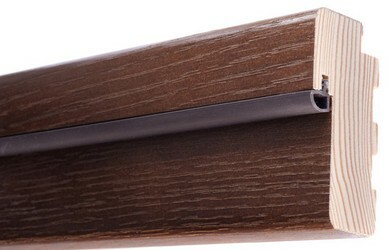
Panel laminated polymer film "under the tree"
Advantages and disadvantages
Installation of the door frame from MDF provides us with a number of advantages:
- Material somewhat lighter wood, because it is easier to work with, and the load on the bearing design, it has less.
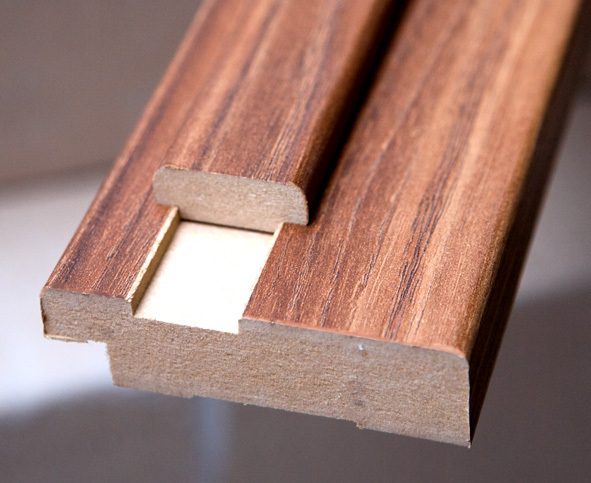
The model with a removable vestibule is more convenient to install
- The homogeneous structure ensures that no delaminations and cracks, wherein the fastening elements are held in MDF very good.
- The use of different decoration technologies allows with minimal cost to imitate expensive types of wood: so the price of veneer, laminate and even more options for oak or wenge will be much lower than that of products array.
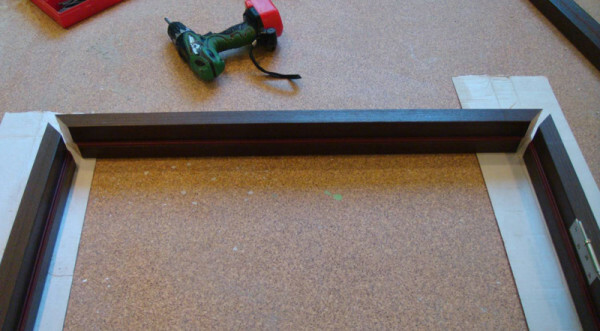
Outwardly indistinguishable from a wooden structure
We have such a solution and disadvantages:
- Cheap panels made of MDF prolonged contact with moisture, swell, which may lead to a change in the geometry of the door opening.
- If you make a mistake and choose too thin door frame, the heavy blade can cause its deformation.
- As I noted above, the decorative coating may peel off from the base, because you need to use the product carefully enough.
Tip!
Unlike products from MDF, boxes made of wood quite easily restoration array can always be sanded, returning him to the pristine beauty.
Well, almost pristine.
- Finally, the disadvantage is a more complicated assembly of a door MDF box: assembly of parts with mechanical fasteners should be carried out with the preliminary drilling, then the nails, and screws not provoke cracking of thin panels.
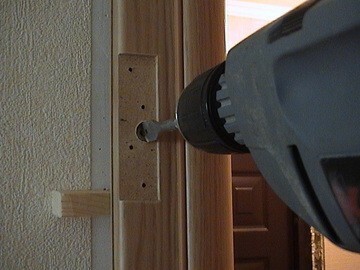
For a more efficient installation should be applied pre-drilling
And yet, such a comprehensive range of parts and their reasonable price have their: boxes made of MDF They can be equipped with doors, even the premium, so that we should understand how to properly mount.
mount technology
Tools and materials
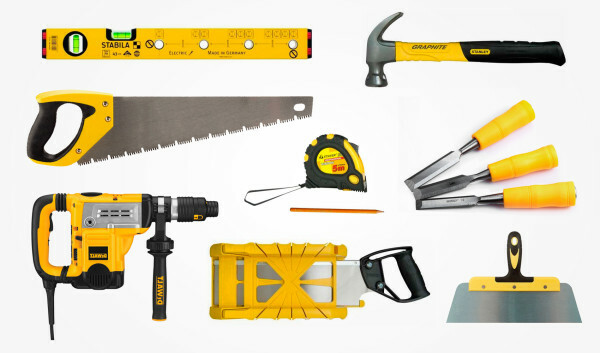
A set of tools for the installation of doors
doorframes installation technology of MDF is simple enough for even a novice can master to implement the project with their own hands.
For the work we need these tools:
- Saw MDF (hacksaw, circular or reciprocating);
- punch;
- drill;
- screwdriver;
- level;
- plummet;
- roulette;
- hammer;

Such fasteners, as in this image, often used to enhance fixation
Apart from the preparations for the door frame will be needed more and other materials:
- Anchor dowels with metal poured plastic sleeves;
- screws;
- wooden boards for the manufacture of wedges;
- self-expanding polyurethane foam.
In addition, the cement mortar may need to recover most of the opening geometry, but it is necessary to determine on the spot.
The assembly of the box
To design turned out quite stable, we need to correctly mount the frame itself. How to assemble the door frame MDF - I'll discuss in this section.
The main requirement for a box that will contain the web - it's rectangular. That is why we need to perform all operations on a perfectly flat stable surface - for example, on the floor, closed with a tarpaulin or non-woven fabric.
Work is performed as follows:
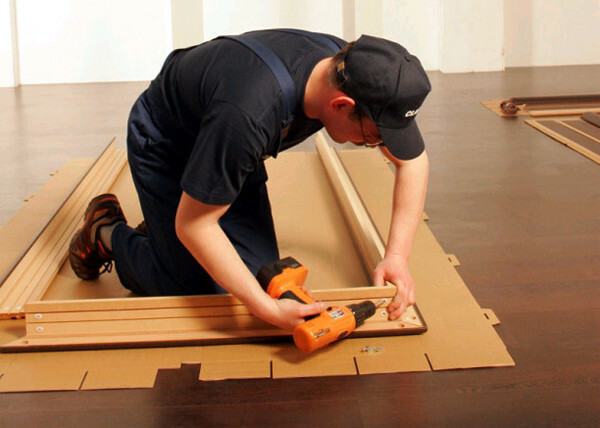
The assembly process of the finished product with pre-trims
- On the floor laid with the door leaf.
- On each side of the door have a blank for the vertical uprights of the box.
- Cropped billet height, leaving a gap of 2-3 mm at the top and 2-3 mm below the threshold.
Important!
If the presence of the threshold is not provided, then do the clearance from the floor about 12-13 mm slit in the lower part is not only provide ventilation, but also allow us to open the door without catching canvas floor covering, carpets etc.
- The top box also cut the strip width, the side making the gap too, about 3 mm.
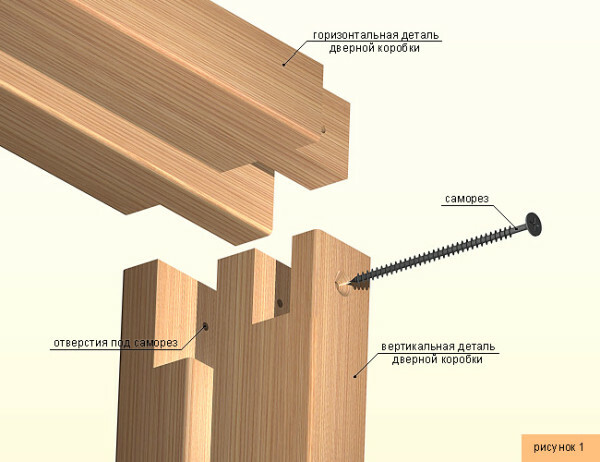
Driving assembly spike
Next we need to connect the uprights to the upper crosspiece.
This can be done in three ways:
- The first method - the connection to the spike. It is the most time-consuming, in addition, for it requires a router, but connections and strength increases significantly. Before you assemble the door frame from MDF, at the ends of parts cut spikes and valleys, allowing to adjust straps close to each other. Putting future door frame by means of glue, screws further amplifying node missing through.
- The second method of mounting - dock at an angle. Connectable MDF panels laid in a miter box and cut at 450. Applies the parts to each other, customize, thin layers of material cutting knife prototyping, after which the fastening screws screwing them also at an angle. Glued seam can also be, but the adhesive plays a supporting role.
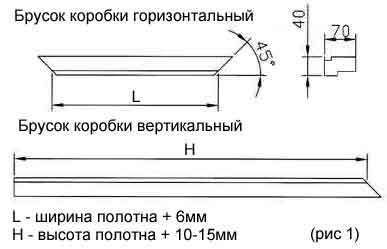
pruning scheme for mounting angle
Tip!
As in the case of finger jointed, it must be remembered that there will be reduced by the thickness of the panel when mounting the vertical and horizontal parts linear dimensions of the box.
Therefore, during the initial fitting should lay the necessary reserve.
- The easiest way to dock at a right angle details. For this purpose, the horizontal bar is located on the ends of the uprights (if necessary, can cut part projecting vestibule), fasten and align with one of the two cross- self-tapping screws. To prevent cracking of the MDF is to drill more holes using a drill the diameter of which is about 2 mm less than the diameter of the mounting element.
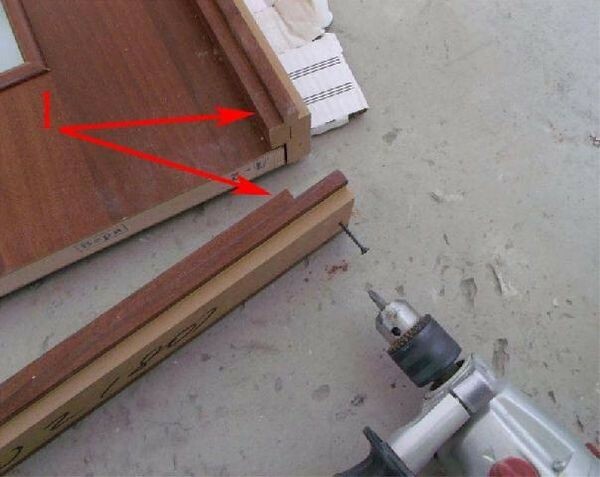
Installation at a right angle
After assembly, the box is advisable to check the squareness of its parts.
Door hinges
Next, the instruction encourages the introduction of those portions of the loops, which will be located on the box.
I used to perform operations on such a scheme:
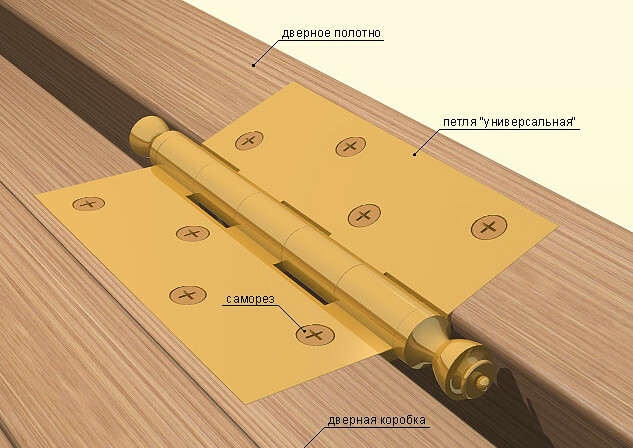
The scheme of fastening of loops
- First, define the place of fastening of loops, taking into account the direction of the door opening. For this purpose, I enclose the web or with already fixed hinges and nanoshu markup or 20 cm measured from the top and bottom, and draw lines in accordance with the width of the support plates.
Important!
Interior doors only two attachment points, while the input design may need three or four loops.
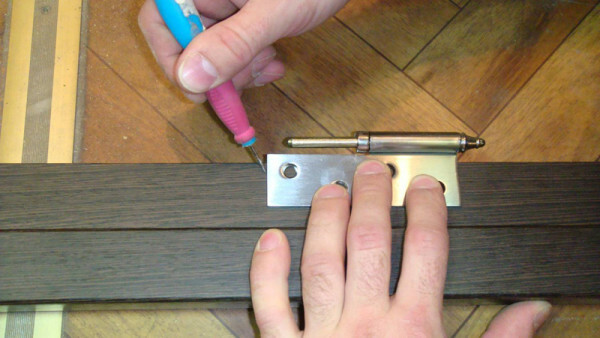
Marking a mount
- According to the planned lines with a sharp knife make an incision to a depth of 2-3 mm.
- Using a sharp chisel and claw hammer, is sampled, the depth of which corresponds to the thickness of the support plate hinges.
- Carefully align the bottom of the sample coarse sandpaper.
- Loop is applied to the sample and put on the label the box in front of each mounting hole.
- Label drill starting slot, and then fix the loop with screws, screwdriver and twisting them "holding out" Phillips screwdriver.
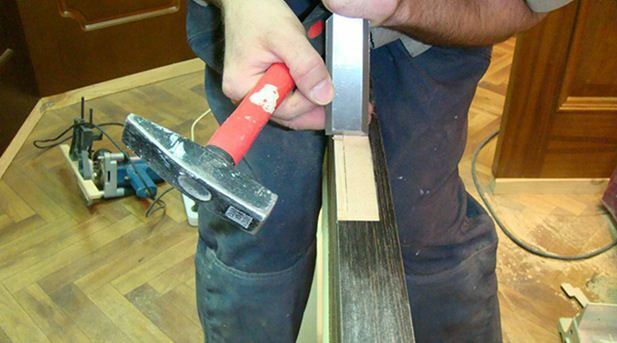
Cutting a groove loop
Sometimes the doors are equipped with non-collapsible hinges. In this case, the parts are mounted on canvas and attached to the box at the moment hanging. However, such a design I do not really like, so I prefer the classic version.
Installation box into the opening
Self installation process takes a minimum of time - at least in comparison with the preparatory operations. There are several installation techniques, some of which involves the use of special steel hangers.
I'm doing something like this:
- The doorway was purified from the protruding elements (old hardware, the remains of plaster, etc.). If necessary, perform repairs using cement mortar.
- The assembled box is inserted into the aperture and align the horizontal and vertical plane.
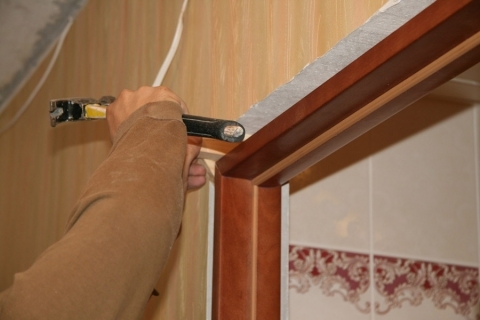
Wedging the upper strap
- Locking structure in the opening by means of wedges. I usually riving product without additional fasteners, in increments of about 50 cm, taking care that the frame is not deformed.
- Spray dampening gap between the box and the opening edge.
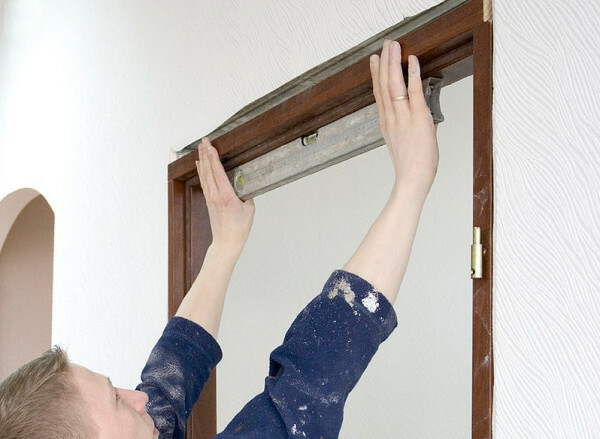
Control of the correctness of wedging
- Fill the gap with foam self-expanding, trying not to leave voids.
- If it is necessary, under the support straps and loops for mating lock plate drilled holes through which spins a few anchors rigidly fixing the box in the opening.
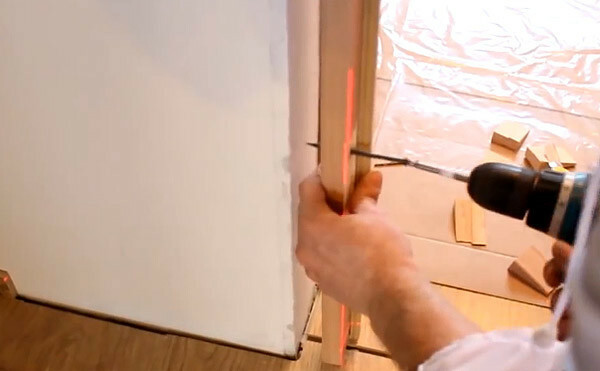
Additionally, the design can be enhanced screws
Important!
If the porch of the box is designed as a removable strap, the groove for the porch, drill holes with a spacing of about 40 cm and also perform consolidation.
- The door hung on hinges, check to see if they are free to go and close them to fully foam polymerization.
Simultaneously with the installation of the door frame or after the completion of this operation can also be performed and installation sloping slats - so-called transoms. Together these elements with frames completely block the assembly clearance, masking hardware and insulation material layer.
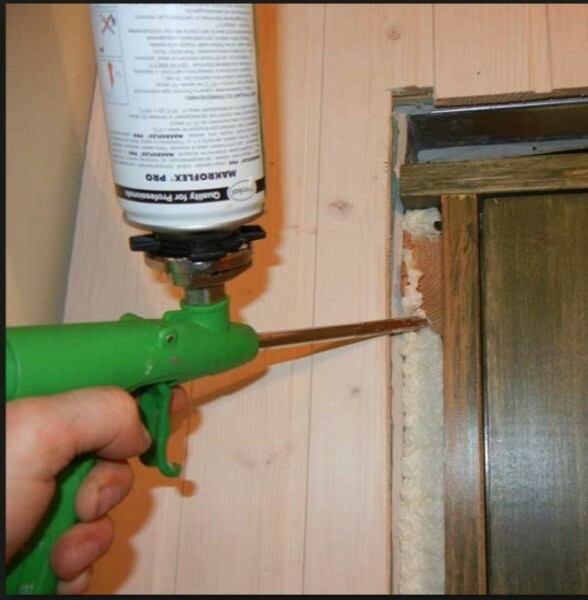
All the gaps fill with foam
conclusion
Assembling the door frame from MDF, as well as installing it in a doorway - it is not so severe as labor-intensive processes. The result depends on the accuracy of the master and by taking into account all the nuances, so before you take up the saw, it is worth to study the video in this article. If questions remain, and after watching - you can ask them in the comments to the material.
