Installing the pillars of the fence - how to make a solid foundation for the protection of their own
Table of contents
-
1 Types of structures and technology of their installation
- 1.1 Option 1 - installation of metal bars
- 1.2 Option 2 - installation of wood poles
- 1.3 Option 3 - Installation of concrete pillars
- 1.4 Option 4 - Installation of brick pillars
- 2 Output
If you think that the installation of poles for the fence with their hands - it is difficult, then this review proves otherwise. After reading it, you will learn how to quickly and efficiently carry out work and save money for builders services. Just follow all the recommendations, and after 1-2 days the supporting structure for the fence will be ready.

In the picture: the quality of the installation pillars depends strength of the whole structure

The pillars can be made of different materials
Types of structures and technology of their installation
We'll look at four types of work:
- Installation of metal poles;
- Assembling wooden elements;
- Using concrete columns;
- Construction of the towers of bricks.
Each option has its own advantages and disadvantages. You need to familiarize yourself with all the information and use it to make choices of material.

Brick elements are different attractive appearance
Option 1 - installation of metal bars
I have to say - I think this is the solution the simplest and most reliable. The metal has a high strength, service life of such elements is generally greater than 30 years. If periodically update protective coating, this period is doubled.
With regard to the working process, it consists of the following:
- First you need to buy yourself a support, and there may be two options. The first involves the purchase of the profiled pipe and the size of 60x60 and a welded thereto for attaching the straps prozhiliny. The second provides for the acquisition of prefabricated elements, which are already welded fastening components, and the surface is covered with soil. Price below the first decision and the second is much more convenient, the choice is yours;

Usual proftruba ideal for fence columns

Finished products are much easier to use
I advise you to never buy already painted pillars. During storage, transportation and installation of the surface inevitably scratched and it will still have to paint. Select embodiments primed, and they are protected from moisture and scratch them do not mind.
- Except the columns you need cement and sand for solution. Also do not forget about the rubble or stones for filling holes;
- From the tool you have at hand should be level, a shovel, a concrete mixer or a drill with a mixer. For the marking of territory necessary to have a construction cord;
- The work begins with the marking works. You need to determine the exact line of the fence passing. The line stretched cord for this every 5-10 meters are driven pegs;

The cord will allow you to see a clear target in the course of work
- When considering ways to install metal poles often considered clogging or instillation and concreting. The first option, I recommend not to use at all, and photo below shows why this can not be done. At high humidity of the soil can support just fall. Therefore, we consider the concreting, as a reliable and durable way of mounting;

Here is a picture of what you can find if you just dig into the ground poles
- Location is marked poles, they are likely to give it a distance of 3 meters from each other although span length may be different. Next, dug holes for concreting. Typically, their depth is 100-110 cm to the lower base part located below the freezing point;

The pit is dug so that the column it was located on the cord
- Burying metal post for a fence must be at least 60 cm. You can place it on the full depth of the pit, but it is not mandatory. You can fall asleep to battle brick, large gravel and stones to the desired level and set the column to them that it is positioned at the desired height. Next backfilled with stone and brick almost to the top of the pit, often due to their element will be flat and without support;

A pillar is placed on the stones at the desired height, whereupon the pit is filled with a filler up to the top
- If desired, can be made small top formwork to concrete element above the soil level. The solution is prepared at the rate of 1 part cement to 4 parts of sand. Consistency is liquid, the mixture penetrates into all the voids between the stones and filled to the bottom of the pit. After pouring sure to check the position of the element level and correct it if necessary;

Always check the position of the support, while the solution is still fresh, and you can set the item smoothly
- If you decide to make a strip foundation along the entire fence, then put formwork. Penetration is 20-30 cm, be sure to fit armirovochny material. This can be a reinforcement in several rows, and mesh. The solution was poured on the desired level and is aligned with a trowel;

Formwork bead can be fastened together at the top to ensure their reliability
- Continue to work can be 1-2 days after pouring the solution. Further fastened to prozhiliny, coloring elements preservative and installation of the fence.

Mostly on metal poles attached decking
Option 2 - installation of wood poles
Wooden poles are used infrequently, since their service life is 5-10 years, which is much less than any other option. But if you need to make cheap fence or the material is suitable for the style of decoration, you can use it.

Here is the classic design of a wooden fence
A workflow is as follows:

The scheme is quite simple and clear
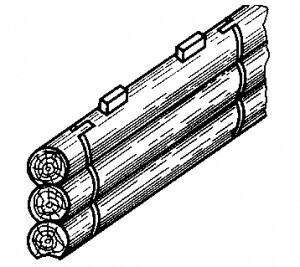
- Pole can be used as a finished timber section 100x100 mm or more, and the whole tree trunks. The elements must be dry, cleaned from the surface of the crust and pollution;

Bruce - one of the options for columns
- The surface of the primarily processed antiseptic. Processing is carried out in 2-3 layers for the best effect. Thereafter, the part that will be located below ground level, is further coated with a bituminous mastic;

The better you processed the pillars, the longer they will serve
- Further portion is marked with a cord, the location of the poles is determined, and digging wells. Penetration should be at least 1 meter, at heaving soils the hole depth should be at least 20 cm below the ground frost line. Pits can dribble a shovel, and can be done using a special drill;
- Now we look at how to properly install the poles for a fence made of wood. The pit is filled layer of gravel or broken bricks 20 cm thick, is placed on it pillar, after which the entire space is filled around the support filler in the form of stones, broken concrete or large debris.
Preparing a slurry of 1 part cement and four parts sand and poured so as to fill the hole to the top. After this post once again leveled and left for a day to pour;
For additional security the underground part of the columns can be further winding roofing material.

So should look design in finished form
- Next on poles attached prozhiliny surface is further covered with weather-resistant paint. The last thing he put a fence.
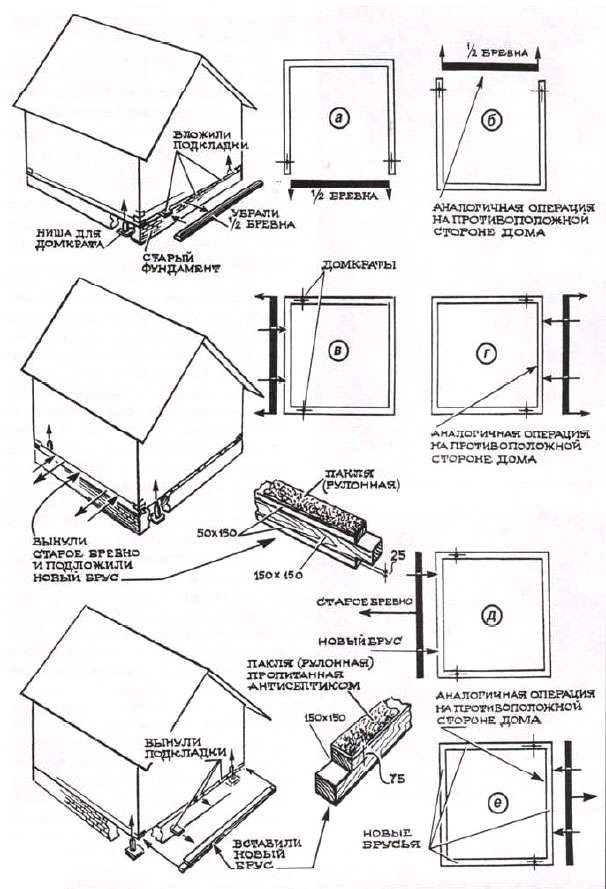
There is another option attachment, which appeared recently, but has already gained great popularity among developers, its differences are as follows:
- Wood is only the aboveground part of the column;
- Poured concrete base, which is embedded plate. Filling can be of various configurations and are shown in the scheme below;

Here is the fixture can be made in the base of the pillars
- Poles are attached to the elements of the mortgage, and then made a fence installation.

This option should also be considered
The biggest advantage of this solution is that you can replace the poles, if necessary, without making major repairs. The base will remain strong for years to come.
Option 3 - Installation of concrete pillars
Concrete poles are amplified reinforcement frame which gives the product strength. Also note a reasonable cost. As for the drawbacks, the main one - the big weight of products. Work is worth two, or even three times as drag and put concrete - not an easy task.

Weigh such a lot of support
We will understand how to set the fence poles of this type. If you put the usual variations of fences made of wood or metal sheets, then the technology will not differ from the installation of iron poles.
We will analyze the elements of the installation option under the sectional reinforced concrete fence, which is very popular.
Works are made as follows:
- The width of the sections of 200 cm, therefore poles to be positioned at the same distance from each other. To begin, pull cords are marked for orientation and location of the seat post. Further digging the pit size 50x50 cm with a depth of 70-80 cm;
- On the bottom of the hole is filled gravel layer of 20-30 cm. It is necessary that from the pillow to the surface was 50 cm, and it is this part of the support should be placed in the ground. Below is a diagram of the installation of such structures;

That's set design
- The first column is installed in a pit, and then snatches to the same broken brick, concrete or stones. It is important to expose the element evenly and pour all the concrete, to the top. The solution should be a liquid to penetrate into all the voids and create a monolithic block, which will provide secure fastening support;
- The second column is put in the next well, to position it at the desired distance taken bar length of 205 cm. It is located in the grooves and ensures the required distance. After pouring the concrete and aligning elements on the level of the bar is removed, and the bottom plate is inserted between the supports. The same operation continues, and further, the lower plate put in place and provide structural strength.

The lower sections are inserted immediately and ensure correct positioning pillars
Option 4 - Installation of brick pillars
Considering ways construction of pillars for a fence, not to mention the brick supports. This option is the most time-consuming of all, but if you do it right, you get a design that will stand half a century and more. To work requires a certain set of materials, the list given in the table.

Many variants of bricks, each will select the optimum solution for your site
| Material | Description |
| Brick | Choose the material you need, so that it was combined with the buildings on the site. If you have a house lined with red brick, and on the fence, it is desirable to pick up something like that. Do not skimp on the quality and do not buy the cheapest options, they usually do not differ reliability |
| Fittings | The base must be very well be strengthened for this purpose fixture that is placed in 3 rows along the entire length of the fence. The thickness of the rods should be 8-10 mm |
| metal poles | They will be located inside the brick pillars, and provide structural rigidity. You can use the channel or area. Some have Laying nets and fill the internal cavity with concrete after the construction of the columns. All options provide reliability, choose the one that is easier to implement |
| Cement, sand and crushed stone | Of these components is to prepare a solution for a base structure. Instead of gravel, you can use stones, broken bricks or other suitable filler |

Reinforcement will make the design at times stronger
To work need a set of tools:
- Shovel for digging trenches;
- Mixer for preparing a solution;

Mixer can be rented for the duration of the works
- Level pillars for erection;
- Trowel for the application of the solution.
on work instruction looks like this:
- The first thing to mark territory with a cord. Initially defined fence line location, and then are marked pillar sites. Typically, the distance between the supports is 2.5 meters, but can vary depending on what material is made fence;

Here is the design of the fence with brick pillars
- Then the solid digging a trench width of 20-30 cm and a depth of 30 to 50 cm. The pole locations of pit digging depth of 120 cm in order to create a strong foundation under heavy pillars;

The trench is dug by stretched cord, digging pits depth of 120 cm in the locations of poles
- Metal poles placed in the pit, the space around the sealed stones in their presence. If they are not, then, a solution of 4 parts sand, 4 parts of gravel and 2 parts of cement. The supports are filled up to the main level of the trench, and then have to leave the structure for a day to pour concrete;
- The trench is placed reinforcing belt, cut supports, which are placed at 1 meter, the longitudinal members are fastened between them. The bottom row is 5 cm above the bottom, and two others are put through a 10 cm. Thereafter constructed formwork required height. The pole locations of square pads are made, the remaining part may already be a solution for saving;

Here is the design of the formwork and reinforcement belt packed
- Poured concrete to the desired level, there is a lot of work, so it's best to use a wheelbarrow to deliver fast and discharging the solution into the mold. Immediately align the surface to get a smooth base for the future fence;

It is desirable to pour all of the base in a single pass
- After one day, the formwork can be removed, so that nothing prevented the further carrying out of works. But bricklaying is better to begin not earlier than after 4-5 days, so that the concrete is well seized and dialed primary strength;

The foundation must stand for a few days
- Prepared mortar (it is easier to buy ready-mixed and diluted with water). Overlaps the first layer of mortar on which a brick laid. The next number is placed in such a way to give a viscous elements. In order that the seams are the same, it is placed on the perimeter of a metal square that goes after aligning elements. When the level is necessarily used;

Level to set the pillars - an indispensable tool if you want to get the perfect result
- Work is carried out row by row, as long as the items are withdrawn to the desired height. Do not forget about the mounting plates, it is easier to weld all at the right level in the course of the job. Then the rows of bricks will fall perfectly, and you do not have anything to alter;

Fixing welded to the right place
- Emptiness inside the pillars is filled with a liquid solution, it allows you to make the structure even more robust. A couple of weeks after filling the cavities can be placed caps for pillars. They are mounted on the solution and protect the upper part of the water, and give the structure a more attractive appearance.

Caps give pillars finished look
If you have a fence will completely brick, in every third row of pillars of masonry laid reinforcing mesh, to communicate design. Very well, this option is shown in the photo below.

The grid ensures reliable connection posts and fencing
Output
I am sure that after reading the article, you can easily select the best option pillars themselves will work. Videos in this article will help you understand some of the features of the workflow even better. If you have questions on the subject, then write them in the comments, we will examine your case and will advise the best solution.