How to make a compost pit at the cottage - a simple free way to obtain high quality fertilizer
Table of contents
-
1 Types of compost pits and recommendations for their construction
- 1.1 The main features of the design layout
- 1.2 Option 1 - simple pit
- 1.3 Option 2 - a wooden box
- 1.4 Option 3 - Construction of bricks
- 1.5 Option 4 - ready designs
- 2 Recommendations for the use of designs
- 3 Output
If you have a cottage or homestead land, and you are constantly buying manure or fertilizers, then this article is for you. In it, I'll show you how to make a compost pit and turn the waste that is normally thrown away in a good fertilizer. Select the most suitable type of construction and make it on his site. It does not take much time and will not take much effort, but it will give an excellent result.

In the photo: the system is very easy composting

Compost - one of the best fertilizers, in which all components of the natural
Types of compost pits and recommendations for their construction
I'll tell you about the four options that you can implement:
- The simplest pit on site;
- Wooden box;
- Brick structure;
- Ready plastic container.
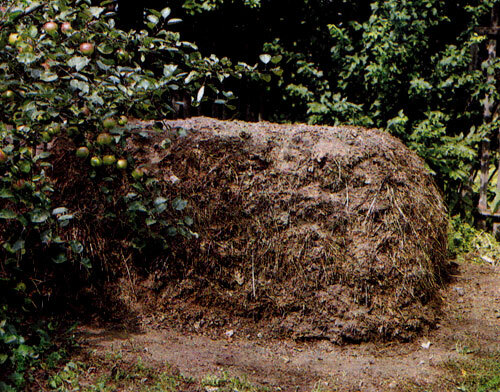
You may even be a silage heap, although you can make a better option
The main features of the design layout
First you need to understand the location of the compost pile, as there is a number of requirements:
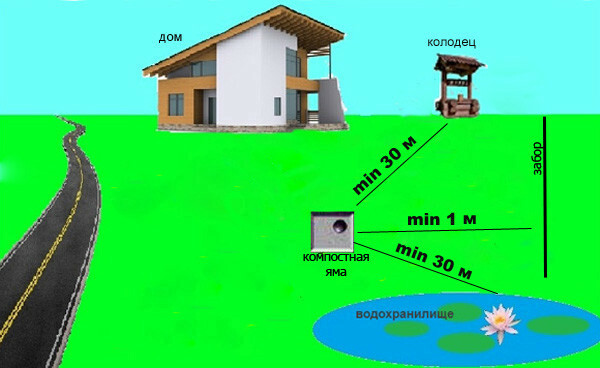
Here are the basic requirements for system layout
- To source of drinking water or pond should be at least 30 meters. At the same pit should be placed not on the dais to the fallout from it have not trickled down to the well;
- To bad smell does not bother you and neighbors, better positioning structure in the far corner of the site. It is not necessary to put it near the road;
- Pit compost can not be placed in a sunny spot. It should be in the shade or partial shade to improve the process pereprevaniya components.
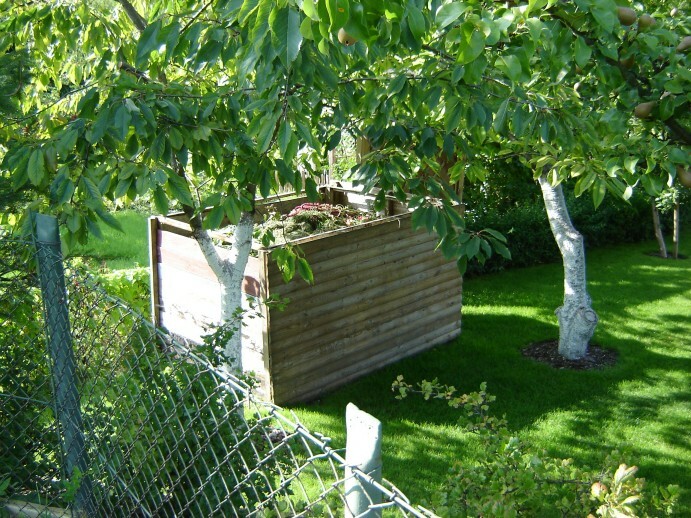
Design better placed under the trees, or where it the sun will shine no more than a couple of hours a day
Option 1 - simple pit
We will understand how to make a compost pit in the country:
- To begin, select a suitable place taking into account the above requirements. Then digging a pit depth of 50-60 cm, 1 meter wide and 3.5 meters long. It can be made smaller version, if you have little organic waste;
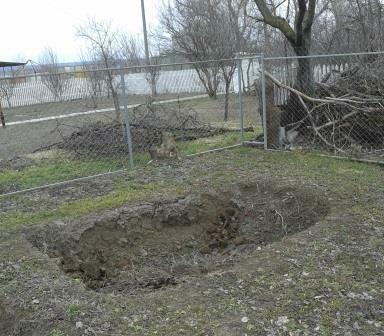
Here is the simplest option, but it is better to modify it to make it more reliable
- Then the old wall enhanced slate or roofing felt. You can leave them so, but over time they begin to crumble, and leave a lot of nutrients on the perimeter. Old slate simply placed on the perimeter, so he held, you can drive inside for a couple of pegs. Bumpers can be done at 30-50 cm above ground level, to increase the capacity of the pit;
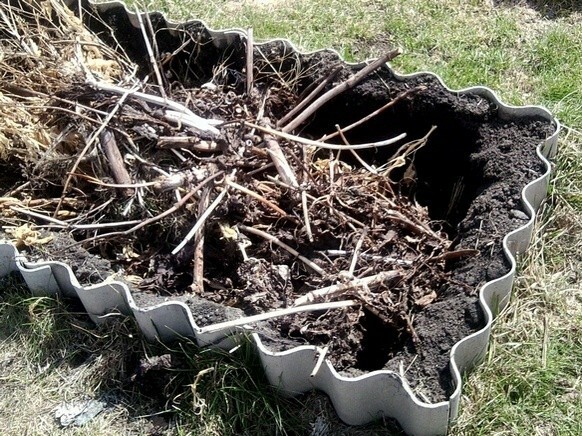
Such an embodiment is simple and reliable
- You can use other available materials: pieces of sheet metal, plywood, etc. It is important to make the container, so that all that will emerge, not falling apart;
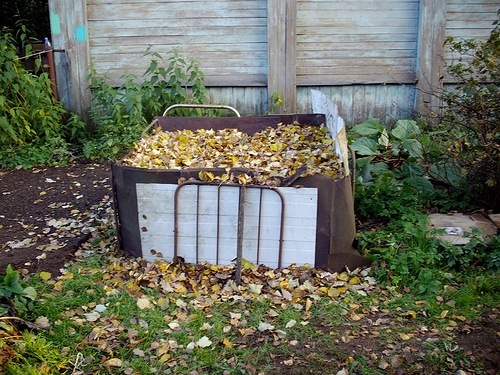
The design should be beautiful, so the work can put all that is
- The finished construction can be filled with waste. At the bottom it is best to lay branches or straw layer thickness of 15-20 cm for drainage, and then a layer by layer put materials for compost. Optimal stacking scheme is shown below.
Here's a simple version will get a great compost
Option 2 - a wooden box
A more practical type of construction. Production versions may be very different, I will talk about the most simple of them.
Instruction on work with their hands look like this:
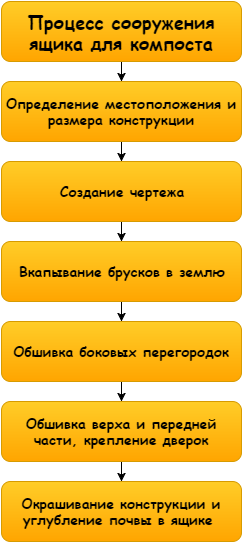
Operation scheme includes the following stages
- To get started is to find a place on the recommendations listed above. After that, it is necessary to define the design of the box. As the compost matures 2 years, the reasonable solution would be the construction of 2 and preferably 3 breakout boxes. Its length may be 3-5 m, depending on the number of compartments;
- It creates a design drawing. There is not need accuracy, important to specify the width and length. As for height, then it should not be more than a meter. But if you do a hinged door or put the board on the one hand in the grooves, it is possible to make design and higher;
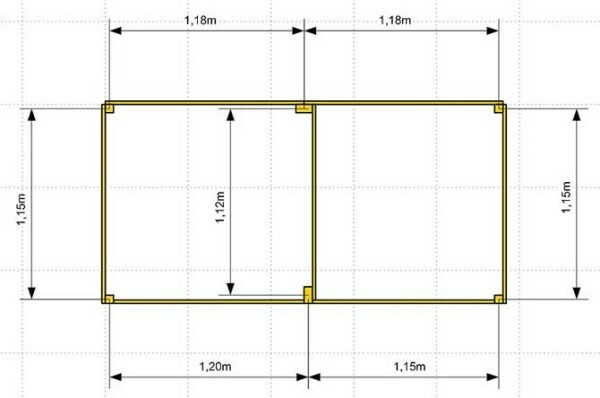
The drawing will clearly represent the final result
- Compost pit with their hands is simple and fast. Put bars on the corners. You can collect design separately, and can be to dig the elements in the ground, it will make the job even easier. After that, between the side walls stuffed boards to the desired height;
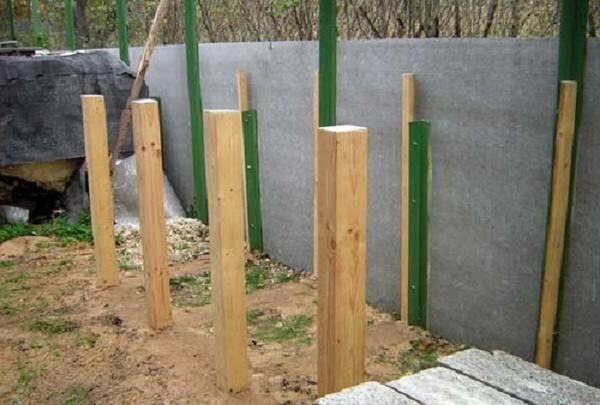
You can simply sticks to dig
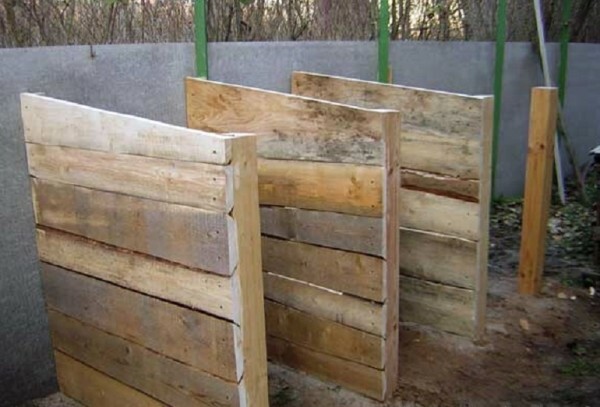
First stuffed partitions, then get to them will be difficult
- The upper part is made in the form of doors to open them if necessary. Front walls clog up to half height. Next door are made, which are attached to the curtains and lock latches. There are no special requirements, do as it turns out, is not afraid of the slot, this will allow air to penetrate into the container and to accelerate the maturation of compost;
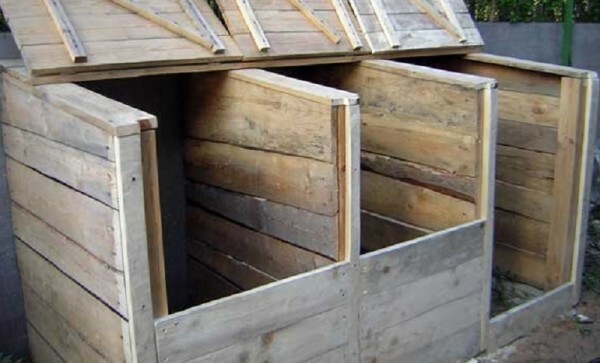
Sheathing design - a simple process
- At least the design is processed antiseptic inside and out, and then painted. Inside is the deepening of 40-50 cm, it increases the capacity of the structure and facilitates the penetration of worms, which are an important part of the maturation process of fertilization.
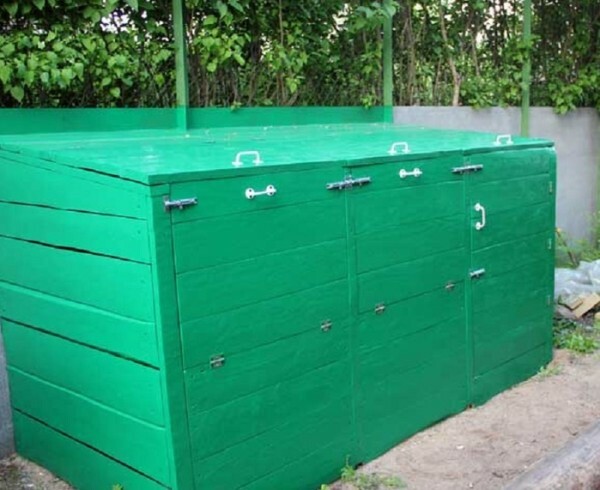
Here is the finished version of the closed type, the door can be opened if necessary
Three-piece version allows to obtain finished compost each year. One compartment is filled with fresh contents, the second matures and the third used. All very efficiently and competently.
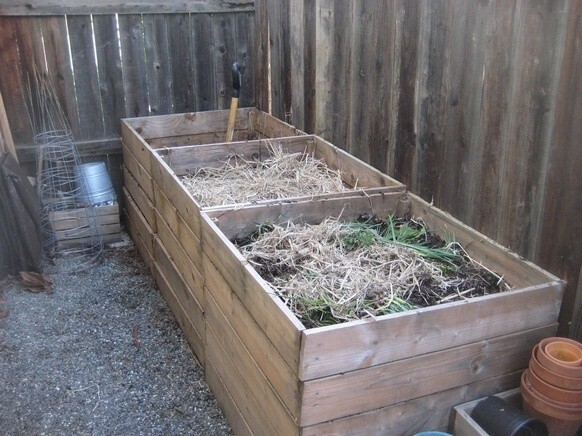
Three sections - the perfect solution for a compost pit
Option 3 - Construction of bricks
This type is characterized by high reliability, but also to build it will be more difficult. Required for materials listed in the table.

Go to work every brick, resistant to moisture
| Material | Recommendations for choosing a |
| Brick | It is best to use the red brick or cement blocks. These options are not afraid of moisture and keep their strength even in the ground. Need to buy a new brick, old, too, fits the bill perfectly, and its price several times lower. even stones can be used if desired |
| mortar | Get ready compound that is diluted with water just before use |
| wooden panels | They design closed. It can be used for this purpose mesh-netting. And you can leave the hole open |
We look at how to build a compost pit in the country with their own hands:
- First of all it is necessary to dig a hole the size you want. Its depth should be 50-60 cm and a width of one to one and a half meters;
- Next wall constructed of bricks or blocks. They are displayed to a height of 1 meter above the ground, no longer need, because you will be uncomfortable to get compost;

Masonry may not be very accurate, most importantly - reliability
- If desired, you can make the wall at an angle, in order to simplify access to the pit. On top of the design, you can put a cover of boards or mesh, not much difference.
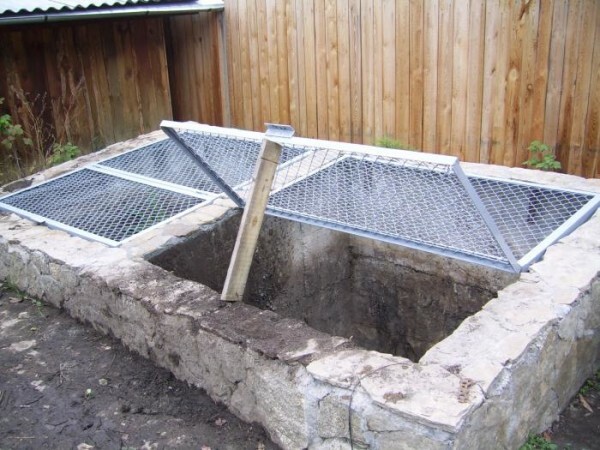
That is such an option, you can do on your site
You can make the front wall of planks, which are inserted between the two rails. This is convenient because, if necessary, you can quickly remove the partition and to remove the compost.
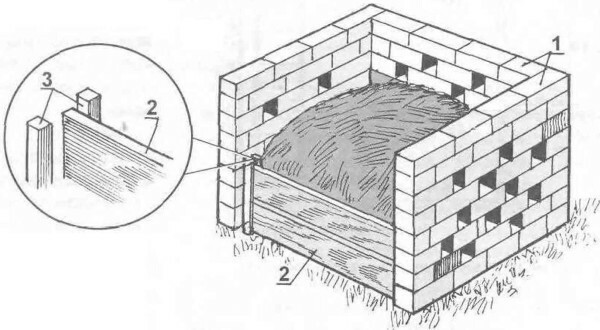
Another example of a very user-friendly design
Option 4 - ready designs
If you do not place on the site or if you want to solve the problem easier, you can use ready-made compost bins. They are made of plastic and are very light weight. In addition, the material does not decompose and retains its strength over the years.
With regard to this option, the recommendations for selection are as follows:

The finished design is very easy to use and looks great
- The volume of construction may be different, choose those containers that suit you;
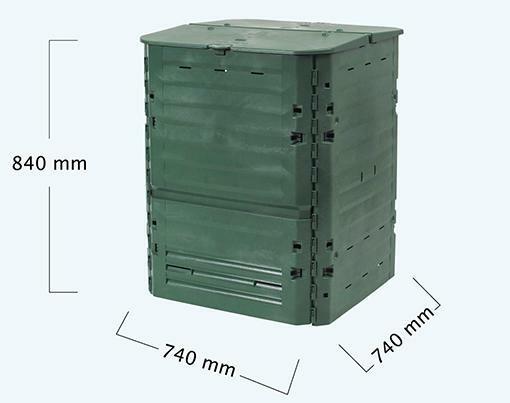
Dimensions may vary
- To fertilizers were you constantly need to put 2-3 containers;
- An important advantage is the availability of the unloading hatch from below, through it you can accrue to the finished composition quickly and easily;
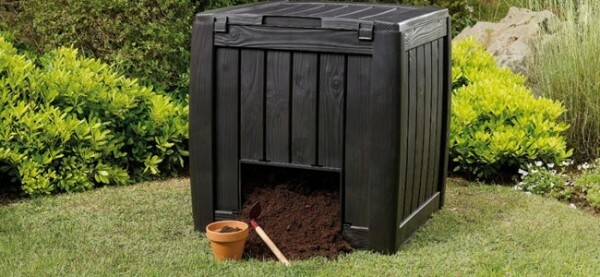
Luc can easily pick up the compost, without getting into the container
- The cost of construction is about 2-3 thousand rubles, which is not so much. And when you consider their longevity, the benefits of such acquisition becomes apparent.
Recommendations for the use of designs
No matter which option you sell, you need to remember a few basic rules for the preparation of high-quality compost.
To start disassemble, that can be folded into the pit:
- Weeds, leaves, stalks and flowers;
- Wood waste, twigs, sawdust;
- Manure, peat;
- Paper waste;
- Remains of tea, coffee, food;
- Vegetables and fruits, including rotten.
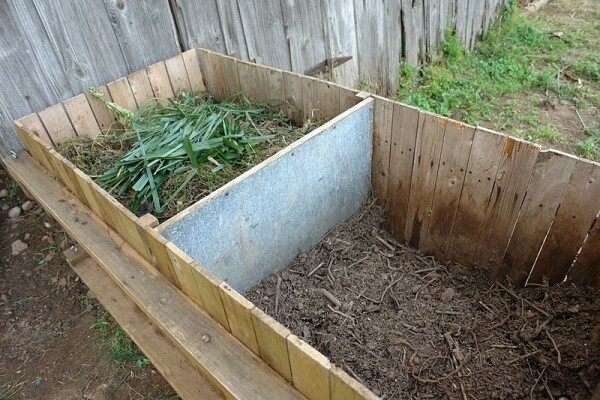
Now all the plant waste and leaves are not garbage, and the basis for fertilizers
With regard to limitation, it is not necessary to put rubber, plastic, polyethylene, and other non-degradable components in a pit. It is not necessary to pour liquid detergents and chemicals.
The composition as much as possible perepreval, it should periodically stir and pour layers of peat or manure. In the dry season, the contents of the pit should be periodically watered, so that the components will not dry out.
If you do not want to wait for 2 years, you can use special drugs called Bioactivator compost. They quickly decompose organic waste and allow to obtain high quality fertilizer in just a couple of months.
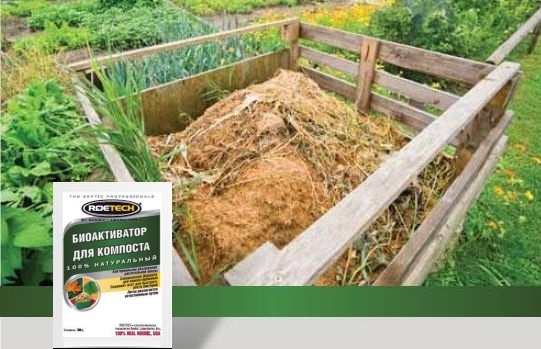
Special compounds accelerate the maturation of compost
Bioactivator to work with maximum efficiency, the mass must be constantly stirring and watered with warm water.
Output
Using the tips of the review, you can easily make compost pit with minimal time and expense. Videos in this article clearly show some of the points discussed above. If you have any questions - please write them in the comments below.
