Repair ceiling - 4 main ways of work
Table of contents
-
1 Variants of the works and their description
- 1.1 Embodiment 1 - surface staining
- 1.2 Option 2 - To glue tiles or wallpaper
- 1.3 Option 3 - plaster and putty
- 1.4 Option 4 - Construction of plasterboard construction
- 2 Output
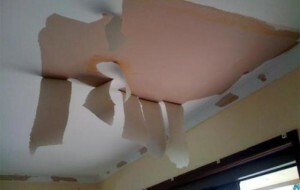
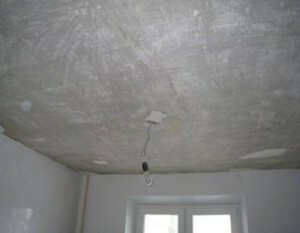
The theme of today's article - a ceiling repair. I want to acquaint the reader with the four most popular solutions of varying complexity. Depending on the quality of the base they will allow to repair with minimal cost and time savings or eliminate arbitrarily severe surface defects.

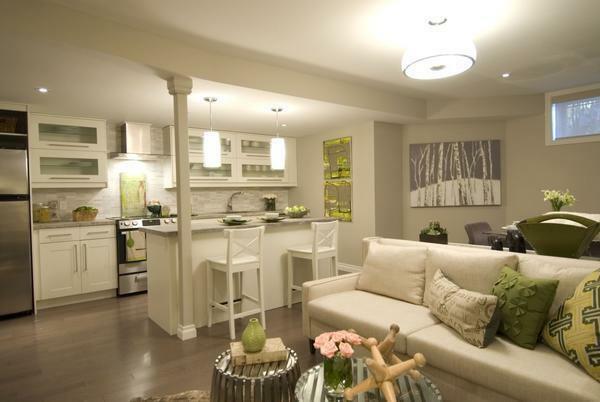
In the photo: the ceiling must be perfectly flat in any interior

Plasterboard ceilings can build different configurations
Variants of the works and their description
First of all I will tell you what types of repairs we will look at:
- surface staining;
- gluing ceiling tiles or wallpaper;
- plaster and plaster ceiling;
- construction of plasterboard structures.
The choice of a solution depends on your state of the ceiling of the room in which the repair is carried out, and your financial capabilities.

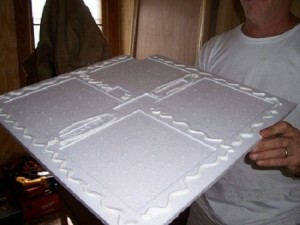
Tiles made of foam - a simple solution for the rapid transformation of the ceiling
Embodiment 1 - surface staining
This kind of work is right for you only if the state of the ceiling is not satisfactory and you only need to brush up on the surface, or to update the color. Most often it repainted previously painted base.
List of materials:
- Primer. Need to strengthen the base, it is best to choose a deep penetration of the compositions;

The primer surface enhances and improves paint adhesion
- Caulking. It is used to remove small damages and scratches. Easier to buy a small part of the package, the bag will be many;
- Paint for ceiling. It is best to use the compounds with an aqueous or acrylic-based color is chosen at will. You can buy white paint and pigment, and prepare their own desired shade.
Better to buy washable paint. Then you can from time to time to wipe the surface from dust and the appearance of the ceiling will be ideal for much longer.
Tool kit:
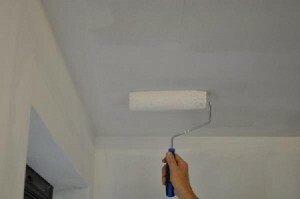
- Roller and brush. The roller is used to perform most of the work, and with a brush, you can paint the corners and hard to reach areas;
- Paint tray. With it you can easily distribute the paint evenly over the roller and thereby improve the quality of the application;

Paint Tray greatly simplify workflow and reduce ink consumption
- Stepladder. Need for so you can get up to the ceiling. It can replace a table or dais;
- Spatula and sandpaper. Necessary if you need to plug minor injuries and leveling the surface.
on work instruction looks like this:
| illustrations | Description |
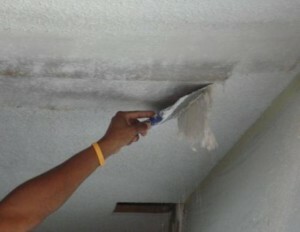 |
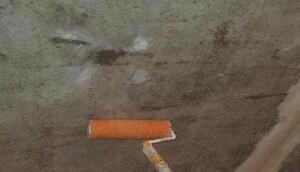
prepared surface. If the ceiling was old whitewash or other coating that is poorly kept, then it should be removed. If the latex paint has been applied previously and durable surface, it can not remove the old layer of clear enough ceiling from dirt and dust. |
 |
Shpaklyuyut and rubbing unevenness. If you find a conspicuous crack in the ceiling, they should be repaired filler. After drying the layer it is necessary to overwrite all refurbished space sandpaper to the surface was smooth |
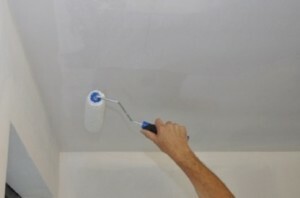 |
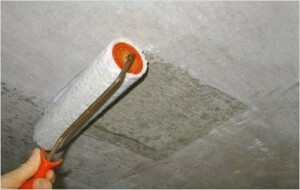
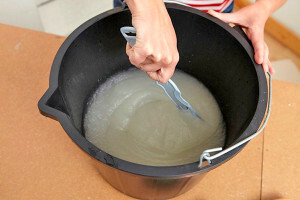
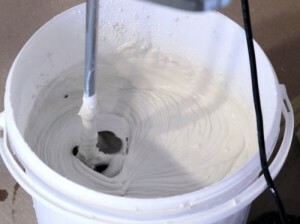
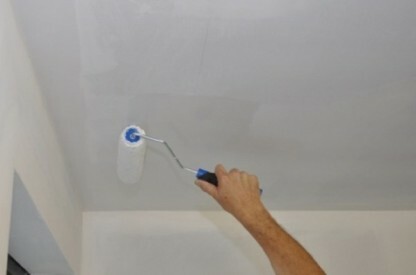
The ceiling is primed. Everything is simple: the composition is prepared (ready soil is mixed, the concentrate is diluted with water) and poured into the bath. Thereafter, the roller is wetted and pressed on the grate and the composition is applied to the surface evenly. If after drying from the ceiling come from small particles, the processing is performed again |
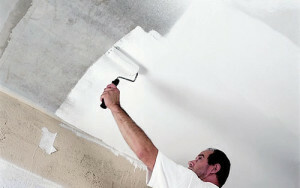 |
The ceiling is painted. The process is quite simple: first, the paint is prepared, it should be stirred thoroughly before use and pour into the tub. Next is the painting hard to reach areas and corners with a brush, then roll the entire surface is covered. Typically applied 2-3 layers, need to look at the ceiling - if the color is uniform, so the work is completed. |
ceiling painting usually takes 1 day, if you do not need to plug minor injuries. If you need to putty the cracks, you will spend two days. Plus, this solution - simple and low cost materials.

The main thing - to put the paint evenly, so that the color was flat across the ceiling
Option 2 - To glue tiles or wallpaper
This method is suitable in cases when you need to quickly make repairs ceiling without special surface preparation and with minimal costs.
Needed to work materials:
- Tile in sufficient quantity. There are many options, choose high-quality products with a dense structure and perfect geometry;

There are many options, you need to choose the one that best fits into your decor
- Adhesive for ceiling tiles. It can be as specialized formulations "Titan" type and universal availability. I usually use liquid nails, they are easy to use and provide fast and reliable fastening of the tiles;

Adhesive options are many and they are all well secure the tiles on the ceiling
- foam moldings. To make the ceiling around the perimeter of the completed type mounted plinth of foam. He is chosen by your tile and attached to the same adhesive after finishing the ceiling;

The plinth is adjusted for tiles
- Primer. We need to strengthen the surface.
Tool kit:
- Knife construction for cutting tiles;
- Glue gun, if you use the option in the box;
- A sponge to remove the excess glue, if they suddenly stood out at the seams.
Now we look at how to make a ceiling in this case:
| illustrations | Description |
 |
The ceiling is cleared. If necessary, the removal of the old coating is produced on the surface should be no areas with unreliable old finish. If the surface does not require the removal of trim, it must be cleaned from dust and dirt. |
 |
If necessary, plates are sealed compound. The joints and seams smeared special blends for joints that are resistant to cracking and give the surface strength. Simple plaster should not be used, it soon begins to crack. |
 |
The surface is primed. Many people miss this step, then there is no tiles due to poor adhesion of the glue. It is better to spend an hour on the processing base and be sure that it is strengthened and properly prepared for subsequent work. The surface should dry completely, it takes between 2 to 12 hours. |
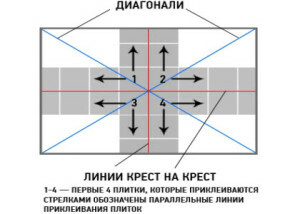 |
Produced ceiling layout. How to do it, of course it is shown in the diagram on the left. At first discharged two diagonals, and then lines are drawn in the middle, on which you will be glued elements. The diagram also shows the sequence of bonding of the first four tiles and the direction of the first series, which are laid out along the lines. |
 |
On the tile glue is applied. This makes the perimeter and in the middle cross-wise, in the photo shows the result. Some types of adhesives after application should be left for 10-15 minutes and then paste the element. Therefore, carefully read the instructions on the package to carry out the work properly. |
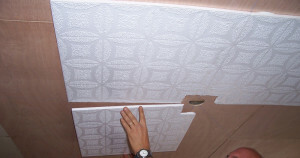 |
Fasten the first 4 tiles. This is done strictly on the lines, it is important to place these items, as they will serve as a reference for the rest of the tiles. Gently press down each part of the surface to ensure a secure fit. No need to press your fingers on the surface, it may remain on the grooves, using the back of his hand. |
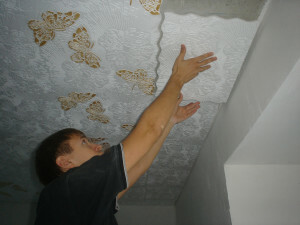 |
Pasted over the entire ceiling. With regard to the whole elements, one here and everything is clear, the main thing - firmly attach them to each other. And if you need to cut some tiles, then it is done so that between the wall and the element there is a gap of about 5 mm. After pasting it is necessary to give the surface to dry for a day. |
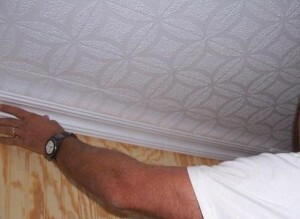 |
Glued baseboard. Everything is simple: on the side adjacent to the wall and the ceiling, glue is applied, and they are put in place. Require special attention corners, they need to kill a connection plinth using the miter box, or use the corner pieces, which are sold separately. After fixing ceiling moldings work can be considered successfully completed. |
Before gluing the tile should lie down for at least day in the room, that the material was the same temperature as the base. If you glue the items immediately, then after a few days between the tiles will be slit.
If you decide to papering the ceiling wallpaper, the process is much the same with the amendment that the wallpapers are available in sheet form.
Wallpapering It is performed as follows:
| illustrations | Description |
 |
the surface is cleaned from dust, dirt and old coating residues. Large bumps better close up, small, and you can leave. |
 |
The ceiling is primed. It is important to treat all papered surface to absorption was the same throughout the area. |
 |
preparing glue. It is important to do the right thing, the packaging is always a recommendation on the proportions of components and the period that the mixture should be insisted. |
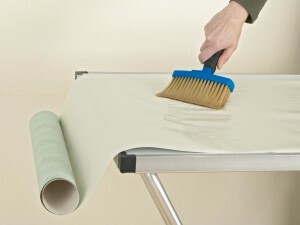 |
The composition is applied to the wallpaper. To do so it's best with a wide brush. The cloth is folded and left for 5-10 minutes to soak. |
 |
The first sheet is glued along the wall or throughWhich is held in advance, so you can see guide the work. First sheet is aligned on edge, after which the surface is pressed against the sponge or spatula smoothing movements in the direction from inside to outside. Similarly, the remaining sheets are glued. |
Option 3 - plaster and putty
If you want to align the surface of the ceiling, you can resort to furnish special mixtures. Plaster is used if the differences are from 1 to 5 centimeters, a thicker layer applied to the ceiling prohibit snip norm. Putty is applied to a layer 5 mm in one pass and is used for minor alignment differences.
Initially analyze plastering, the following materials are needed for them:
- mortar. Choose a ready-made options, which prior to use simply diluted with water. For premises used compositions based on plaster, wet is better to take the plaster on the basis of cement;

Production of "Knauf" company is popular among professionals
- Primer. Need for ground before finishing plastering and strengthening layer;
- Lighthouses. Needed to build the future of the ceiling plane;
- Grid plaster. Used when the layer thickness exceeds 10 mm.

Ceiling plaster mesh is sold in rolls, you need to calculate the amount and buy a piece of the desired size
To perform the job, you will need the following tools:
- Drill with a mixer. I need to prepare a solution. Prepare well in advance the capacity for these purposes;
- Roller or brush. Used for applying the primer;
- drill. Essential for drilling dowel holes;
- Spatula and rule. Spatula composition distributed on the surface and generally plane can align and remove excess plaster.

The rule allows you to align the composition of the beacons
ceiling plaster is as follows:
| illustrations | Description |
 |
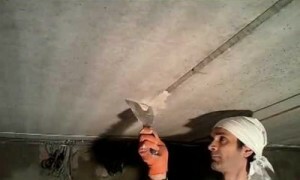
the surface is cleaned. The lower the ceiling is the old coating residues - the better. Ideally, you want to remove all the concrete to carry out the work as much as possible better. |
 |
The ceiling is primed. Everything is simple, the main composition evenly over the surface and wait for it to dry completely. |
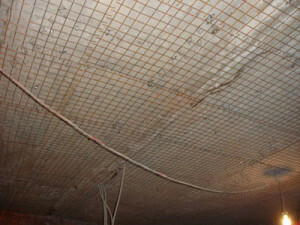 |
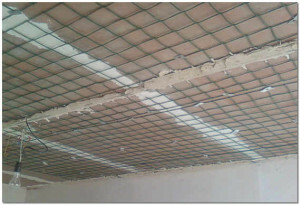
Fastened plaster mesh. Here everything is done as follows: on the surface of the drill holes for dowels, and then made the fixation of the grid. For reliability by screw dowels can underlay washers or metal plates. |
 |
mounted beacons. To this solution was applied strips and the element is pressed against the surface. Alignment is done by level, to make it easier to bring the plane should pull a few strings across the location of the guide. After that, the ceiling must be left for a day to dry the solution. |
 |
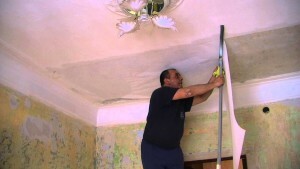
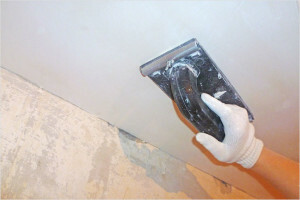
Applied plaster. Composition initially spread on the surface with a trowel or spatula uniform layer. Thereafter, using a rule plaster is evenly distributed over the surface and leveled. If necessary, the composition is added to the individual sections and the processing is repeated. |
 |
Surface overwritten and primed. Grout is carried out in 1-2 hours after the application, to make the ceiling more even. After drying, the ceiling made it a primer in order to strengthen the foundation. |
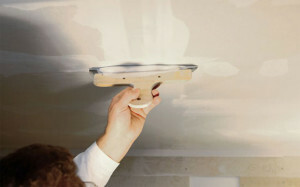
If you have minor surface variations or the need to bring to the ideal plaster ceiling, the plaster is made.
For this type of work will need the following materials:
- putty composition. I recommend to purchase materials brand "Vetonit", they are of high quality, ease of application and ease of handling;
- Primer. We need to strengthen the surface.

Compositions "Vetonit" perfect for plastering the ceiling
Tool kit:
- Capacity and mixer. Are used to prepare the solution;
- Narrow and wide spatula. necessary for applying putty;

This set is always used with putty
- bead. Used for applying the primer;
- Grater with sandpaper. With its help you quickly and easily level up the plane.

Grater need to eliminate all the flaws on the surface
Now we look at how looks workflow:
| illustrations | Description |
 |
The ceiling is primed. It is necessary to strengthen the surface and improve the adhesion of the putty. If you primed and the base plastered it, this step can be skipped. |
 |
preparing putty. If you are using "Vetonit", it can be kneaded for a few hours, as it keeps the plasticity during the day. The most important thing - to observe the proportions of water and the dry mixture and mix the components. |
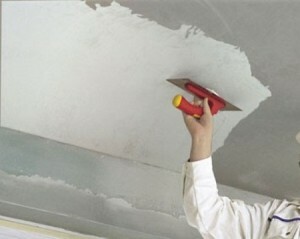 |
Apply the first coat of putty. Work usually starts from the edge, the composition is distributed uniformly wide metal spatula or trowel. The tool is held at an angle of 30 degrees to the surface and is conducted with moderate pressure as to leave a layer no thinner than 1 millimeter. |
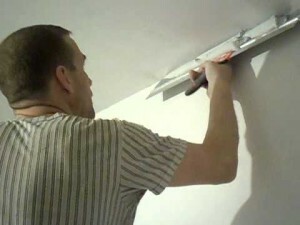 |
Apply a second layer. This is done after complete drying of the first layer prior to application with a spatula surface spew resection solution. This application is done as gently as possible to smooth surface is obtained. |
 |
ceiling sanded. For operation using a grater with sandpaper P150-P180. Processing is done in a circular motion, you need to remove all the shortcomings and bring the surface up to ideal smoothness. The easiest way to control the plane using a light bulb or flashlight, light shows all the flaws that must be addressed |
 |
Leveled ground surface. Before that, the ceiling cleaned of dust. Soil Application putty layer strengthens and improves paint adhesion. Staining is performed as described above. |
Option 4 - Construction of plasterboard construction
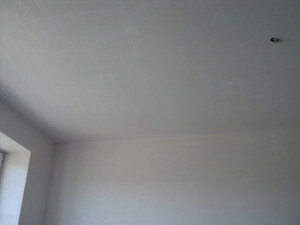
If the restoration surface seems difficult due to its poor condition or big drops, then the best solution would be suspended plasterboard ceilings. This option allows you to make a perfectly smooth ceiling of any room.
Materials for the work:
- gypsum plasterboard. Ceiling embodiment uses 9.5 mm thick. But if you need reliability, then you can use a wall thickness of 12.5 mm version. In rooms with high humidity is best to use water-resistant gypsum board;

Waterproof material can be easily distinguished by the green coating
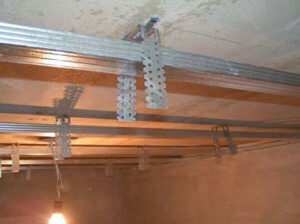
- Profile for the frame structures. Guiding elements are used mm size 27h28 and 27h60 basic profile size mm. Calculation of the guide is produced around the room with regard to load-bearing profiles, they are arranged in increments of 40 or 60 cm, the ceiling is better to put them more often;

A profile allows you to create a lightweight and durable frame
- Fasteners Drywall. This includes direct suspensions for securing the carrier profile, screws for connecting the frame members together and fixing plasterboard to the structure. It will also need nails, dowels, which will fix the profile trim and straight suspension.

Set all the required looks like this
With regard to the work, then you need this tool:
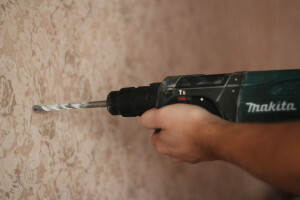
- Perforator to drill holes for dowels. Do not forget to stock up on the necessary drill diameter and length;

Without the punch to make holes in the concrete can not be
- screwdriver. In the process, we will have to tighten the screws a lot, so do not do without this tool. Stock up several nozzles under the screws, as they wear during operation;
- Shears for metal. With their help the cutting profile produced;
- building a knife. Need for cutting plasterboard and chamfering at the ends, if necessary;

Drywall knives can have different configurations
- Roulette. Need for measurements. For marking sure to lay up a pencil or pen;
- Building level It is used to control the plane. Better and more convenient to use variations in length of 100-120 cm.

Level - a mandatory attribute in the construction of the ceiling plasterboard
Now look at how the construction is made of false ceilings, the workflow consists of the following:
 |
mark up. Is determined by the location of the guide profile line. Minimum offset from the ceiling is 30 mm, but can be omitted if desired plane by 50 or 100 mm. The marking is done by water or laser level put the label, and then between them carried the line around the perimeter of the room. |
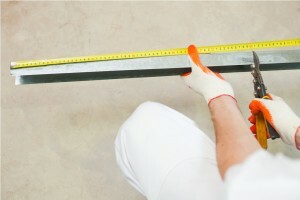 |
cut profile. To do this, measure the brightness, and then deposited on the size of the elements and produces sharp. The process is quite simple: at first notched sides, whereupon the profile is bent and dorezaetsya along a fold line to the end. |
 |
drill holes. For this purpose, the wall is applied profile, and makes a mark. The holes should be within 10 cm from the edge of the profile, if you do not have them there, then you need to make them. As for working with the hammer, the most important thing - to drill to the desired depth and keep the tool perpendicular to the wall. |
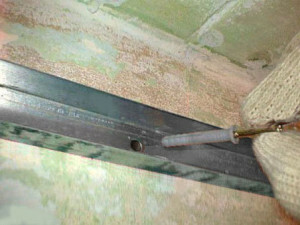 |
mounted guide. Everything is simple: profile puts a wall in the hole to lock dowels are inserted. When they came up to his hat, then hammered a screw, it is a simple hammer. If the plug is not entered before the end, it is necessary to deepen the hole. |
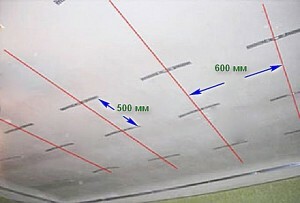 |
On the ceiling fixed suspensions. They are located on the main line of fastening profiles, it is better to mark their position in advance. The distance between the hangers must be 50 cm and fixing elements is made via plug-nails 6x40 mm. Products are placed on the line center, as shown in the diagram on the left. |
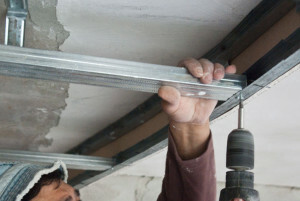 |
The main profile is fixed to the guide. If necessary, the supporting elements notched or lengthened. The ends are inserted into the guide profile and are arranged in a line. Fixing is done by means of screws, bedbugs, there should be at least two on each joint. |
 |
Profile is attached to the suspensions. For this podgibayutsya hangers to the supporting elements, and then checked the level of design and is fixed in position. On two sides screwed into suitable holes for screws. Extra ends do not have to cut, just bend them up, get in the way, they will not. |
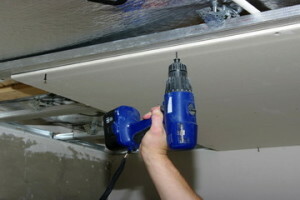 |
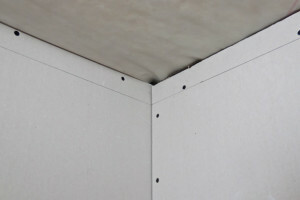
For frame mounted drywall. To work better attract mates to keep their leaves until you mount it. Screws are arranged with a pitch of 15 cm along the edges and indented from the end face is not less than 10 mm, so as not to break the material. Middle fastening step should be 20 cm, the cap must be recessed into the surface by 1-2 mm. |
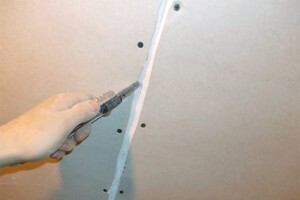 |
At the end joints cut off chamfer. It is necessary to strengthen the joints and to avoid the appearance of cracks in the ceiling. Construction work is carried out with a knife edges are cut at an angle of 45 degrees on both sides of the joint. |
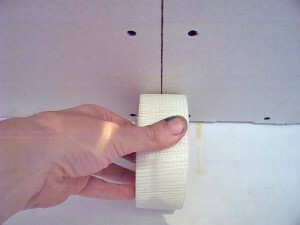 |
Seams are glued mesh-serpyanku. It's simple, the tape is unrolled and glued in the middle of the junction. On a material has a self-adhesive layer, so you just have to firmly press the foil and cut it where necessary. |
 |
Shpaklyuyut seams. For this purpose a special composition "Knauf Fugen" which is characterized by high strength and resistance to cracking. The mixture is applied so as to cover all the joints, the excess removed trowel. After drying, the entire ceiling progruntovyvaetsya seams. |
After all of the above work surface puttied as described above. Such repair the ceiling transform it beyond recognition, even if it was in a deplorable state.

This option allows you to get a perfectly flat surface
If you were in favor of a stretch ceiling, it is best to entrust the job to professionals. Without the experience and special equipment it is very easy to ruin the fabric.
Output
After reading the review, anyone will understand how to make the repair of the ceiling. Detailed section with step by step instructions will help you to work, and the video in this article will help you understand some of the nuances of the theme even better. If you have any questions - please write them in the comments.