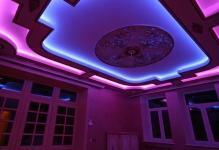
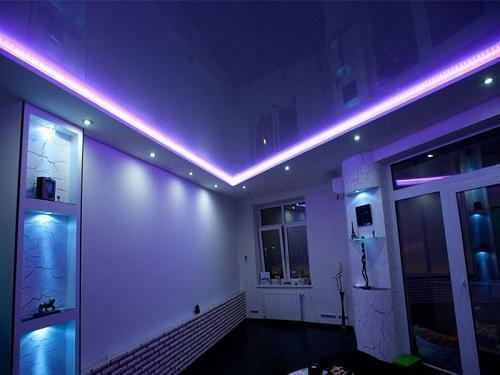
 Ceiling with illumination placed around the perimeter, looks very impressive and harmonious The ceiling with illumination around the perimeter is a very original solution that looks much more attractive than just a ceiling without lighting. Such a design solution is simple and quite inexpensive. In addition, such a highlight can be done by yourself, with your own hands, without resorting to the help of a hired brigade, which, by the way, is quite expensive.
-
- How to make a ceiling with illumination around the perimeter with your own hands
- LED lighting around the perimeter of the ceiling: in the plinth made of polystyrene
- Materials needed for the LED lighting device
- Ceilings with LED strip under the baseboards
- CorrectConnection and installation
- How to connect LED strip RGB( video)
- Ceiling with illumination around the perimeter( photo)
LEDs are usedIt is by no means accidental, since LED lighting is not just a fixture, but a very thought-out design solution that, together with the basic lighting, creates a harmonious light ensemble.
How to make a ceiling with illumination around the perimeter with our own hands
In our time of recurring crises, budget repairs have become a fashion, which, incidentally, are even more spectacular than expensive ones, with incomparably lower costs.
This simple design, like LED lighting, can be arranged, practically, by anyone.
Perhaps, it is worth considering one of the most common methods, where the LED tape is placed in a drywall box.
Its advantages:
- Since the box is placed in the second level, it seems that the light comes from nowhere;
- Light does not cut eyes, and it evenly flows along the perimeter of the ceiling.
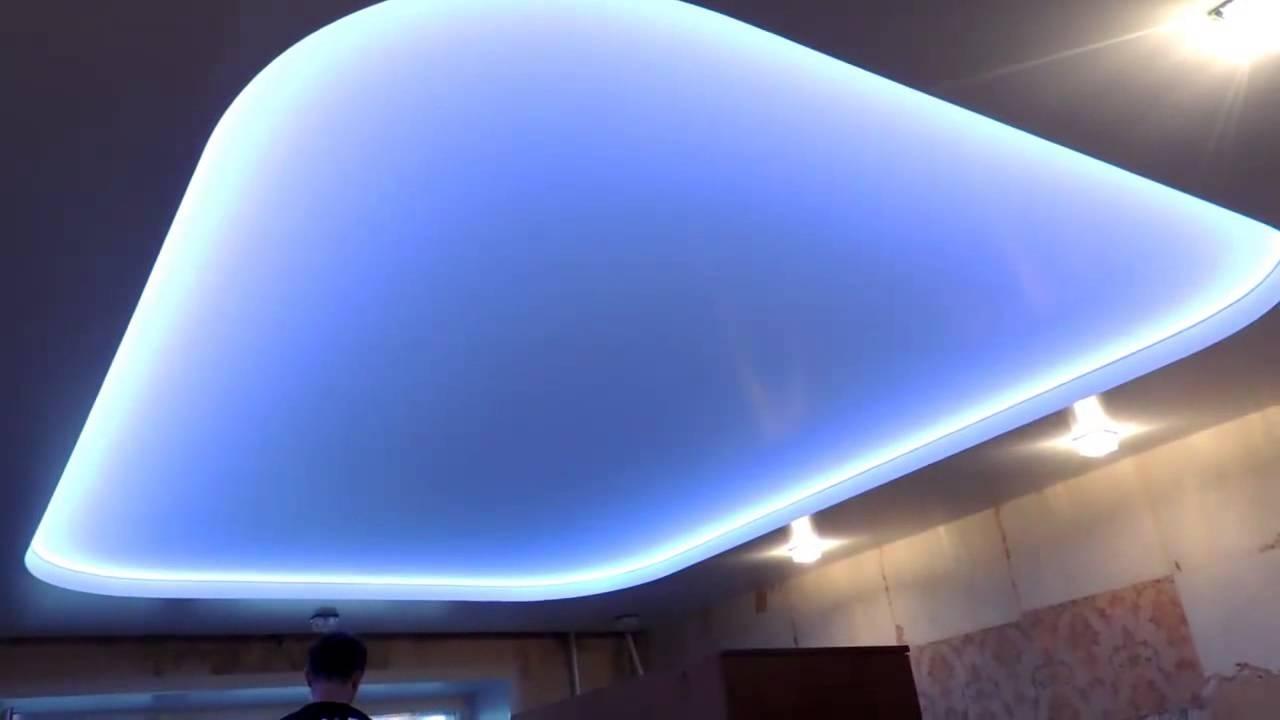
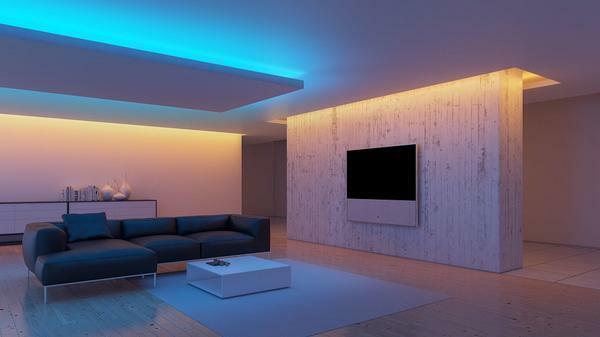 The backlighting gives a pleasant light glow that creates an atmosphere of appeasement in the room
The installation of such a box, of course, requires some effort and effort in terms of installation. However, there are much simpler methods.
LED lighting around the perimeter of the ceiling: in the plinth made of foam
Alternatively, an LED strip is used, which is placed in a wide ceiling foam plinth manufactured with imitation of hand-made stucco. The plinth is fixed on the wall along its lower edge.
Between the ceiling and the baseboard, leave a gap of about 5-7 cm, and in the pocket formed and hides the LED tape.
This ceiling with LED strip also found wide application.
Advantages:
- Much cheaper than a gypsum board;
- Much easier to install.
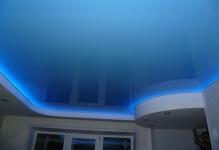
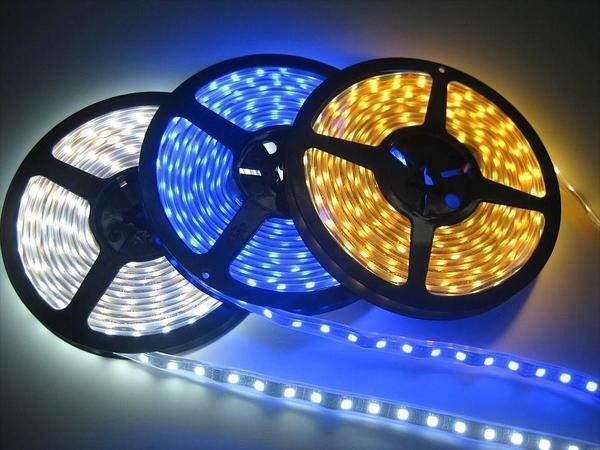 The main advantages of LED strip - a diverse color palette and low cost
Thanks to these two qualities, the ceiling device with lighting is greatly simplified.
Materials for the LED backlight
Materials for the LED backlighting need not so much, and the materials themselves are inexpensive.
What you need:
- Conductive strip with LEDs. Tapes are waterproof( white), as well as RGB( multi-colored).Waterproof tapes are placed in a white silicone tube. They are more expensive, but, at the same time, they have reliable isolation from possible leaks from the upper floors.
- Transformer reducing, to which a diode band is connected. It is built into the gap between the switch and the backlight.
The LED strip is switched on by a separate switch.
It is not recommended to arrange the backlight in conjunction with the main light, where the inclusion is carried out by a single switch.
The backlight will lose all the effect, interrupted by the basic lighting.
It has already been mentioned that there are tapes that give out a multicolored backlight( RGB).In this case, in addition to the transformer, there is a need for a controller, so that you can control the brightness. The switching of light is carried out at the expense of the program.
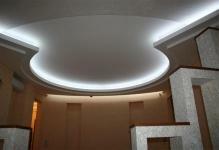
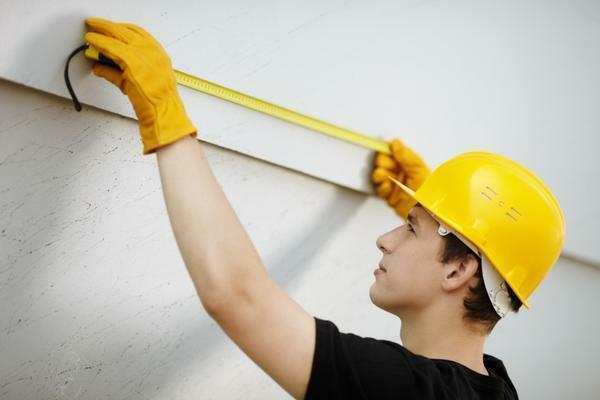 To determine the required length of the LED strip, it is necessary to measure the perimeter of the ceiling
Tapes can be different, both in terms of power and frequency of placement of LEDs on them. The most common tapes with a density of 30, 60 and 120 LEDs per running meter. The higher the density, the greater the brightness.
LED ceiling under the skirting boards
You can, of course, long rummage on the Internet, killing your time and doubting the correctness of your actions, or you can just make the right calculation in order to understand the benefits of this event.
LED strips are a very reliable source of lighting, lamps are extremely rare - the tapes are very reliable and durable.
In order to arrange everything correctly, you need the simplest knowledge, plus simple actions.
Procedure:
- Accurate measurements of the perimeter of your room;
- The result is multiplied by the power of one running meter of the LED strip;
- In order not to doubt the power, we need consultation with the seller, before buying;
- Based on these data, you need to select the power supply and controller.
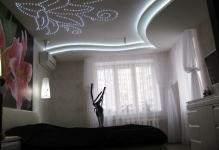
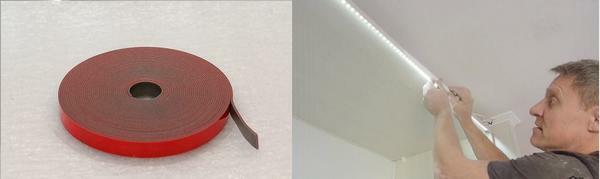 LED strip fastening to the ceiling is made with double-sided tape
If the ceiling is multi-level, then the LED light is perfectly combined with a beautiful chandelier. By the way, the backlight can be performed not with a single tape, but with its fragments.
Correct connection and installation of
To ensure that the backlighting has turned out without blemishes and shortcomings, it is necessary to take into account some rules.
Rules:
- The tape is sold in five-meter coils, and if necessary, it is cut and soldered to the desired size;
- The tape is carefully cut only by marking;
- The pieces of the tape are soldered according to the scheme;
- In order to fix the LED strip, use a double-sided adhesive tape, or a self-adhesive tape. Before gluing the surfaces are degreased, the protective layer is removed, and the tape itself is pressed against the required area.
Mounting the tape on the baseboard is different from mounting the tape to the wall. Both options are used by the consumer.
The skirting board is not glued directly to the ceiling, but lower by five centimeters, and ten lower, in case of gluing to the skirting board.
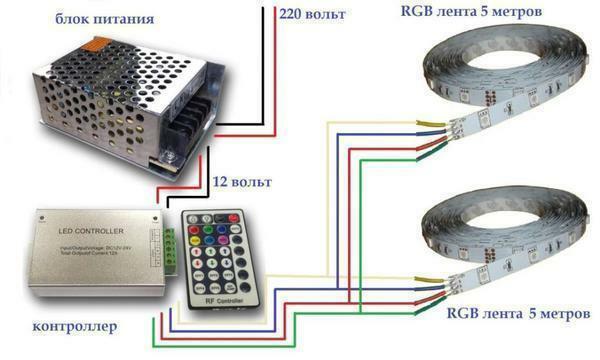 LED strip connection sequence
It happens that the power supply is sold without the power cord. Then you need to buy a cord.
How to solder:
- Plus with a minus when the tape is the same color;
- If the ribbon is colored( RGB), then the contacts V +, R, G and B must be soldered.
After the tape has been obtained the correct size, you need to connect the transformer and controller.
Do not allow tape to overheat when brazing!You can not solder more than three coils in series - the tracks, in this case, do not withstand the load.
At all stages of work, the main principle is accuracy, caution and thoroughness. The radius of bending is not less than 2 cm. The paths can not be bent more than 90 °.
How to connect the LED ribbon RGB( video)
And in conclusion, the following should be noted. On the originality of the ceiling with LED backlighting is not worth mentioning, because it is already quite obvious. In addition, one of the advantages of this ceiling is the fact that the lighting installation is not something extraordinarily complex, requiring the intervention of narrow specialists with special training - you can do it yourself. The fact that such illumination can be arranged both on a gypsum cardboard ceiling and on a tension ceiling is also a good thing. In a word, having studied the articles on this subject, having looked through the photo and video materials, as follows, having thought over how it will look like, get the necessary materials, and rolled up the sleeves to get down to business.
ceiling with lighting on the perimeter( photo)