Sound insulation of the ceiling: 4 choices of work
Table of contents
-
1 Types of works and their features
- 1.1 Option 1: gluing boards "Izoplat" on the surface
- 1.2 Option 2: The isolation of the carcass under the drywall special cotton
- 1.3 Option 3: insulation for ceilings
- 1.4 Option 4: insulation material via Ekozvukoizol
- 2 Output

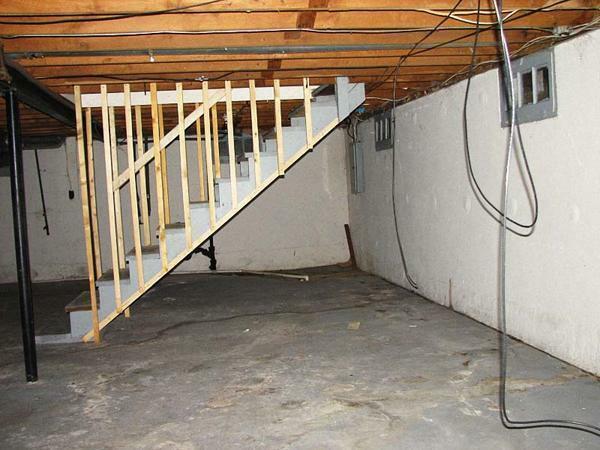
Noise insulation for the ceiling is most often placed underneath the frame, but the work can be carried out without a special design
You want to protect yourself from the noisy neighbors above, but do not know how to perform insulation of the ceiling in the apartment? I will tell you 4 ways of work, proven by me personally.

Fixing without frame allows you to save space, which is very important in rooms with low ceilings
Types of works and their features
We deal with such variants of the work:
- Insulation boards "Izoplat";
- Sound insulation frame using special mineral wool;
- Soundproofing mineral wool under the ceilings;
- Using Ekozvukoizol panels as sound insulator.
Option 1: gluing boards "Izoplat" on the surface

"Izoplat" - green material timber with excellent sound characteristics
To begin with talk about the main benefits of heat-zvukozoliruyuschih plates "Izoplat":
- Naturalness and environmental friendliness. Plates made from softwood fibers by heat treatment and pressing. As part of no chemical additives and adhesives. This allows you to use this option in the premises of any purpose;
- Convenience. The material produced in sheet form 2700h1200 mm. According to the requirements of the product coincide with ordinary drywall. They optionally may be attached to the metal and wooden frame;

"Izoplat" sheets meet the general standards of materials, which is very convenient for installation
- Selecting options. The sheets may have a thickness of 8, 10, 12 and 25 mm. The most commonly used variant 12 mm but if it is necessary to isolate the ceiling in a room with a high noise level, it is better to use elements of 25 mm thick;
- Low weight. Sheet 8 mm thick weighs 6 kg, 10 mm - 8 kg, 12 mm - 10 mm and 25 kg - 20 kg. Ease of elements makes it easier to work with them;
- The smooth front surface. One side of the flat plates, which simplifies its finishing.

"Izoplat" - green material timber with excellent sound characteristics
The cost of the plates is dependent on their thickness. Price sheet 8 mm is 600 rubles, 10 mm - 700 rubles, 12 mm - 800 rubles, 25 mm - 1700 rubles.
This plate is perfect for soundproofing rooms with low ceilings. It can be used to isolate high quality surface, the ceiling height is reduced by only 15-20 mm. For work, we need the following materials:
| Illustration | Description of material |
 |
Plates "Izoplat" 12 mm. Number is calculated by the square of ceilings that need to be isolated. When you purchase always take the material with a small margin of 5-10%, as inevitably are formed during the cutting waste. |
 |
Liquid Nails. With them will be primary fixation elements. You can use almost any option, as long as the composition suited for wooden and concrete surfaces. One package is enough for about 3-4 square meters. |
 |
Dowels for insulation. It is best to use options with a plastic nail. They are cheaper, and do not transmit sound vibrations, as this may occur in versions with a steel nail. Due to low weight plates, plastic nails provide the necessary reliability. For the operation, use the options in length of 70-90 mm, is no longer needed. If you find these anchors is not possible, you can use the presser washer and plain dowel quick installation of 60 mm in length. |
 |
Primer. Before applying sound insulating base plates necessarily grounded. It is necessary to strengthen the surface and improve the adhesion of the adhesive composition. |
Tool for the job:
- drill. Used for drilling holes for dowels. Do not forget to stock up on drills required diameter and length. If work is carried out in several rooms, drills should be at least two, as in the process, they quickly wear out;

Without the punch to make holes in the concrete slab will not work
- Brush or roller. We need to apply a primer to the ceiling;
- Pistol for applying liquid nails. A standard option for sealants. Choose a design poprochnee as an adhesive composition is quite thick, and when applied to the gun are high loads.

Sealant gun accurately and easily applied liquid nails on the sound-insulating material
- Staircase, table or floor. It is necessary to ensure easy access to the ceiling. Work best way, therefore, the design should be such that it could stay on the three men;
- Hacksaw on wood or jigsaw. Cutting boards can be as a power tool, and conventional manual hacksaw. Choose a tool with a fine tooth size to as little as possible damage when cutting the ends.

Hacksaw should have small teeth to gently cut "Izoplat" plate
on work instruction looks like this:
| Illustration | Description stage |
 |
prepared ceiling. If it was a whitewash or other finish, then it should be removed. If the surface has been painted and the paint is held very firmly, it is optionally removed. The main thing - to remove all that rests precariously. |
 |
The ceiling is primed. The composition is applied over the entire surface evenly. More convenient and faster way to work with a roller. After treatment, you need to wait until the soil is completely dry. This may take from a few hours to a day, it all depends on the room temperature and the type of formulation used. |
 |
At first adhesive sheet applied. Initially the composition is distributed along the perimeter strip flat indented from the edges of 2-3 cm. |
 |
Since the adhesive is applied in the middle. It is important to put structure on the entire sheet. You can do this as shown in the photo, but it is possible and in another way: in zigzags, in a chaotic manner, etc. The main thing - that the adhesive was not only at the edges, but in the middle. |
 |
The first sheet is mounted on the ceiling. You start from any angle. The work done by three people: two set and keep the sheet, and a third drill holes and install anchors. |
 |
Drilled fixing holes. The distance between the anchors must be 50-60 cm. They are located both along the edges and the middle sheet. In the process, make sure the vertical position of the punch. |
 |
Dowels are inserted and fastened to. Everything is simple and fast: the first dowel is placed all the way into the hole and then hammer a nail hammered plastic. |
 |
Mounted following elements. Everything is done in the same way as in the first case. There is one caveat - the transverse joints of the elements should not be the same. Therefore, each successive sheet is cut so that at least 20 cm was the discrepancy between the compound. |
 |
Here is the result of work. If between the sheets to obtain a wide gap, they need to fill with foam. Subsequently surface puttied or painted and finished with any other way. |
This material is also suitable for wall and floor, so you may want to soundproof all surfaces.

"Izoplat" great for the sound insulation of walls and floors
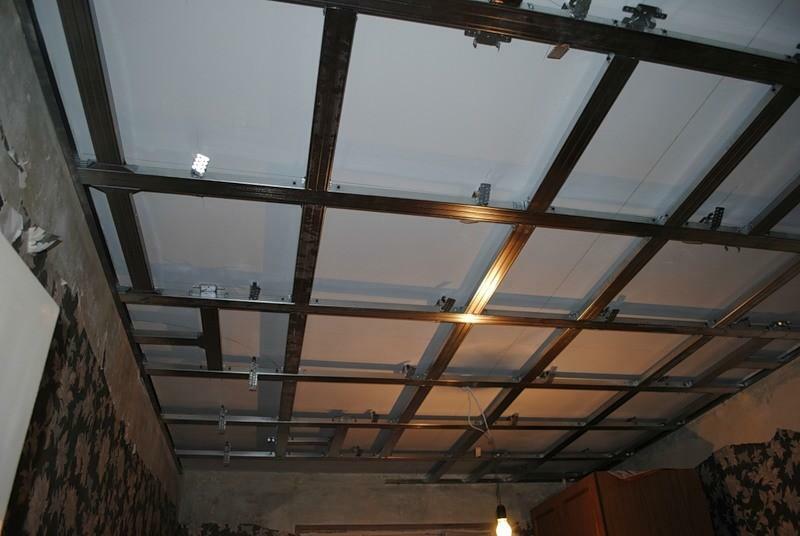
Option 2: The isolation of the carcass under the drywall special cotton
This type of work involves the use of special mineral wool. Such materials for soundproofing have the following features:
- High sound and heat insulation performance. Mineral wool perfectly dampens sound waves and simultaneously serves as a good insulator. If you need to insulate and soundproof ceiling, then the best option is not to find;

Mineral wool is good because it is not only good sound-insulating surface, but qualitatively it warms
- Wide range of variants. The articles may be in the form of plates and in the form of rolls. The thickness may be from 2 to 10 cm. The best option - 50 mm, this is usually enough for the quality of insulation;

The thickness of mineral wool may be different, so one can qualitatively isolate any surface
- fire resistance. Mineral wool does not support combustion, which allows its use in areas with high fire safety requirements;

The word "sonar" in Russian or English language indicates that the mineral wool is used for sound insulation
- Availability. The cost of mineral wool is low, a square meter of the material thickness of 50 mm will cost 130-150 rubles.
To work need the following materials:
| Illustration | Description stage |
 |
Acoustic mineral wool. This is the main material that we will use. Best to buy sheet options 50 mm thick, if you want to put a layer of 100 mm, it is simply possible to put two rows. |
 |
Accessories for the frame. These include the following:
|
 |
acoustic suspensions. This is the main difference between a conventional design and acoustic plasterboard ceiling plan. The elements are fasteners with the damper seal, whereby sound vibrations from the ceiling is not transmitted to the structure. |
 |
gypsum plasterboard. Commonly used for ceilings sheet thickness of 9 mm, but the wall I recommend purchase option by 12.5 mm. It will serve as a further sound-insulating layer, providing best quality of sound absorption. |
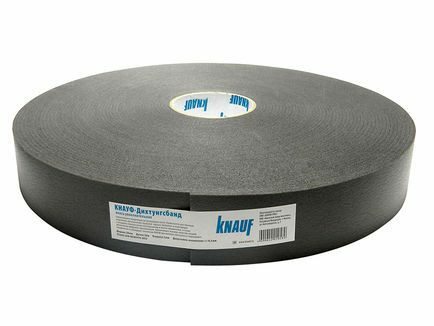 |
Acoustic band. Glued to the wall-attached profile. It prevents sound waves from the walls transmitted to the ceiling structure. |
Tool for the job:
- drill. Drilling holes in the ceiling and walls of a mounting frame;
- screwdriver. In the process of frame structures need to tighten the screws a lot of hand-make it difficult. Complete with a screwdriver have to be more nozzles configuration desired;

Screwdriver - an indispensable tool in the construction of the frame and attaching the drywall on the ceiling
- knife construction. It can be used to cut and plasterboard and rock wool. If you rockwool high rigidity, it is more convenient to use a special knife for insulating material;

Knife construction is suitable for cutting mineral wool, as well as for cutting drywall
- Level, measuring tape and a pencil;
- Stairs or other device to work on the ceiling.
We understand, how to make sound insulation of the ceiling:
| Illustration | Description stage |
 |
To mark the wall for guiding profile. To do this, it is best to use a laser level, but you can do the usual. The line must extend no less than 50 mm from the ceiling. Mineral wool is used most often so thick and the frame is much easier to build. |
 |
To the profile of the base tape is glued acoustic. Recording a material with a protective layer, gently pressed against the surface and is cut at the right place. |
 |
Fastened guide profile. To do this in the wall at the point of fixing the hole drilled for dowels. Chopyk then inserted into the wall, and they twist the screws or screws hammered drums. |
 |
Ceiling mounted hangers. They are disposed on the basic profile line location in increments of 50-60 cm. Fixing to the ceiling is made with dowels. |
 |
To the suspensions fastened basic profile. To do this, first using a level to set a certain position, and then tighten the screws in the right places. |
 |
The framework laid mineral wool. Sheets neatly tucked into the cells, and the ends of the hanger, bent to the side, serve as the fixation material. It is important to lay sound insulator as closely as possible to between the sheets has not cracks. |
 |
Surface Finish looks: Sheets are arranged densely, the entire ceiling closed with mineral wool. |
 |
Surface sheathed plasterboard. Here everything is done in a standard manner. |
Option 3: insulation for ceilings
If you have a suspended ceiling, you can use a variant with mineral wool, but without the device frame. Proceed directly to the list of everything you need:
| Illustration | Description stage |
 |
Acoustic mineral wool. Suitable for both slab and roll option. Recommended film thickness - 50 mm. Ceiling height should be sufficient to enable you to lower the level of 7-10 cm. |
 |
vapor barrier membrane. Used to protect the insulation. When calculating the number of do not forget that in the compounds of the material necessary to do laps of at least 100 mm. |
 |
Fixing for heat insulation. The length should be 4-5 cm greater than the thickness of mineral wool. |
 |
plastic collars. Need for connecting webs between a vapor barrier. Instead of clamps you can use a special double-sided tape for vapor barriers, but it is on sale not in all stores. |
 |
Rondol. So called the pressing plate, with the help of steam, will be fixed. |
 |
Plugs with mushroom head. Please note that in addition to the cap in the fixture has protrusions-antennae. At their expense will be mounting the vapor barrier in the mineral wool. Please note that the screws are not needed. |
Tool:
- drill. And drill the required diameter and length;
- Hammer - nailing dowels in;

Ordinary hammer will help to quickly and accurately score the plastic nails in the dowels
- Knife - for cutting mineral wool and vapor barrier material.
In this case, sound insulation on the ceiling in the apartment is fixed as follows:
| Illustration | Description stage |
 |
Drilled holes in the ceiling. The standard size of the sheet of mineral wool - 60h100 cm. Under each item is 5 holes - four in the corners indented to 4-5 cm from the edge and one in the middle. Hole depth should be 1 cm deeper than necessary. To not constantly monitor the drilling depth, wrap a piece of tape on the drill or tape, this will be an excellent reference. |
 |
Fixation is made of mineral wool. Installation of ceiling sound insulation is very simple:
|
 |
When attaching the material do not press too hard. Dowel should not be tightly pressed mineral wool to the ceiling. The exceptions are the options slabs of high rigidity, they can be pressed strongly. |
 |
The entire ceiling is closed sound insulator. It is important to well-docked items so that they are held tightly against each other and well adhered to the walls. |
 |
It begins fixing vapor barrier membrane. Let us consider how to work with their hands:
|
 |
The connection is performed over the entire surface. mounting location is determined by step in place. It is important that vapor barrier tightly to the mineral wool, if somewhere there is slack - put another fixture. |
 |
The compounds are bonded. In this case, we use plastic clips. They push through the holes punched for them, and tightened. Extra ends are cut. You can then put the suspended ceiling, the surface quality soundproof. |
Option 4: insulation material via Ekozvukoizol
I like this option for the simplicity and versatility, as the material serves as an insulator and as a decoration of the ceiling. The main features of Ekozvukoizola are as follows:
- Environmentally friendly. Articles are profile made of cardboard filled with a special mineral filler. The material does not contain chemical components that is completely safe. Another major advantage - vapor permeability, ie the moisture inside will evaporate, without lingering in the structure;

Ekozvukoizola sheets are made from natural raw materials
- Strength. The material is very robust and can withstand even heavy loads without compromising the integrity of the elements. Ceiling Ekozvukoizola much stronger than gypsum variant;
- Simplicitymounting. You do not need to stack mineral wool under the frame. Ceiling sound insulation is made simultaneously with the skin surface. This saves time and effort.
As for the cost, it is from 700 to 900 rubles per square meter. The thickness may be 11, 12 or 13 mm. The height of the elements 1200 mm, two widths - 800 and 450 mm, the first weight - 18.5 kg, the second - 10.5 kg.
Materials for the work:
| Illustration | Description of material |
 |
plates Ekozvukoizol. Number is calculated by the ceiling area. Do not forget to add a small margin, as in the works need to be cut and the elements may be formed waste. |
 |
Special tape ends. It is used for sealing the cut ends to close the surface and prevent precipitation of the filler from the cardboard profile. |
 ylamryovpagy3 |
Accessories for the frame. These include the following:
|
 |
Acoustic band for wall-attached profile. Used to create a sound-proof barrier between the frame and walls. The number is determined by the length of the walls in the room. |
 |
Antivibration sealant. Used for sealing joints and junctions of design to the wall. |
 |
Washer increased M5. It will be worn on the screws to increase the area of pressing, and thereby increase the reliability of fastening. |
Tool:
- Perforator with drill;
- PH2 screwdriver with a nozzle;
- knife construction;
- Tape measure, level and a pencil;
- Sealant gun;
- Hacksaw with a fine tooth - cutting sheets.
Ceiling insulation process is as follows:
| Illustration | Description stage |
 |
Partitioning the line of wall mounting profile. Need otchertit bottom edge future design. It is important to mark the perimeter exactly, that the plane was smooth. |
 |
On the trim profile is glued sound-proof tape. Just gently unwind the material exactly place it on the profile and carefully press down the entire length. The tape is very easy to cut with a knife in the usual construction. |
 |
Fastened guide profile. The work consists of the following actions:
If you need to get the dowel, then screw unscrewed screwdriver. |
 |
attached hangers. The process looks like this:
|
 |
The basic profile is inserted into the guide. The elements are aligned, suspensions podgibayutsya as shown in the photo. Then, using the level positions of the elements is checked. If necessary changes are made and the profile of fixed screws. Excess parts hangers simply folded up, so as not to interfere with further work. |
 |
attached jumper. Since Ekozvukoizola sheets have a high weight, the skeleton must be strengthened bridges. The distance between them tamp size sheets. Each joint has to fall on the profile, remember this simple rule. The easiest way to fix the cross with the help of special hardware-crabs. They just put on a longitudinal profile, and then put the jumper and screwed screws. It turns out a reliable framework for the ceiling of Ekozvukoizola. |
 |
Mounting starts from the corner. Before installing each subsequent sheet to be applied soundproofing joint sealant. It is important that the connection has been completely filled with the composition as shown in the photo. In the picture also shows how the fixed material: worn on the screw washer. |
 |
If necessary cut sheets. The most important thing - to carry out precise measurements and mark the item before sawing. Leave a gap of 2-3 mm, the sheet has become a place and you will not have to trim it further. |
 |
On the cut ends glued special tape. It is sold with Ekozvukoizolom and need to cut out sections not spill filler, because in the material has a honeycomb structure. |
 |
All connections are treated with a sealant. This is a very important part of the process, so do not forget to do it in advance. It is important not to gloss over the joint from the outside and fill it over the entire width. |
 |
Sheets before attachment of very accurately aligned. You have to match them so as not to tear off the sealant from the end. Around the junction must come up, it is a sign of quality filling compounds. After that, the fixing. |
 |
Abutment on the perimeter walls are filled with sealant. The more you fill up the emptiness, the better will soundproofing. Do not spare the sealant. |
 |
Ready ceiling is left to dry sealant. Then carefully cut off the excess composition, surface puttied. |
Output
Sound insulation of the ceiling - the process simple, choose any of the four options, and implement it in his apartment. Videos in this article will help you understand the topic better. If you have any questions - ask in the comments below.