How to build a plasterboard partitions (33 photos): a detailed guide
Table of contents
- 1 Getting Started
- 2 Calculation and material costs
-
3 editing process
- 3.1 Mount the horizontal bridges
- 3.2 The final stage
-
4 The partition of complex shape
- 4.1 Principle of operation
- 4.2 Output
- 5 Photo Gallery
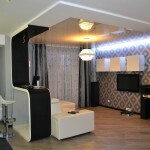
To date, construction of plasterboard took a huge niche in the construction and repair work. Why? They are versatile, easy to install and varied in form.

stages of construction
Finishing material is well established and so it is often used in construction, since it is:
- easily and quickly mounted;
- It is environmentally friendly;
- From it you can do both simple and complex designs.
So, we are building a plasterboard partitions.
Getting Started
This article discusses the incremental steps will provide detailed instructions on how to build a partition with his hands.
For the work we need.
- hammer, drill to punch 6x40 and 6h60;
- Metal or Bulgarian scissors;
- Roulette 5 m;
- pencil or marker;
- crown 64 mm diameter for sockets;
- carrying 5 m;
- level of 1 m;
- pliers;
- hacksaw for gypsum plasterboard;
- plane.
Getting Started
Before you begin construction of plasterboard partitions, it is necessary to have a clear idea:
- What we build a structure made of plasterboard (simple or complex shapes).
- There will be a niche or a door (if so, where and how).
- Think also about the location of the sockets and switches.
- Free up space on anything that might interfere with the installation.
It's time to calculate the amount of material in order to build a partition of plasterboard with their hands.
Calculation and material costs
Suppose the width of the room of 3 m at the standard height of 2.50 m. We believe perimeter P = (3000 + 2500) x 2 = 11 m.
2 Profile (3 m) we will go to the ceiling and the floor. It is 11-6 = 5 m, two profiles on the vertical struts to the walls.
Since the height of 2.50 m, it turns out that the meter is. Four pieces we need, one meter by 50 centimeters remains. It can be used on a horizontal crosspiece.

The guide bar
Now consider how much to profiles on the vertical uprights, to build a partition of the drywall. 3000 mm 60 mm = 5 pcs. Provided that we are putting them through a 60 cm, you will have another 2 to profile horizontal frame jumper, a total of 7 units. Profile on vertical racks shown in the photo (SS-50 * 50).

rack Planck
It remains to count the number of sheets of drywall to buy. We ceiling height of 2.50 m, as in the sheet when flat width of 3 m: 1.20 = 2.5 for the sheet side, total - 5 sheets.
To build partitions must take 12.5 mm thick sheets. Sheets of smaller thickness in the drywall partitions is not applicable.
For installation we need hardware:
- Dowel-nail 6x40 or 6h60 depending on the type of wall.
If they are wood or a gypsum can be used on wood screws. Also require screws for fastening the frame and the sheets themselves.
The figure shows some screws used for gypsum plasterboard (size 3,5h25)

You can pick up and fine-pitch thread
- Screws with a press washer 3,5h13 mm are required for frame assembly. I work with them, because they are not bulging bonnet and does not break when mounting the sheets.

Screws better to take no drill at the end of
- Dowel-nail 6x40 or 6h60 for fixing profiles, skirting on the dowel for installation is better to take a fungus (hard).

The optimum dowel for mounting
So to summarize. For the construction of partition walls, we needed:
- Profile Mon-50-50 - 7 shares at a price - 64 rubles. Unit * 7 = 448 rubles.
- ProfilPS-50x40 - 4 pieces at the price of 133 rubles. Unit * 4 = 532 rubles.
- Sheets gypsum plasterboard - 5 shares at the price of 236 rubles. Unit * 5 = 1180 rubles.
- Hardware - 250 grams in a single partition.
- Dowel-nail - 35 pieces.
Total we get 2160 rubles. + 500 rubles. on hardware = 2660. Price approximate, depends on the region and the quality of the selected material.
editing process
After all we need is already bought, we proceed to construction.
- Making the layout.
- Prune (or saw off) height profile for drywall.
- Using the first level starting to mount the vertical profile of the wall.
To take this CW-40x50 profile thereto puts vertically level look as to obtain perfect vertical and begin to mount the frame via the punch to the wall.
Tip!
If you have little experience or not at all, the best kind of work to do together.
Attaching profile, look at the next floor. Insert into each other and already existing markup lower profile fastened to the floor. Likewise establish a profile for plasterboard partitions on the opposite wall.
Tip!
In the place where the joined vertical and horizontal profiles, prior to twisting softwood tighten them with pliers, it will facilitate the process.
It remains attached to the ceiling of the bar, which we will go into the uprights. If the width of the room is greater than 3 m, it is possible to the edges of vertical struts attach the thread and put it on the user's profile.
Next, we need to put in to get the uprights of the frame. To do this, do the layout, take a tape measure and pencil, starting with the first attached to the wall profiles, to celebrate 60 cm to end the partition of the floor plate.
Measure out and cut rack profile height. Plant received preform fixed horizontal plate.
Expose the bottom of labels so that the profile strip located at the center. Secured using self-tapping 3,5h13 screwdriver. Pristavlyat level with the inner side of the upright profiles are putting on it and fasten the upper edge. The rest of the set on the same principle.
This is how should look like mounted partition.

Mark up the horizontal bridges
Mount the horizontal bridges
The next step is to install the horizontal bridges for stiffening the frame.
We note from the floor to stand at a distance of 60 cm, similar to the level of doing over the entire height. From these marks with the level tolerated size of the remaining racks. Measure out length so that the one edge into the upright, and the second length is a second middle.
It is necessary to attach it with the "ears", as shown in the photo.

Incised and folded shelf
Insert the jumper and fasten them with screws.

The final stage of work
The final stage
Paving the wiring and to sew up one side of the sheets of gypsum plasterboard. We put mineral wool and assemble the sheets on the other side.
Tip!
Leave a gap of 5 mm between the floor and sheets, as well as on the ceiling.
Here we come to the final stage. Now you can easily build a partition with his hands.
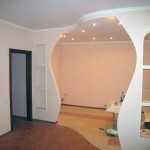
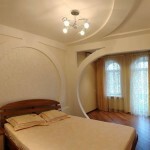
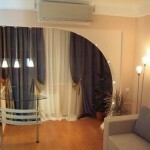
The partition of complex shape
I want to talk a little bit, how to make a partition complex designs of plasterboard.
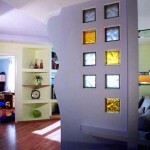
To do this, it is important to understand:
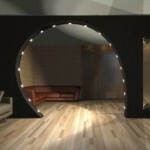
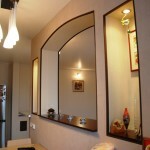
- how to make a semi-circle;
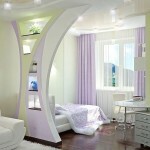
- how to make shelves or niches.
To perform a semicircle incision ribs in the profile.

Creating a bent shape
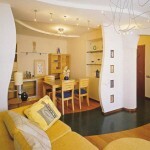
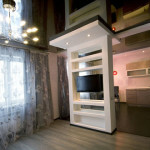
Principle of operation
Before making shelves or niches, think where they have will be. Next, assemble the frame and sewed up his sheets.
Tip!
On the construction of the frame with shelf is better to take the profile or 50x100 50h75.
When attaching the sheet to the sliced strip enclose a wooden block, is prevent flexing when mounting screws.
Output
Now that you know how to install a plasterboard wall. In order to more accurately understand the technological and practical issues on our website provides detailed photo and video instruction, in which you will find the necessary information on the question.
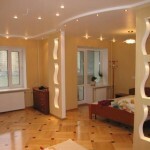
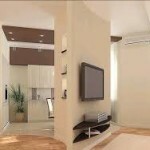
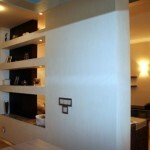
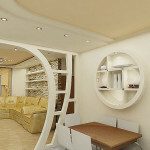
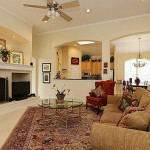
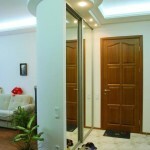
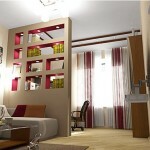
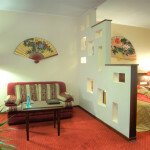
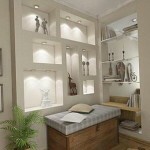
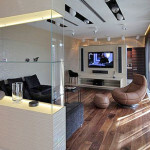
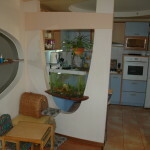
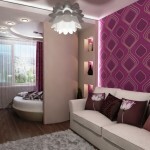
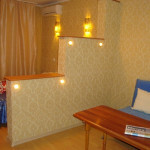
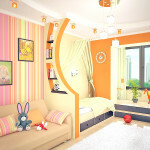
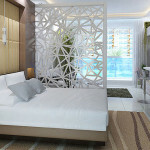
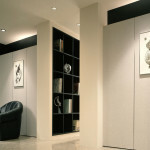
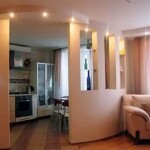
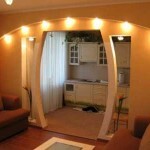
Photo Gallery