Sheathing balconies lining: training facilities and installation of finishing
Table of contents
-
1 Materials and tools
- 1.1 The sheathing?
- 1.2 Additional materials
- 1.3 Set of tools
-
2 Preparations for decoration
- 2.1 Installing glazing
- 2.2 Thermal insulation work
- 2.3 Installation of the subfloor
- 2.4 PVC panels or MDF
- 2.5 wooden wall paneling
- 2.6 finishing operations
- 3 conclusion

Finishing in natural wood - it reliably and efficiently
Sheathing lining the balcony with his own hands - quite popular, but it is time-consuming method of interior decoration. I will explain what is necessary for the independent exercise of this work, as well as describe the performance of the basic stages of plating technology, paying attention to the subtleties and nuances.
Materials and tools
The sheathing?
Sheathing of balconies lining - one of the most popular ways of "domestication" of the premises. It allows you to not only make the wall more attractive, but also cover a thick layer of insulation material. In addition, some types of lining themselves are quite good thermal insulators, so that the finish gives the opportunity to optimize the room climate.

Warming - is another plus, which provides the finishing balconies lining
For finishing the balcony Different materials are used for this technology:
| Illustration | materials |
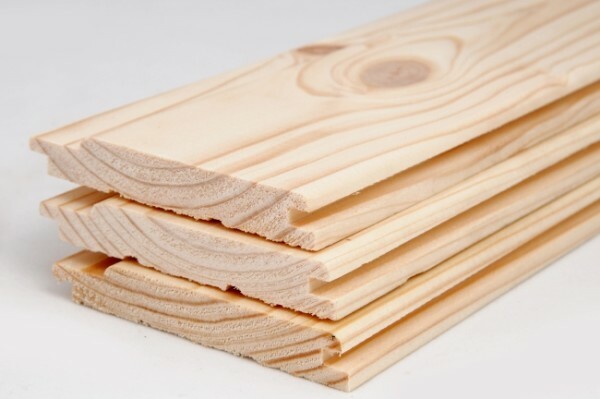 |
Wooden wall paneling. This material is a board, the edges of which are treated in a special way. On the one hand on the lateral edge protrusion formed - spike, on the other - a groove whose dimensions correspond to the dimensions of the stud. When mounting a spike of one board into the groove the other, and thus trim parts are connected without gaps and crevices. Wall paneling can be made of different wood, but the cheapest for finishing (and therefore most popular) - pine. |
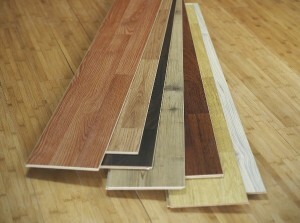 |
Molded MDF (Medium density fibreboard, medium density fiber board). According to the shape and appearance similar to wood, but differs significantly in structure. The basis for the sheathing panels of pressed and glued cellulosic fiber. The front surface is covered with thick melamine paper on which a drawing (mostly - wood imitation). MDF panels are cheaper than natural wood wainscot, but inferior to her, and mechanical strength, and moisture resistance. |
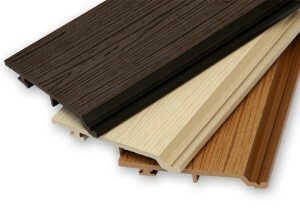 |
The plastic lining. Panels made of PVC (polyvinyl chloride) may also be used for covering of balconies and stairs. These advantages include high moisture resistance and low cost. On the other hand, the plastic strength is small, and appearance such inferior finish and wood, and MDF. Exceptions are PVC panels texture made of thick plastic with internal stiffening ribs. But the price of such products is much higher than the standard plastic lining. |
Buying panels for finishing the balcony, or loggia, do not forget about the additional structural elements. Their set is different depending on the project, but are commonly used are:

Wooden skirting boards are ideally combined with a shell made of natural wood
- Plinth - masking the floor and wall junction.
- Ceiling fillet - for covering the junction of walls and ceiling.
- corner pads - mounted on the joint vertical planes.
- sloping panel - are used for the decoration of the slopes of windows and doorways.
- sills - usually put together with the glazed balcony, but can be purchased and installed separately.

Angled plate designed to mask the joint boards
Additional materials
Sheathing lining the balcony or loggia - this is just one step in a complex process of finishing such premises. To decorative panels were securely fastened, they do not disintegrate over time and properly perform its function, it is necessary to hold a series of preparatory activities.
To implement them, we will need:
| Illustration | materials |
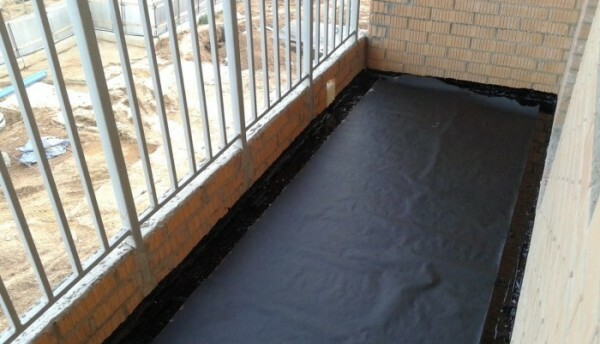 |
Waterproofing materials. Waterproofing of balcony base most often carried out either using penetrating formulations for concrete or using bitumen mastics. The most effective treatment is the complex using a liquid waterproofing and laying polyethylene film or membrane. |
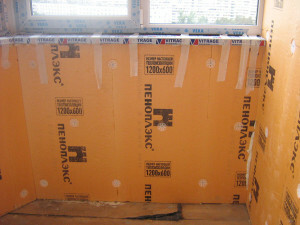 |
Thermal insulation materials. Before sheathe balcony or loggia, it is desirable not only to protect against moisture, but also to insulate. It is considered most economical for this insulation using foam or polystyrene: we need slab thickness from 50 to 100 mm. Thermal insulation with mineral wool (50 mm thick) would be more expensive. On the other hand, mineral wool is different vapor permeability, which contributes to normal ventilation in the room and reduces the risk of the walls of a fungus. |
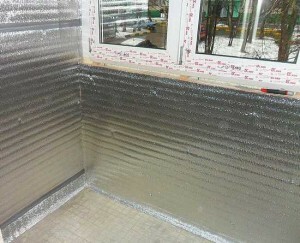 |
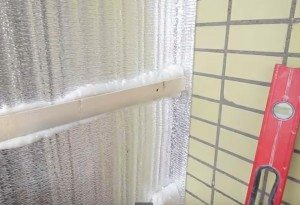
Vapor barrier. From inside the heater block desirable vapor barrier film preventing penetration of moisture. The cheapest option here - to use a dense polyethylene. More efficient use of foil materials based on polyethylene foam. They not only provide a vapor barrier, but also act as insulation, reflecting infrared radiation back into space. |
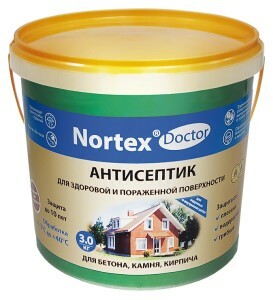 |
Antiseptic. The walls under the skin are exposed to moisture, which can cause the development of bacteria and fungi. Deal with this problem will help processing antiseptic primer. It is also an antiseptic used to impregnate the elements of the framework, and sometimes the most lining. |
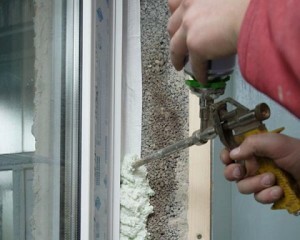 |
Polyurethane foam. Universal material for sealing cracks sticking Plate heat insulator and perform similar operations. It is desirable to take a little low modulus brand spreading factor: thus after polymerization of the sealant layer is a more dense and homogeneous. |
 |
Details for the frame. To sheathe clapboard walls and ceiling, on the supporting surface on top of the thermal insulation must be installed crate. It lathing made of timber battens or section of at least 20x40 or 30x30 mm. The frame is mounted either on the wall or (if the insulation thickness is more than 50 mm) on the plate metal brackets. |
 |
Metal fasteners. To sheathe the loggia wooden paneling, the panels made of MDF or PVC need such fixing elements:
|
 |
Materials for finishing. Linings made of plastic or MDF does not require additional treatment. And to protect the wood panels can be used:
|
A list of materials given in the above table is not exhaustive. It can also include:
- auxiliary materials for glass mounting (Parapet reinforced construction elements, and vapor-permeable vapor barrier tape);
- Materials for the installation of flooring (Lag for the supporting structure for a board or plywood subfloor, the floor covering);
- roofing elements (At the balcony unit in the loft);
- components for lighting systems (Wire, cable channels, switches, recessed lighting), etc.

When finishing the balcony on the top floor have to do a visor - approximately the same as in the photo
The total list of materials and the amount of the purchase is worth to argue after the development of the project plating balcony, choice of finishes scheme and measurements of the object.
Set of tools
In addition to the materials for the execution of works on skin with your hands need tools. Inventory should include:

A basic set of tools for the cladding board or balcony panels
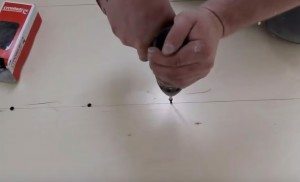
- Hammer drills with concrete / brick;
- screwdriver;
- staple gun;
- saw wood / plastic;
- a knife for cutting the heat-insulating material;
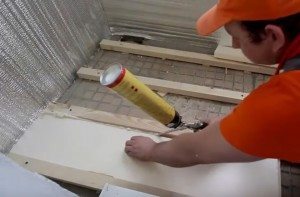
- submachine dispensers for sealant and adhesive foam;
- measuring tools - tape measure, level, plumb line;
- hand tools - hammers, pliers, chisels, etc .;
- rubber hammer glazing assembly;
- brush for waterproofing, priming and painting.

To trim a large number of panels it's best to use a jigsaw or circular saw
It is also desirable to get a small bookcase, stool or sturdy mounting cladding on the ceiling.
Preparations for decoration
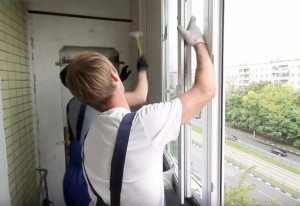
Installing glazing
Before you decorate the room clapboard, it is highly desirable to glaze. Installing glass not only protects the skin against moisture and other external factors, but also on the procedure reduces heat loss.

Quality wooden frame can not be changed
Glazing of balconies and loggias can be used:
- wooden structures. Cheap wooden joinery does not provide efficient heat-saving, but modern windows made of profiled laminated veneer lumber insulate the loggia very well;
- aluminum structures. Most often used lightweight frame sliding from rain they defend well, but the heat loss due to the small leak would be high;

Lightweight aluminum frame are well protected from the rain, but it is bad "hold" heat
- metal-plastic windows. Universal option allows for quite a reasonable amount of glaze balcony or loggia, providing a reduction of heat losses. Minus - a large mass, which leads to an increase in the base load.
Algorithm mounting window frames will be approximately the same for all the mentioned species.
The article provides only a general glazing installation scheme.
| Illustration | The procedure for the installation of glazing |
 |
Dismantling of old frames. If on the balcony or loggia frames have been previously installed, perform their dismantling. To do this, remove the flap is then sawn and gently break out of the frame. |
 |
Preparation of the support structure. When the balcony railing manufactured of concrete or rigid metal profile, the frame can be placed directly on it. If necessary, fence reinforced with wooden beams or weldments. Also possible construction of a new parapet using aerated concrete or concrete blocks. |
 |
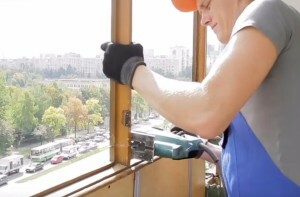
Installation and fixing of new designs. Frame mounted on a balcony railing, aligned and fixed. Used for fixing the metal mounting plate and anchor bolts. |
 |
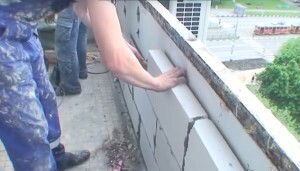
Filling construction joints. All gaps between the frames and the edges of the opening are filled with self-expanding construction foam. Outside, it is desirable to close the gaps nashchelnikami - it will eliminate foam collapse under ultraviolet light. |
 |
Attaching shutters. Sash hung on hinges. If necessary, performed sash alignment adjustment screws. |
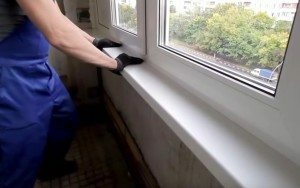 |
Installation of additional elements. After completion of the work shall be established:
|
Thermal insulation work
Before lining the walls, floor and ceiling need to insulate. The technology of thermal insulation works depends on what kind of material we use:
- dense polystyrene plates can be mounted directly on the supporting structure. Their mechanical strength sufficient to withstand the load of the frame and casing;

Mineral wool to protect from creasing - this requires a rigid frame
- panel of mineral wool is desirably set in crates cell. This would eliminate the sealing material, which could lead to increase in thermal conductivity.
Here we consider the case with polystyrene casing.
| Illustration | Warming of polystyrene |
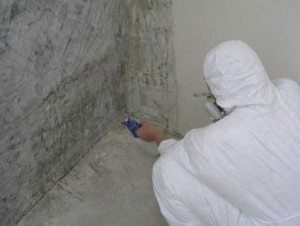 |
Antiseptic. All concrete or brick surfaces are treated with antiseptic penetrating. This will protect the ground under the skin against fungi and bacteria. When processing is required to use a respirator, goggles and protective clothing. |
 |
Bonding of insulation. Insulated panels are clipped to size and stuck on the walls, ceiling and balcony railings. For gluing use low modulus polyurethane foam with good adhesion. |
 |
Mechanical fixing. To improve the reliability of fixing each panel further anchoring dowel several umbrellas. |
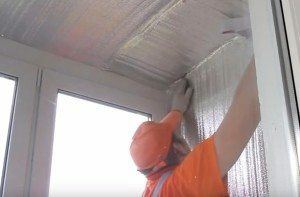 |
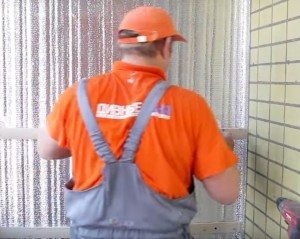
Vapor barrier. Above the insulation layer laid foil material on the basis of polyethylene foam. Joints sizing tape web material with a metal coating forming a continuous web without gaps and crevices. |
Installation of the subfloor
The next stage of interior decoration - mounting base for the flooring. It is also desirable to insulate: in this case, the heat loss in the lower layer will decrease at times, and be at the balcony will be much more comfortable.
When lining trim loggia the optimal variant of a floor - design on joists with plywood flooring or rough boards.
| Illustration | Laying the subfloor |
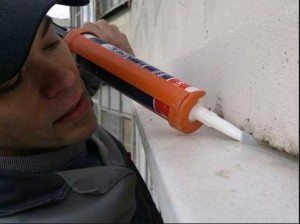 |
Eliminating gaps. The gaps between the floor and the balcony guardrail embedded sealant or polyurethane foam. If the gap is large, it may be necessary sealing both the inside and the outside. |
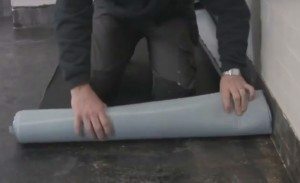 |
foundation waterproofing. Balcony plates cleaned from dust and debris and process the composition of a moisture - either penetrating or superficial, based on bitumen. On top of the base can be treated paste waterproofing membrane or dense bed layer polyethylene film. |
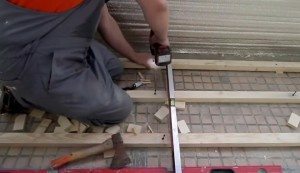 |
Mounting lag. On the basis laid joists (stacking step - about 60 cm) and carefully align their level. To be placed horizontally placed under the joists cranial bars or plastic mounting wedges. Fix to the floor structure by means of anchors. |
 |
Thermal insulation of the floor. In the cell between joists put cropped in size of the panel heat insulating material. The gaps between the insulation and joists fill the self-expanding foam - so we avoid the emergence of "cold bridges". |
 |
Installation of the subfloor. lag laid on top of the plywood at least 12 mm thick. Fix plywood sheets to logs using screws. |
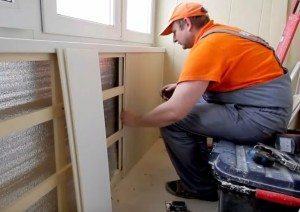
PVC panels or MDF
Now we have to sheathe clapboard balconies with their hands. To do this, we first need to prepare the frame, and then secure it on the shell parts.
Instructions for installation of plastic panels or lining is made of MDF:
| Illustration | How to install panels |
 |
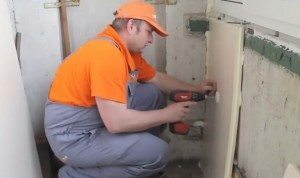
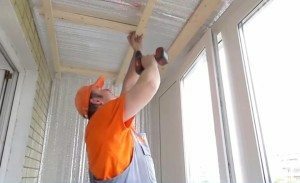
Installing the frame on the wall. On the basis of increments of about 50-60 cm set the horizontal bars. For fixing dowels use with a plastic liner, the length of which should allow to pass through the heat insulation layer. Bars themselves secured by screws, screwing them into the pre-installed anchors. |
 |
Installation of battens on the fence. When installing the first frame anchoring several vertical boards, placing them in increments of about one meter. Then they were through every 30-40 cm fasten horizontal slats. |
|
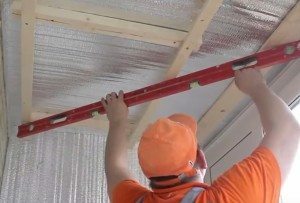
Installation of the frame to the ceiling. By the same principle holds batten setting for the ceiling paneling. Expose framework strictly on the level. |
 |
Thermal insulation of the frame. Where batten bars in contact with the vapor barrier membrane and insulation, fill the gaps with foam. This will reduce heat loss. |
 |
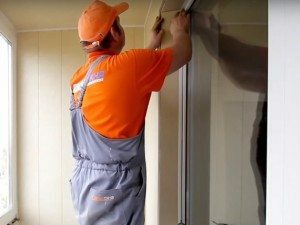
Headliner. Clipped in size panel or MDF, plastic, to attach the roof sheathing. For fixing use steppler building with galvanized staples. Each following panel is inserted into the groove already installed, align and fix to the frame. In order not to damage the edges of the panels, MDF is fixed by means of clips, clamps. For fastening plastic is allowed to use "liquid nail". |
 |
Skinning of walls and fences. By the same token we perform plating installation on vertical surfaces. Here it is necessary to closely monitor so that the panel does not warp. |
wooden wall paneling
If used for finishing natural wood paneling, its mount technology has its own characteristics:
- first board a spike set to the corner. Its aligned vertically and fix using screws by tightening them as close to the edge.

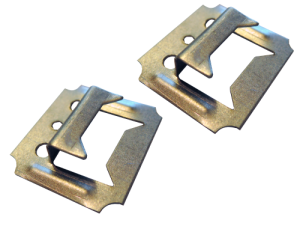
The principle of using capping
- Anchoring battens. To do this the lower lug groove board installed in front of each timber for sheathing put on clamps. We fix-clamp to the batten using construction stepplera.
Typically, the mounting holes in such detail the case in accordance with the dimensions of standard staples. Attach have to "blindly", but easy to adapt himself - literally turns after a dozen attempts.
- Instead of staples, you can use subtle pinks. To prevent damage to the edges of the groove, it is desirable to score not directly, but with the help of extensions - the small hammer or metal bar.

Fixing nail capping can be carried out
- We continue to trim just as in the case of MDF panels until you reach the opposite corner. The last board, will likely have to saw along - fix its edge as well as that of the first boards in the series.
finishing operations
To look sheathed balcony was as attractive as possible, to make a few finishing operations. Their list depends on what we are planning to get a result. So here I will mention only the main tasks.
| Illustration | finishing operations |
 |
No extra parts. After completion of the primary plating anchoring all missing items - sloping strips, angled linings, moldings, flat strips, etc. Also at this stage it is possible to perform the installation of decorative moldings. |
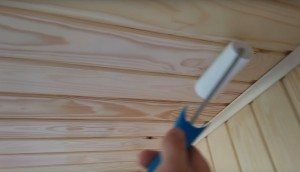 |
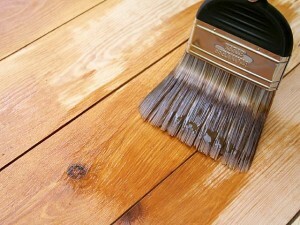
Lacquered lining. After skin panel made of natural wood dedusting, dried varnish and autopsied. Varnish is applied in several layers, using a wide flat brush or roller. To impart the desired tint timber (this may be necessary, for example when plating light pine lining) in the lacquer composition can be added Kohler component. But the lining of plastic and MDF additional treatment is not needed. |
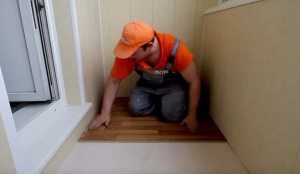 |
Installation of the floor covering. On rough floor laid flooring - laminate, linoleum, sexual decking, etc. Doing so it is desirable at the end of the work - so finishing the floor will not be spoiled and soiled in the previous operations. |
|
Fixing baseboards and thresholds. The final touch - setting the threshold in front of the balcony door trims and binding on trim moldings. These parts are fastened either using screws (for plating natural wood) or with an adhesive such as "liquid nail". |


The final result should be approximately the
conclusion
The above plating scheme balcony can be realized if there is even minimal skills finishing work. For beginners to learn the technology will help the video in this article, as well as expert advice - you can get them by asking a question in the comments.


