Installing doors in plasterboard wall: A Practical Guide
Table of contents
-
1 Calculation and partition layout
- 1.1 The main theses
- 1.2 marking
- 2 The framework for opening
- 3 door box
- 4 Installation box into the opening
- 5 completion
- 6 Tool
- 7 conclusion
For the manufacture of partitions between the rooms is better to use drywall. This is the most practical and cheapest material. But if you separate part of the room partition, the question arises, how to insert the door in plasterboard wall?
To solve this problem will need some skills and good instruction, as well as the necessary instrument and consumables.

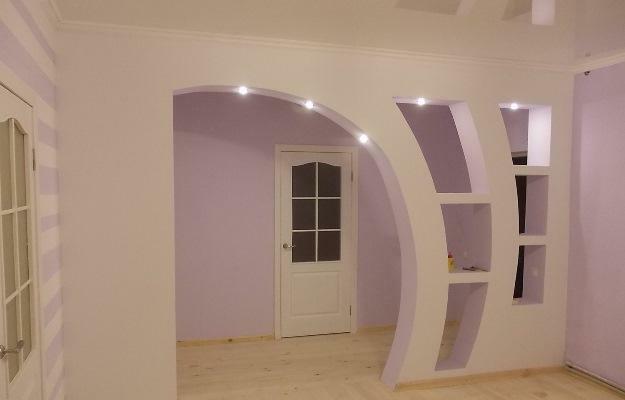
Door in the set plasterboard wall using the enhanced framework.
Calculation and partition layout
The main theses

Partition with a door requires a responsible approach to the manufacture of the frame.
The partition is not made of plasterboard bearing construction element, so typically does not require calculations of strength. However, if the partition includes a door, it should take into account the additional burden that this door will, especially during opening and closing.
Installing plasterboard partitions with a door requires a responsible approach to the manufacture of the frame, otherwise, with the door will vibrate the entire wall.
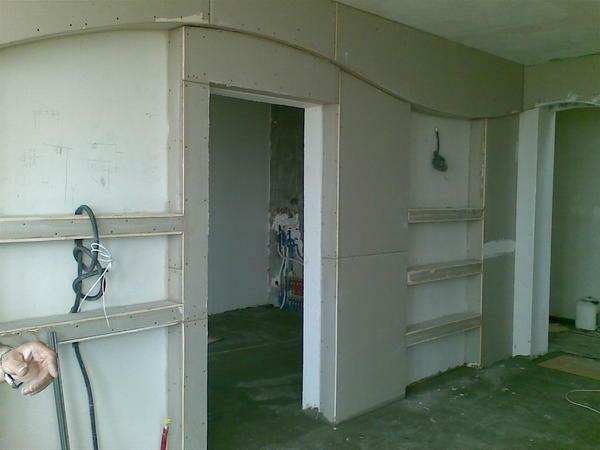
As can be seen in the photo frame to make a large number of transverse profiles and uprights set often enough.
The exact figures depend on the partitioning parameters: the height of the ceiling and run the length of the wall-to-wall. If the ceilings have a height of 3 meters or more, the opening may require the strengthening of reinforced uprights from floor to ceiling. To enhance the use of wood or any additional profiles.
marking
Markup produced as follows:
- In the place where it is assumed installation of drywall partitions, hold a straight line on the floor, exactly perpendicular to the side walls of the carrier.
- With the help of a plumb line from the ceiling mark two points and transfer line at the ceiling.
- The upper and lower lines connect the vertical lines, which mark is made on the walls.
- The spirit level and plumb the verticality of the resulting plane is checked.
- Further, to these profile lines attached to the walls, ceiling and floor using dowels and screws 75 mm in length.
- If the door will be installed at the wall (as in the photo), the bottom profile is made smaller by the width of the door. If it is located in the middle of the partition, the profile is divided into two parts extending from the opening to the walls.
- Next, the cutting and assembly of the frame.
Important! For better sound insulation of the future design of all metal profiles, which are adjacent to the walls, laid on the sealing tape, specially designed for this purpose.
Mounting profiles is done in increments of 50-60 cm on the screws and dowels.
The framework for opening

The doorway should properly arrange even at the stage of the frame assembly.
Part of the frame that forms the doorway - the most responsible in the whole structure, because it takes the brunt of the load.
To understand how to install the door in drywall with your hands, you should strictly follow this procedure:
- For profiles, laid on the floor and the ceiling are fixed two vertical posts, which will be opening side boundaries.
- The thickness of the metal profiles to be 0.4-0.6 mm thinner metal is unacceptable since it will scroll screws.
- If the ceiling height of more than 3 m, the uprights must be strengthened wooden bars, profiles or nested inside double profiles.
- A distance equal to the width between the uprights of the door frame plus 2-3 cm margin on either side on each side.
- Next, put the rest of the uprights with a pitch of not more than 60 cm.
- Now we form the letter "P". Between the uprights of the sides of the opening set jumper at a height equal to the height of the door box plus 2-3 cm margin.
- Then additional strengthening jumper uprights, connecting it to the ceiling, as pictured above.
- Install the horizontal bridges between the remaining racks.
Tip! If a large wall and ceilings are high, you can use the reinforced profiles, which offer almost all modern manufacturers.
Yes, it would increase the cost structure, but it will serve longer and serviceability.
In this installation the frame can be considered as completed. Further, the installation is made of sheets of drywall, plaster drywall finishing and finishing. Details on these steps will not stop, because on this subject there is a separate article.
door box

Door box can assemble yourself.
If you have some experience of working with wood or installation of doors, it is better to collect their own box, as in this case, the cost will be lower.
Attention! The box should be strictly rectangular and match the calculated size, otherwise the door will not close.
You should also take into account the damping gaps and do not forget about the quality of the wood, its moisture content and thickness.
If you have the slightest doubt in their abilities, it is better buy ready-door box with door and hinge.
Installation box into the opening

The box is attached with screws and mounting foam.
Before you put the door in a plasterboard partition, you must perform all painting and decorating. Now we take the box and paste it into the opening. Fasten and fix it with the help of wedges, are putting on a level. When the box is placed in the correct position, fasten it to the profiles of self-tapping screws through the pre-prepared holes.
Now, once again carefully check the level of vertical installation. If all goes well, we proceed to the next step.
With gun fills the gap between the casing and the opening (remember that 2-3 cm?) Polyurethane foam.
Attention!
Foam during expansion may deform the box and the door will not work correctly.
To avoid this, you should rasklinit box bridges.
After that, we wait until the foam dries and cut off the excess construction or office knife. Hang the door can be the next day, when the foam is completely dry up.
The hinges are usually inserted pins into the holes receiving loops. Do not forget to lubricate them.
completion

Do not forget about the trim.
To finalize the process, the door should ennoble and decorate. For these purposes, use frames. Plat is best to choose immediately, and those who go to the door in the set.
If there is no need to choose the color. It is better to refrain from all kinds of figures and patterns if you're not an artist and designer.
Plat nailed with a flattened cap to the box, to close the gap and foam. Cut into strips so that they are butt-joined at 45 ° each, to obtain the result desired 90 °. It's simple.
If the price cuts in the store is not high, it is better to cut strips immediately upon purchase. Otherwise, you'll need a guide template or accuracy of the hands, because any deviation from the specified angle is fraught with corruption plank.
Plat hammer nailed on the perimeter of the door with a step of fastening 20-25 cm.
Tool

For all work fairly small set of very simple tools and devices.
If you do not plan on spending the extra tools necessary to buy, they can be rented in any large supermarket building your city.
partitions required for the manufacture of:
- hammer;
- screwdriver;
- Metal or Bulgarian scissors;
- roulette;
- level;
- plummet;
- pliers;
- Hacksaw on a tree;
- electric drill;
- putty knife;
- bucket;
- roller;
- line;
- rule.
conclusion
As you can see, no supernatural skills in such work is not required. (cm. also Article Soundproofing drywall - Myths and Reality)
For clarity, we suggest you review the video, which is shown in detail door installation in plasterboard wall.