From rags to riches // repair the toilet with his hands - everything you need to know for work
Table of contents
-
1 Step workflow description
- 1.1 Stage 1 - the development of the future interior
- 1.2 Stage 2 - the purchase of necessary materials and tools
- 1.3 Step 3 - Removal of the old finish and plumbing
- 1.4 Step 4 - Communication laying
- 1.5 Stage 4 - the construction of the box
- 1.6 Step 6 - floor covering device
- 1.7 Step 7 - wall decoration
- 1.8 Step 8 - Ceiling Finish
- 1.9 Step 9 - plumbing installation and other equipment
- 1.10 Step 10 - Installation of doors
- 2 Output
The article is intended for those who want to repair the toilet with his hands, but has no experience. I'll tell you about the most popular and available finishes and offer a step by step algorithm. You just need to stick to my recommendations to get quality results.

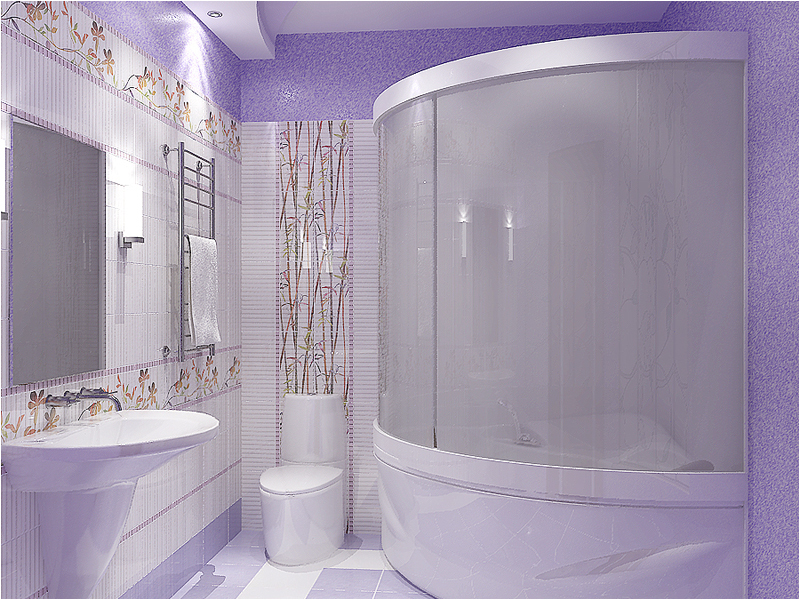
The photo is an example of how it is possible to carry out the work

Even in a small area, you can create a comfortable and attractive environment
Step workflow description
Repair the toilet - employment at the same time simple and complex. Simply because the amount of work is small due to the small area, and difficult for the reason that of the lack of space you need to carefully think through everything.
All work can be divided into 10 stages:
- The development of the future interior;
- The acquisition of necessary materials and tools;
- Dismantling of old plumbing and finishes;
- Replacement and installation of new communication (if necessary);
- The construction of pipes ducts for masking;
- floor covering apparatus;
- Decorating the walls;
- ceiling trim;
- Installation of plumbing and other equipment;
- door installation.

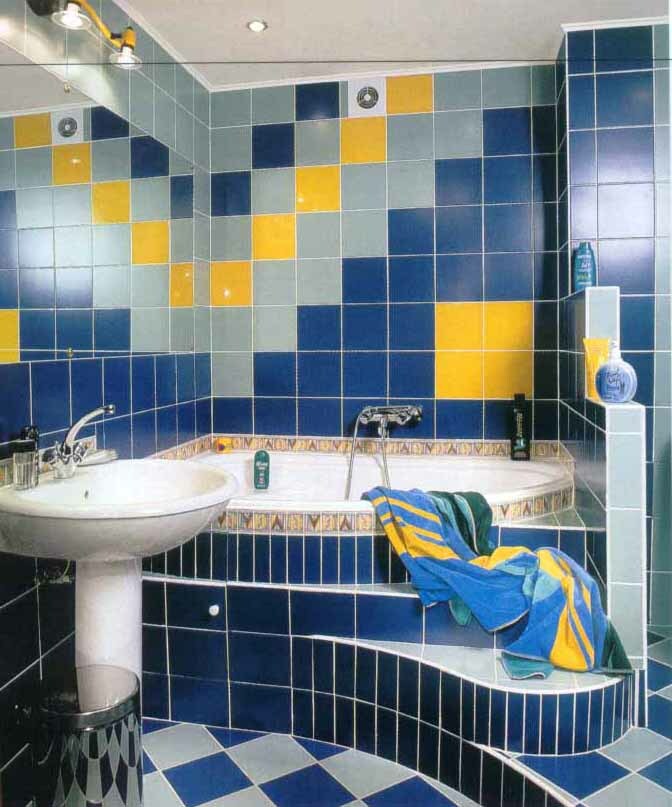
To get a neat bathroom, have to spend a lot of works
Stage 1 - the development of the future interior
No need to think, where to get started, because we must first consider the layout and decoration.
To do this, perform the following steps:
- Measure the area, which is at your disposal. This is the main aspect that affects what you can deliver and how to arrange the elements. Unfortunately, most of the place is very small and you have to adapt to the circumstances, and not to come up with interesting solutions;
- Determine what equipment will be installed. If space is very small, only put the toilet more often. If more space, you can add a sink, bidet or urinal, it all depends on your wishes;
installation norms from the center of the toilet and the wall must be at least 40 cm, sink should be located at a minimum distance of 30 cm;

It is important to have the correct plumbing
- A great solution would be hanging toilet. It does not take place on the floor, but the wall will have to attach a metal frame, which will take about 10 cm of space. This option is very attractive, but in installing it much more difficult, it is also necessary to take into account;

Hanging toilet - an interesting solution for small spaces
- The color scheme should be in soft colors. Do not use bright colors and colorful decoration, in the bathroom it looks no better. Ideas for decoration you can see on the Internet, examples are many, and anyone will find an option to your liking.

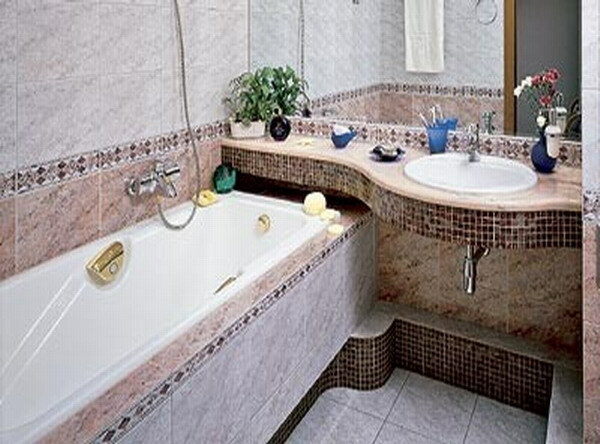
A lot of options, find the one that you like and that you will be able to implement
Stage 2 - the purchase of necessary materials and tools
Once you have decided on exemplary design, you can proceed to the selection and acquisition of materials. You must hold a pre-measurement of the floor area, ceilings and walls, to quickly calculate the approximate costs of one or another variant of finishing.
To begin with we shall understand, that we can put on the floor:
- Ceramic tiles - the most popular solution. On sale is a huge number of species, so the problems with the choice does not arise. If you want a cheaper option, you give a little advice: look nekonditsiyu in stores, it is inexpensive, and in view of the low volume, you can choose a good ceramics. Most often, marriage is not visible, but you can very well save;

Tile - the perfect solution, the material looks good and is not afraid of moisture and cleaning agents
- Self-leveling floor - a relatively new solution that is perfect for bathrooms. Coverage is not cheap, but because of the fact that the floor space is small, its unit costs are only slightly higher than when using ceramics. In addition, this option can be realized, and with his own hands, which is also important.

Such coatings can mimic a variety of image
For walls, you can use these options:
- Ceramic tile. On the walls, you can create patterns or even a picture of the ceramics. Suitable for the most demanding mosaics, very effective, but rather expensive coverage;

Tile is great for walls
- Budget option finishes - PVC panel. They cost a bit, but also look a lot worse than the same tile. But if you want to make a cheap and reliable, this solution can be very useful;

PVC panels are well suited for toilets
- It can and does stick to the walls of wallpaper. You need to choose water-resistant variants. I would recommend using glass fiber, as they can be repainted. That is, you can easily carry out repair and refresh the room later, just by changing the color of the walls.

Wallpaper can create a very original environment
As for the ceiling, then with your hands the easiest way to implement one of the two options:
- Fixing of plastic panels. On the ceiling, they look good and are inexpensive. You can choose more expensive - rack metal ceilings. They look presentable and to install almost indistinguishable from plastic;

This embodiment looks good
- You can simply putty surface and paint it. If the ceiling of the curve, it is easier to build the frame and secure waterproof drywall. So you get a flat surface, which should be a thin layer of putty and paint.

The color of the ceiling chosen by the rest of the finish
As for the instrument, its list depends on the materials chosen for the finishing. Below I will specify a list of devices where necessary.
Step 3 - Removal of the old finish and plumbing
Begin work necessary to remove all unnecessary. Process simple, but requires a lot of effort and time-consuming.
The sequence works as follows:
- First remove the old plumbing. Most often, you just need to remove the corrugation from the toilet. If you have old equipment, you have to break the cement, which is usually stronger connections;

You can temporarily put a new toilet to use the bathroom
- On the floor it is often the old tile, which is very firmly held. It can knock down like a hammer and a chisel and hammer. The process of the dusty and noisy, so work better in the daytime;

Removing the old tiles - the work tedious
- If the walls of the tiles, it will be removed as well as the floor. If the surface is covered with wallpaper, their need to soak and remove. Painted plane and can not be cleaned, if the paint keeps them firmly. The exception is oil compositions, they should be sure to take to work best to use a special stripper;

It removed from the walls of all that poorly kept
- If the ceiling whitewash, it is necessary to soak the water and remove with a spatula. Painted surfaces are inspected, remove only the damaged areas.
Step 4 - Communication laying
In this step are performed such works:
- If the old riser does not inspire confidence, it is advisable to replace it with a new plastic. Most often you have to change the section from the floor to the ceiling, at the junction of adapters are set, and the construction itself can be easily assembled from the components of the desired configuration;

Riser mounted on special clamps
- If you want to pipe laying around the room, it is best to hide them in Stroebe. Communications may be required if you put the sink and bidet or bought a toilet with bidet. It is important to think about the correct location of terminals that all it was convenient. Even if to lay pipes in new places is not necessary, it is desirable to replace the old steel communication on the new plastic;

Pipes better hide in the wall
- Do not forget about laying wiring to fixtures and fans, if any. They are also better to hide in Stroebe.
Stage 4 - the construction of the box
To hide the pipes, it is necessary to build a box. If the riser is in a corner, it only closes this part of the premises, and if in the middle, it is easier to make a partition and sew up all the space behind the toilet.
Instructions for the work is simple:
- For framework we will use metal profiles for the drywall. Along the walls of the guide elements are mounted, and forms a main structure profile;
- Initially, the design layout is done, the walls using a level or plumb held vertical lines on the floor and the ceiling are drawn outlines of the box;

For precision markings can be used gon
- Along the perimeter of the future design of fixed-line trim profile. For this purpose, the walls of the drilled holes for quick installation of anchors with a diameter of 6 mm;

The guide elements define the contour of the future structure
- Then fixed frame, for this purpose, the basic profiles. To make the construction stiffness is enhanced by ribs which are arranged in 40-50 cm;

The framework must be tough
- In the last turn fastened to a moisture-resistant drywall. He cut into desired size pieces and fixed with special screws with fine pitch.
When carrying out plating do not forget to leave an opening for the installation of the door to check the condition of the equipment and taking the readings from meters.

Luke will be inserted after the finish
Step 6 - floor covering device
We will start with this part of the room. At first we look at how the floor is made of ceramic. For work, we need a specific set of materials and tools listed in the table.
| What is necessary | Description |
| Ceramic tile | Number is calculated by the square. Do not forget that some of the elements have to be cut, which is why consumption may increase |
| adhesive composition | Clay tile is sold in the same place and ceramics. The right amount is calculated by the flow rate, which is indicated on the packaging. Usually enough for sex 1 bag |
| Tic remote | With their help, you can make perfect joints throughout the area. Floor taken embodiments 3-5 mm |
| fugue | Grouting is performed using a special composition. For its application to purchase a rubber spatula |
| Tool | For preparation container glue trowel for applying and its level for the control plane. For cutting ceramic tile cutter is needed |

This simple kit is needed for work
Sex in the toilet is placed as follows:
- Measurements are made to determine how the elements will fall and where needed trimming. If you need to cut a lot, it is easier in the beginning to put whole pieces in the middle. To this end, the adhesive is applied to the floor in the place of application, is aligned with a notched trowel, then placed the first tile. It is aligned on the level and gently rap if necessary a rubber hammer;

The plane is controlled by the level required to
- When installing the following elements in the joints are inserted spacers crosses. They allow you to do the same joints. When installing the level is checked on several tiles. It is important to bring flat surface;

Tiles must be laid very carefully
- The surface is left for a day to the glue has dried. The next day the rest of the elements are cut and reported. After the floor has to dry for another day;
- Preparing grout, which is gently applied to the seams. The composition has to fill all the voids, excess carefully removed with a rubber spatula. An hour later, you can delete a tile main contamination. The next day, the surface with a damp sponge to remove, the floor is ready.

Ingredients carefully applied into the joints with a rubber trowel
As for the self-leveling floor, it is the application of technology:
- The base should be carefully handle reinforcing primer deep penetration. It is better to do it twice;
- Surface is leveled via the self-leveling. He poured, leveled to obtain a flat plane. The composition is leveled with a spiked roller or special trowel;

Self-leveling allows you to align the plane quickly and efficiently
- Further, self-leveling floor is used, it can be like a flower and transparent composition. In the latter case, the surface was covered with an image that after pouring acquire three-dimensional effect. The workflow is simple: the composition is mixed, poured onto the surface and quickly leveled with a spiked roller. After it dries, you get a solid floor.

Evaporation of harmful composition, so you need to work in a respirator
I advise you to do monotonous sex, after all options with the image more difficult to implement, and the drawing may be damaged during operation.
Step 7 - wall decoration
The most popular solution in this case - repair toilet tiled, with this option, we will begin:
- A list of materials and tools needed is the same as in the case above, therefore, to dwell on this aspect, we will not. The only difference is the profile for drywall or flat rack, we will fix the perimeter of the first series;
- All the walls must necessarily be primed. If the surface has significant irregularities, they are pre-sealed with putty, cement-base. The box is made of plasterboard finish under the tile is not necessary, only the seams are sealed, and the entire surface of the double-primed;

The soil required to be applied on the walls
- Along the perimeter of the room at a height of 1 rack of tiles fixed or levels. It is from them we will start finishing. This will allow guaranteed to get a smooth clutch regardless of the floor level. Initially, put the first row, put crosses between elements, and the surface is continuously monitored level;

The first series is based on the rail, which provides its perfectly smooth location
- Masonry continues row by row until reaching the required height. Crosses are placed on the vertical and horizontal joints;
- After a day of rail is removed and made laying the first row of tiles. Elements are cut if necessary, and as a result we get a perfectly smooth finish no worse than that of the pros;

The first row is placed most recent
- At least rubbing seams, the same technology as on the floor, so it makes no sense to disassemble.
If you choose to use plastic panels for finishing the bathrooms, the technology of the work will look like this:
- Along the walls of the frame is constructed from metal profiles or wooden block. First, using the level of mark up, and then the carrier elements are mounted on the lines. The distance between the posts should not exceed 50 cm;
Do not forget that the frame is always perpendicular to the panel. If they stand upright, the crate should be horizontal, and vice versa.

The framework is set by the level of
- Mounting panels are simple: start-mounted profile or area in which the plant was the first element. Fastening with screws is made through the projection on the edge of the panel. The following strap tight joints and also fixed, the work is simple and does not take much time;

Fastening elements - simple lesson
- All angles are closed with special elements, and they can be attached to the panels, and then you can just stick to the surface of liquid nails.

The panels look good only with careful installation
If you decide to glue the wallpaper, you need to make the repairs of the walls in such a way:
- The surface must be cleaned from dirt and dust and primed. Processing is carried out in two layers;
- Next is the plastered walls. For the operation, use the composition "Vetonit" for wet rooms. It is applied in 1-2 layers, depending on the roughness of the walls and leveling the surface. Sometimes you may need a third application to bring the plane to the ideal;

Caulking can eliminate all the bumps on the walls
- After drying, the surfaces they should be completely leveled by a float and nazhdachki. Processing is done in a circular motion, the control plane is made by means of a bulb. If you find flaws, they can podshpaklevat, and then wipe;

Grinding will erase all small flaws on the surface
- Mills are cleaned from dust and primed again. After that, they can be glued wallpaper you selected.

With the wallpaper can give a very original kind of apartment sanitary
Step 8 - Ceiling Finish
We will understand how to make a false ceiling.
The technology is also suitable for fastening drywall and panels and consists of the following:

The scheme is simple workflow
- The first level via otcherchivayutsya perimeter lines which will exhibit future design;
- For wall mounted guide profile. For this purpose holes are drilled dowel quick installation, the length of which can be from 4 to 8 cm depending on the strength of the surface;

It is important to consolidate the guiding elements exactly
- Basic Profile will be placed with a pitch of 40 centimeters. Through their passage to the ceiling mounted pendants. Further supporting elements are exposed on line screwed to the guide strip and are exposed on the level, after which the suspensions are fixed in position;

Such frame withstand high loads
- Mounted on the frame chosen finishing material. Remember that the walls and ceiling should be combined, so select the appropriate shade when using panels. Plasterboard is fastened with screws, which are located every 15 cm indented from the edges of 2 cm;

It is important to firmly attach the panel to each other
- If gypsum board was attached, the surface should be finished. Initially, reinforced and sealed with stitches, and then the whole ceiling puttied and overwritten for a perfectly flat plane. At the end you need to paint the base in the desired color. It is better to use washable paint.
Step 9 - plumbing installation and other equipment

Installation is fixed to the wall decoration
It is important to remember one caveat - the installation for a suspended toilet bowl is placed in advance and sutured drywall or other material. In this case, you need to set up the construction of walls, then just fix the toilet.
As for the traditional options, the technology looks like this:
- First, let's fix the corrugation on the inlet pipe sewage and combine it with a toilet. After that, the toilet is exposed in the right position, corrugated flexible, so it can be moved without problems. It is important to control the offset from the wall, so that the tank is not limited by the surface;

It is important to arrange the structure so that the bottle is not rested in the wall
- On the floor is marked the position of the toilet soles. For simplicity, we can outline it and mark drilling point. The holes are made by a drill on concrete required diameter. Across the tiles have to go through a special drill ceramic, so as not to damage the surface;

Partitioning allows you to fix the optimal position of the design
- After drilling holes in them are put dowels. The toilet is in place and fastened hex screws, under which lay a rubber washers to prevent damage to the plumbing. After fixing the cap fasteners are closed decorative caps;

Tighten the fasteners must be carefully not to damage the toilet
- In the last connected water, and place the sole interface with the toilet floor is sealed with silicone sealant;
- What sways shells, then all is simple. They are fixed either on brackets that are supplied or the plugs in the wall. You need to fix the structure as described in the instructions, which always comes with the product. In the last connected water and drainage system.

shell mount - simple operation
Step 10 - Installation of doors
This process looks like this:
- The door leaf is removed from the box, if it is standing on it. Thereafter, the frame is inserted into the opening and level aligned. To design are arranged as needed, side and top insert pieces of wood or plate. Check the position of the box on all sides, it should be set perfectly straight;

Box initially fixed into cubes of suitable size
- If the door leaf is heavy, the box must be secured to the slopes with dowels. That they could not be seen, fasteners located in the hinge locations and under the slot for the latch. When attaching constantly monitors the level of that structure is not moved;

When fixing the level is checked constantly
- Next, put in a box canvas. It is necessary to check the geometry of the frame and fix it in the desired position. plate can be inserted to comply with the desired clearances between the door and the frame;
- Applied polyurethane foam, which is to fill a gap on the perimeter of the opening and fasten the box in the desired position. Spread part of zigzag movements and do not put too much. The foam tends to expand, and the surplus will climb on all sides;

Foam filled all joints
- After 12 hours the excess foam can be cut. This is done with a sharp knife, work carefully and do not cut too much;
- If the box is thinner than the wall, you need to install additional elements on one side of the opening. If the box has slots, the straps just cut to the desired size and snap if you ordinary boards, they can be glued to the foam core or fixed with screws;

Finishing panels make an opening trim
- The last casing is attached. If the box has slots, it just snapped, and if you have a normal variant, the finishing nails are used for fastening. Pick them in the color of the surface, and they are almost invisible.

Platbands nailed with finishing nails
Output
From the article, you learned how to competently carry out repairs in the bathroom. Videos in this article will help you understand the topic better, and if you still have questions, please write them in the comments below.