Summer terrace to the house - a detailed guide for the construction of 6 stages
Table of contents
-
1 What is the terrace, and why it is needed
- 1.1 Technical features outdoor terraces
-
2 Construction of the summer terrace
- 2.1 Stage 1: site selection and design work
- 2.2 Step 2: Preparation of tools and material procurement
- 2.3 Step 3: The foundation arrangement
- 2.4 Step 4: production of sex
- 2.5 Step 5: Set side fences
- 2.6 Step 6: The installation of the canopy
- 3 conclusion

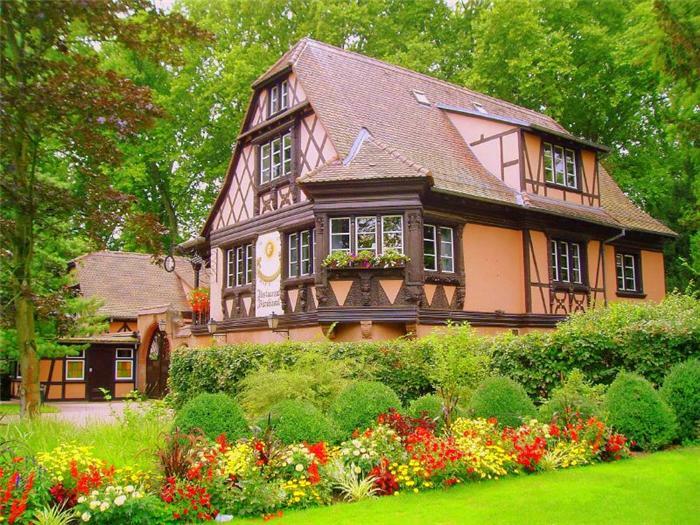
Terrace does not have to be rectangular, it can be any shape.
You want to do outside his home a cozy quiet place for a family holiday in the fresh air? This article describes the various options for small architectural forms for holiday relaxation and leisure. I also tell you in detail how to attach an open terrace to the house.
What is the terrace, and why it is needed
Many residents of country houses often confuse pavilions, terraces and verandas. Next I will try to explain what it is, and how they differ from each other:
- Terrace - a flat open area designed for recreation of residents and visitors during the warmer months. It is characterized by the following features:
- By location, there are terraces, Attached directly to the home or to the bath, and there are separate, installed at some distance from residential buildings;
- To eliminate the flooding water during heavy rains, flooring usually located at 150-500 mm above ground level;
- Along the perimeter established low decorative fence, and top mounted light shed from the rain and sun;
- sitting area on the terrace equipped with a set of garden furniture, barbecue or barbecue stove.

If you allow the size and layout of the site, even a small outdoor swimming pool can be placed on the terrace.
- Veranda - a kind, large unheated enclosed porch, which is attached to the first or ground floor of a country house:
- Veranda is built on a separate tape or pier foundation. In some cases, it is mounted on a common foundation of an apartment house;
- Floor veranda usually located on the same level with the finished floor in the apartment building;
- The lower part of the walls vsploshnuyu sutured, and the upper half is set panoramic stained glass;
- The roof has a capital structure, and is a continuation of the residential building roof;
- On the veranda there are usually two doors: one facing the street and the other in the living room.

On the enclosed porch can be equipped with a full kitchen, living room or dining room.
- arbor - a free-standing structure made of wood, brick or metal. This vacation spot is usually located in the yard, in the garden or on the waterfront:
- Pergolas can be at a considerable distance from the house. They are installed on your own belt or columnar foundation;
- The arbor has its floor, supporting pillars, side walls and roof of capital;
- The walls can be fully open, half open, latticed or glazed;
- Inside the gazebo set outdoor furniture, grill or barbecue stove.

For freestanding gazebo often parked outside terrace.
Technical features outdoor terraces
Among the garden described the architectural forms, the most popular option is considered a summer terrace, and attached to the house. There are several reasons:
- manufacturing simplicity. To build their own summer terrace on the site are quite capable of any handyman even without assistance;
- Low price. For its production does not need the use of expensive building materials or machinery rental;
- Low weight. Easy open platform can be installed on site with any terrain on any type of soil;
- Independent design. Any wooden houses eventually dry out and shrink. Attached terrace is mounted on a separate foundation, and is not associated with the structural elements of the house;
- outdoor terrace with a low fence does not close the panoramic view from the windows and not prevented from entering the house of sunlight.

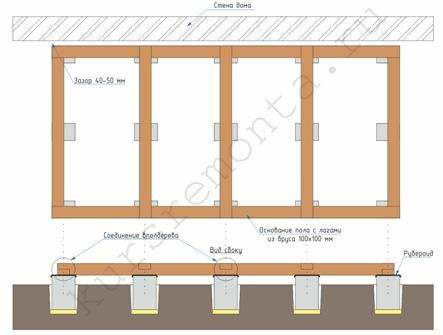
Between the base and the carrier elements terrace house must remain 50-100 mm gap.
Structurally, any summer outdoor area consists of the following elements:
- Foundation. Most often, the construction of terraces to the house is done in a light pier foundation. In some cases, it is set directly on the ground with bedding sand and gravel;
- Flooring can be of three types:
- Wooden floor decking floor board - laid on the longitudinal carrying logs, which are based on the pier foundation;
- Plastic decking - hollow bar of a polymeric material with simulated colors and texture of natural wood. They are mounted as well as the board, but have a much higher strength, abrasion resistance and durability;
- Paving tiles or flat polished stone - laid on the subgrade over sand and gravel backfill.

Plastic decking looks like a real, is much longer, and does not require any maintenance at all.
- side protection performs protective and decorative functions:
- Usually made of wood or metal in the form of openwork lattice fence or railing with rather narrow;
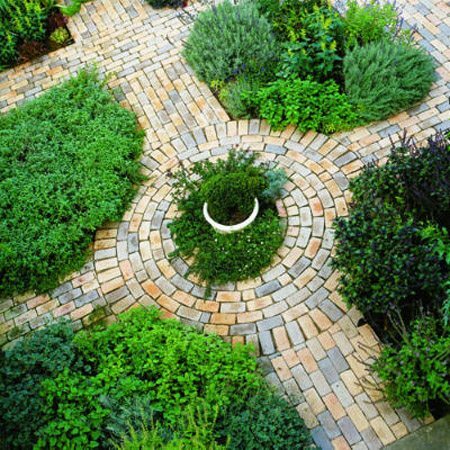
- To create shadows on the perimeter planted a hedge of tall dense shrubs or climbing plants;
- For protection against wind sides sealed transparent molded polycarbonate or tempered glass 8-10 mm thick;
- In cold regions, and short summer, it is best to approach all-weather covered terrace. In this case, it is equipped capital roof and front door, and install double-glazed windows that open on the perimeter.
- shed not save you from heavy rain with the wind, but will protect against light rain and sun. Sheds may have different constructions:
- Folding fabric Elbow awnings that attach to the front of the house;
- Removable awning cloth, which is mounted on a metal or wooden frame;
- Folding umbrellas or bells - each of them is mounted on a separate rack;
- Light rigid roofing materials (metal, Ondulin). For such a pass is made base frame, and in the corners of the site set the supporting pillars.

Canopy smoked polycarbonate is inexpensive, has a low weight, creates a shadow, and at the same time allowing the natural light.
I brought here exemplary solutions for the open-air terrace, adjoined to the house. Which of them is better to stay - you decide for yourself.
Construction of the summer terrace
Stage 1: site selection and design work
Before you attach to the house the terrace, it is necessary to choose the right place for its location:
- Rest area should be located in the courtyard at the rear side of the house;
- On both sides of the horizon, it is preferably oriented to the south or south-east;
- It is desirable that with a panoramic scenic view of the garden, forest or water;
- If a house or room, located on a slope, terrace is better to attach to the bottom of the building;
- The distance from the rest zone to the street toilets, dustbins or cesspool must not be less than 10 m.

Terrace near the bath is better to locate on the west side, because the steam usually go in the late afternoon when the sun is coming to a close.
For your own convenience before work necessary to prepare a simple technical design of future buildings. In it the following items should be reflected:
- Plan your site with the designation of the house and tied to elevations;
- A detailed sketch of the terrace with the projection in three planes and showing all the principal dimensions (length, width, height) in mm;
- Section and sections responsible nodes and supporting structural elements;
- List and the number of materials used (I advise you to specify a small margin).

Sketches and cross-sections for the project can be drawn by hand, the main thing that you understand all the construction technology.
To determine the optimal size for a future terrace, I advise to proceed at the rate of 2-3 m² free floor area for each of the tenants or regular visitors of your home.
Step 2: Preparation of tools and material procurement
To work you need a common set of household tools that should be in any private home. Building materials will have to buy separately:
Instruments:
| Illustration | Set of tools |
 |
Hand tools:
|
 |
Carpentry tools:
|
 |
Power:
|
 |
Gardening Tools:
|
materials:
| Illustration | material list |
 |
Building materials for the foundation:
|
 |
Timber:
|
 |
Supporting materials:
|
 |
fasteners:
|
Step 3: The foundation arrangement
Enclosed garden to the house starts with the fabrication of columnar foundations. If you do not plan to raise the floor above ground level, it is possible to lay paving slabs on a gravel bedding.
| Illustration | Description of work |
 |
Planning work:
|
 |
Installation of pier foundation:
|
 |
Floor paving slabs:
|
Terrace floor of paving slabs makes sense to do on the high flat and dry areas with low groundwater levels. If your site is located on the slopes or in the valley, then I recommend to install the pier foundation.
Step 4: production of sex
The following provides detailed instructions for assembling a floor covering of the grooved floorboards and plastic decking:
| Illustration | Description of work |
 |
Installation of the base of the timber:
|
 |
Laying additional lag:
|
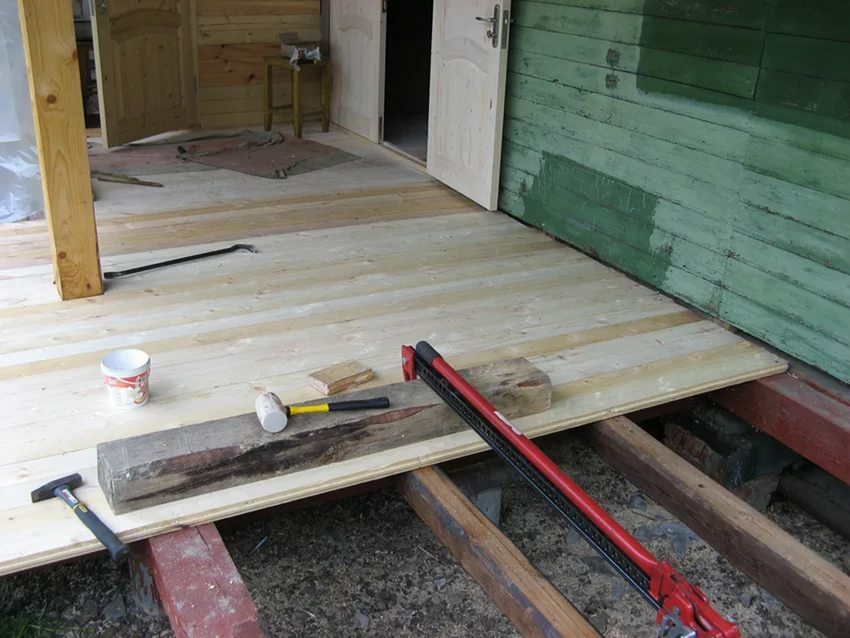 |
Wooden Flooring:
|
 |
Fixing decking:
|
To not rotted wooden terrace over two years before the final assembly of all parts of the tree have to doubled on all sides to handle antiseptic impregnation for exterior use.
Step 5: Set side fences
Here are a few variants of the side fences terraces. It can be made from metal, wood, glass or living plants:
| Illustration | Description of work |
 |
Fence made of wood:
|
 |
Metal fence:
|
 |
Hedge:
|
 |
Fence made of glass:
|
Step 6: The installation of the canopy
For your comfort in all weather outdoor terrace have to be shed. In this section I will offer a few options, and you can choose at its discretion:
| Illustration | Description of work |
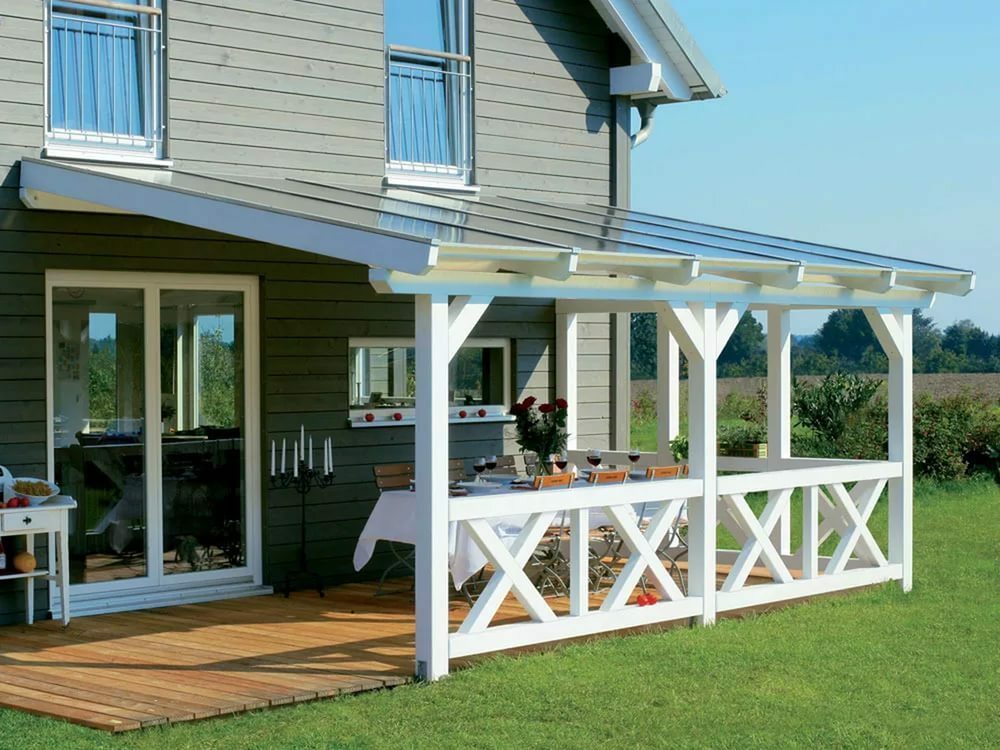 |
Rigid roof:
|
 |
Sliding cloth awning:
|
 |
Elbow awnings:
|
 |
Folding umbrellas:
|
conclusion
Now you'll be able to build his home near the open summer terrace, on almost every taste and every budget. If you have something to add, please contact me in the comments, and be sure to watch the video in this article.