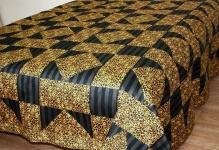
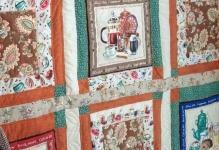
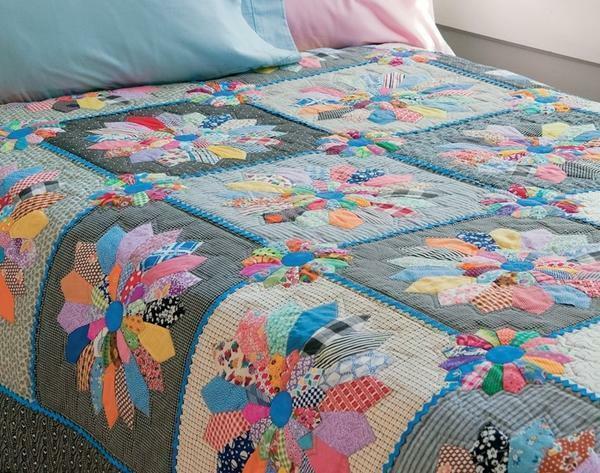
 Patchwork quilt in patchwork technique can be made by yourself, and the accessory will give the interior a cosiness and originality The quilt is considered a symbol of home comfort and mother care in many countries. The tradition to sew bright beautiful canvas originated at a time when this was a real necessity: the whole fabric was deficit. Now the tradition has returned with a new force: patchwork quilts and gizmos made in the patchwork technique, have been at the peak of popularity for several years.
-
- Patchwork materials
- How to sew a quilt in the patchwork technique
- How to combine colors and textures for a quilt.
- Combination of colors and textures for tailoring a quilt( video)
- How to sew the quilt itself: master class for beginners
- How to sew a quilt( video)
- Quilted blanket with your own hands: schematics( photo)
Materials for patchwork
If you seriously decide to do patchwork, it is recommended to prepare all necessary materials in advance. Judging by the set of tools, patchwork is a unpretentious business, accessible to everyone.
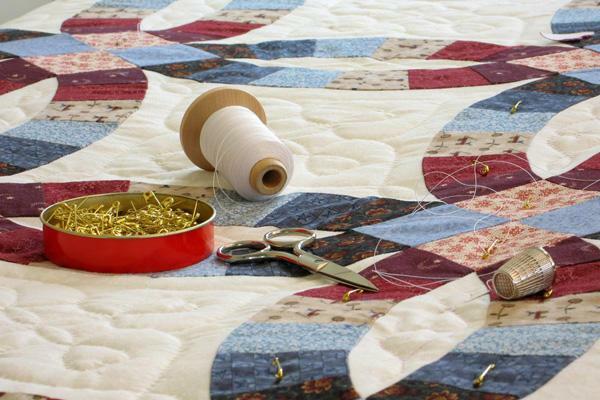 For the manufacture of a quilt, simple tools are required that are available for every housewife
To start the patchwork, you will need:
- Fabric. Of course, you can traditionally use old scraps of textiles from the grandmother's chest, but they will have to tinker with them before using it in the case. The best option, promising a guaranteed success, is the selection of special patchwork fabrics. These are sold in virtually any fabric store.
- Sewing machine. There are no special requirements for the patchwork machine. Amateur home sewing machine is quite suitable for this business. It is desirable that the working surface to the right of the needle is as large as possible. This will simplify the sewing of large items, such as a blanket.
- Rasparivatel. This item is indispensable for highlighting clear squares. The best alternative to scissors in patchwork.
- Iron.
- Pins and needles. These little helpers in patchwork will need a lot. Choose thin quality pins and needles: they will last longer, do not break and do not bend.
- Sewing scissors. Two pairs are useful: for large applications and for small parts and strings.
- Threads. It takes a lot of different colors.
With such a set, you can start work without fear of missing out on any significant trivia. Visit a specialized store and you will find there all these things.
It is useful when you patchwork to carry a magnet or a magnetic needle bed. So your pins and needles can easily be found and rendered harmless to the work site.
How to sew a quilt in the patchwork technique
You will be happy with your decision if you are serious about making a quilt. This bright spot in the interior will complement the atmosphere of home warmth and coziness.
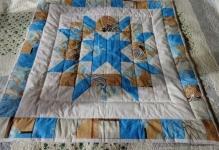
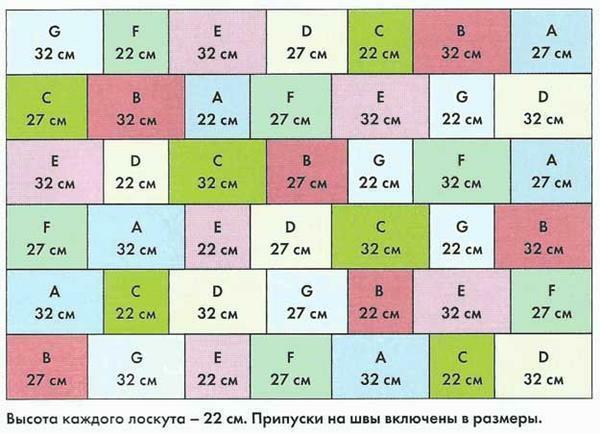 As a basis for tailoring a quilt, you can take a simple scheme for cutting and fastening elements
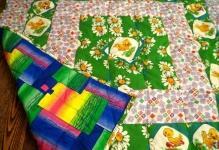
In general, the quilt consists of 4 parts:
- exterior, sewn from pieces of fabric;
- the wrong side, consisting of a single cloth;
- rims around the perimeter of the product;
- filler( for example, sintepon).
Choose quality fabrics for your blanket: natural textiles are best: cotton, cotton, linen.
If you want to make a very warm blanket, then as a filler you can use holofayber. But remember that working with such a thick material can give you a lot of extra trouble!Quilting a thick product can be difficult as a beginner craftsman, or a modest sewing machine.
For making a quilt, natural cotton or linen fabrics are best suited
How to combine colors and textures for a quilt.
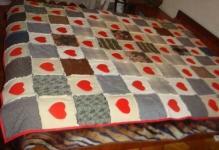
To make the blanket look perfect, you need to choose the right materials for the front side of the product. It is important to observe the rules for the combination of color and pattern, as well as the compatibility of textures.
In general, the patchwork quilt assumes a slight acrimony and negligence, but some recommendations are necessary for compliance:
- The thickness of the shreds must be exactly the same, otherwise the product will look ridiculous. Together, the sewn pieces should resemble a single colorful canvas, rather than a few dozen different colored scraps.
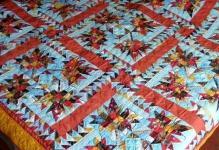
- There must be some logic in the pattern of your blanket. To do this, it is convenient to sew the shreds into identical blocks or strips, and then sew them in turn, forming the front side of the blanket.
- In advance, you should consider the style in which the canvas will be executed. The classic alyapian patchwork is somewhat different from the modern style, where a greater emphasis is placed on geometrically distinct and monochrome blocks. You can also make a decorative element in this technique for the shocking directions of art deco, modern, kitsch.
- When choosing colors, pay attention to the color wheel and the order of the shades. Near the best look either contrasting colors( for example, blue and yellow), or nuanced combinations( for example, different shades of green for one block).Do not forget about the overall color solution of the room in which your blanket will live.
- Do not overdo with segments with a pattern. Too many different patterns on one blanket can disrupt the unity of the composition.
If you decide to use secondary fabric for work, then it must be prepared. Wash, starch and iron the material.
Combination of colors and textures for tailoring a quilt( video)
How to sew the quilt itself: master class for beginners
So if you have done all the necessary preparations, have got patience, creative energy and inspiration, then you can start makingBlankets!
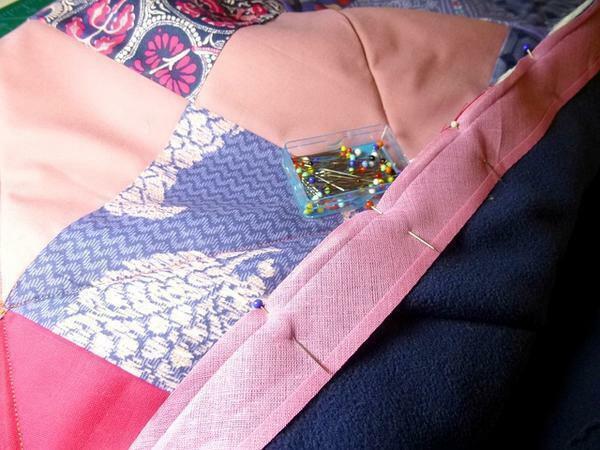 To ensure that the details of the product are not distorted when sewing, they must be carefully fastened with pins and ironed.
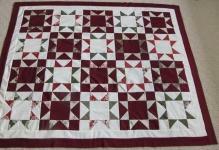
Below is a step-by-step instruction with which you can sew a blanket measuring 1 square. M. In the patchwork technique:
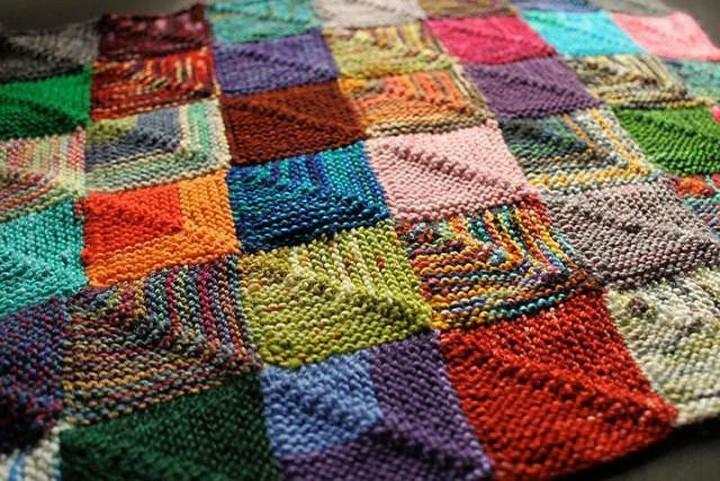
- For such a blanket, 25 squares measuring 20 by 20 cm should be made. To get the details straight and equal, it is recommended to cut them in a pattern. Draw a square of the specified size on the cardboard, and then draw it with a larger square, stepping back from the first line of 1.5 cm. This will be the allowance for the seam. Cut out the resulting border.
- On the pattern, draw a cloth: the outer square will serve to cut out the part, and the inner one will be used for the seam. For the first blanket, take 4-5 kinds of colors. Cut out 5-6 squares of each kind.
- Now position the squares as they should be on the product.
- Now we start sewing!To do this, fasten the first parts with the help of the pins 2 and stitch along the line for the seam. Open the seam and take the next detail. So you need to connect pieces of 5 pieces in a line, and then sew these lines together into a single cloth.
- When the assembly of the bright part is finished, we are going to fix the insulation and the back of the blanket. Take a thin layer of sintepon or fleece, which will be larger than the finished front piece by 3-5 cm on each side, and also of the same size with a plain cloth.
- Sew them together on the inner square( about 97 by 97 cm).Then proceed to the connection of the resulting part to the front side.
- Push the back of the pin onto a few pins;the bigger, the better. Make sure that the materials fit tightly together to make the product even.
- Now you need to properly quilt the blanket: walk through all the seams and perimeter. It is important that the new seam slightly away from the first: about half a centimeter.
- Now gently trim the excess pieces of fabric and insulation. It is important that the parties coincide.
- To close the edges of the blanket, you need to make side strips. Cut out 4 identical pieces of plain cloth( in contrast to the back) with a size of 110 by 10 cm.
- Now it is necessary to draw the stripes: leave 2 cm at the seam turnstiles on both sides and 6 in the middle for the visible edge of the blanket.
- Fasten the rim with pins. Turn 2 cm on each side, and wrap the rest with the rest. It should be 3 cm of fabric, framing the blanket on both sides.
- Gently sew 4 sides, bending excess fabric at the corners.
- Your blanket is ready!
Particularly important in patchwork is attaching parts to pins and ironing edges. If something was done inaccurately, then the entire composition can "float" to the side.
How to sew a quilt( video)
There are different schemes for creating original drawings in the patchwork technique. Having mastered the technique, you can sew plaids and blankets from different fabrics. Like jeans or jersey. Assembly and tailoring will seem to be a creative and interesting activity. Love manual work, and the fair of home craftsmanship will open before you in all its glory!
quilt with your hands: the scheme( photo)