 Prepare the ceiling surface before starting work. In the future, access to the ceiling will be limited to Stretch ceilings became widespread in Europe in the late 80's. Due to its practicality and durability, stretch fabrics have proven themselves in the CIS countries. You can install tension ceilings yourself. To do this, you must always prepare the surface before starting work.
-
- How to prepare a ceiling under a stretch ceiling: Step-by-step instruction
- What is usually done ahead: stretch ceilings or wallpaper
- Install stretch ceilings: preliminary preparation of the room
- Is it true that the ceiling must be primed before the stretch ceiling
- Prepare the ceiling before installing the tension ceiling( video)
How to prepare a ceiling under a stretched ceiling: step by step instruction
 ForPreviously mark the location of lamps, chandeliers. Post the transaction. In the future, this will facilitate the work of installing the tension ceiling
Before installing the stretch ceiling, you must make a preliminary surface treatment. First you need to check the joint of the ceiling and walls. If there are any defects, they must be eliminated. It is also recommended to treat the surface of the ceiling with a fastener.
Then begins the preparation of electricians. This process is the most responsible. On the correctness of its implementation will depend on the success of the installation work. During the installation work you can use incandescent lamps, whose power does not exceed 60 watts. You can also use halogen lamps with a power of no more than 30-35 watts.
If you decide to use energy-saving lamps, there is no power limitation, as these products do not undergo strong heating.
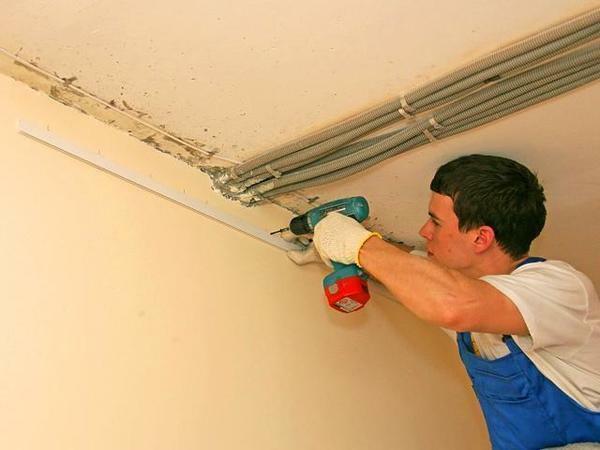
The following is the preparation of the wiring:
- First you need to mark the place where you will install the light sources.
- Further check up working capacity of wires and carry out their wiring.
- At the end you need to calculate the exact location of the fixtures.
After preparing the wiring, it is necessary to clean the ceiling of the previous coating:
- The whitewash must be removed by wetting the ceiling with a soap solution. After that, whitewash should be removed with a sharp spatula. If the whiten does not swell under the influence of a soapy solution, use an acid-base mixture or adhesive.
- If the ceiling is covered with paint, then a special corrosive solution must be applied to its surface. Also, the paint can be removed by hammering.
- If the surface is covered with ceiling wallpaper, then it is necessary to impregnate them with warm water. After that, you need to remove the wallpaper from the surface with a spatula.
- Dismantling the ceramic coating is somewhat more difficult. First you need to get a drill with a special nozzle. If the tile is made of polyurethane, it can be removed with a spatula.
What is usually done ahead: stretch ceilings or wallpaper
Many people have the question: "First glue the wallpaper or install a stretch ceiling?".Experts say that it is best to level the walls first and cover them with wallpaper. After completely drying the wall, you can install a stretch ceiling. The baguette needs to be mounted on top of the wallpaper. In this case, you can mask all the errors in the finish.
However, this sequence has its flaws. If you decide to glue the wallpaper ahead, you can stain them. In this case, you will need to process wallpaper using a vacuum cleaner or a rag.
This problem can be solved if you follow the following sequence:
- First you need to mark the place of fixing the stretch ceiling.
- Then you need to attach a baguette to the top of the walls.
- Then you need to paste the wallpaper.
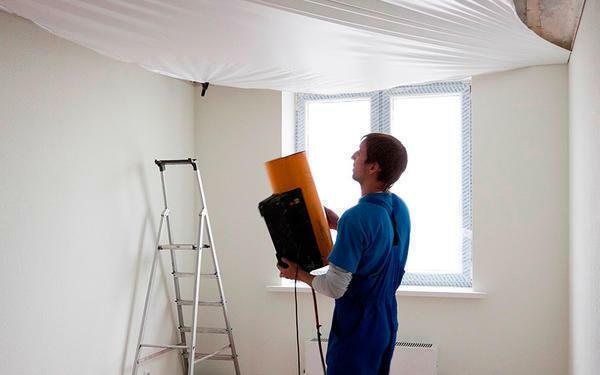
- After the glue dries, you can proceed to the installation work. To do this, you need to use a heat gun.
You can also use a large skirting ceiling. When you install it between him and the ceiling will be a small gap.
Install stretch ceilings: preliminary preparation of the room
 Remove the cracks by covering the gap with gypsum. At the end, primer treatment is mandatory.
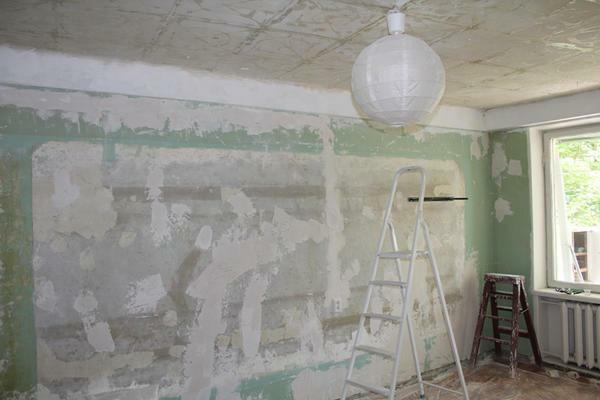
Before starting the installation of the structure, it is necessary to pre-prepare the room. Technique, all pieces of furniture, paintings, hanging cabinets need to be taken out. If you have a closet in your room, install a special bar for attaching the panel to it. It is also desirable to cover the floor covering with a sheet of cardboard.
Also do not forget to prepare the surface of the walls. Dusty work is desirable to be done before the installation of stretch ceilings, as dirt can settle on the canvas.
When working on walls, follow some recommendations:
- If you are building walls with liquid wallpaper, you need to clean them more thoroughly. Cracks and microdefects are recommended to be eliminated. Another defect can be sealed with gypsum, and then plastered. Such treatment will help to get rid of even deep cracks.
- It is possible to paste gauze impregnated with PVA on the cracks.
- The surface of the walls must be treated with a primer. Then mark the bottom point of the structure.
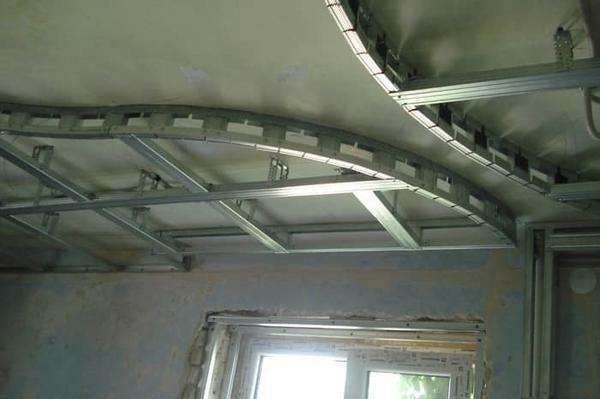
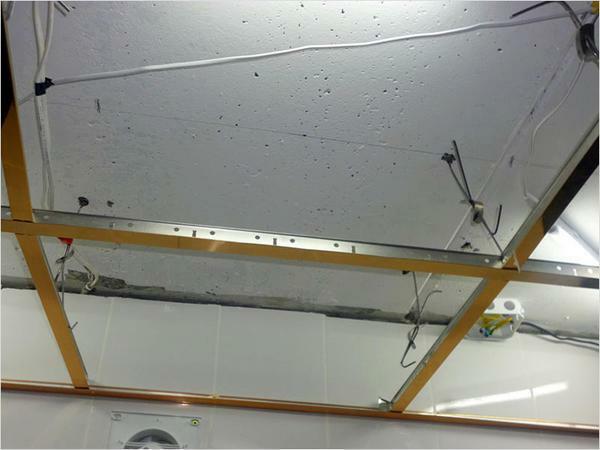
.It is at its level that the profile will be fixed. If you are going to install a multilevel ceiling, markup must be done separately for each level. In this case, the distance between the overlap and the guide profile should be increased.
Is it true that the ceiling must be primed before the tension ceiling
 Observe the priming sequence of the ceiling. Do not overdo it with water, but the primer will be too liquid
Many people do not primer the surface before installing the stretch ceiling. Experts believe that before installing the suspended fabric, it is necessary to primer the surface. Choose a primer with a deep penetration. They will help to avoid the appearance of fungus and mold in the future.
Primer mixture can be made by hand. To do this, mix 2.5 kilograms of hydrated lime, 200 grams of laundry soap and 100 grams of drying oil. In a separate container, stir the lime with 4 liters of water. Then add to the resulting mixture linseed oil, 3 liters of boiling water and soap. Stir the solution thoroughly.
Primer in the following order:
- Use the brush to process the corners and joints of the surface.
- After this, apply the primer to the ceiling with a soft pile roller.
- After the primer layer has dried, apply a second layer in the perpendicular direction.
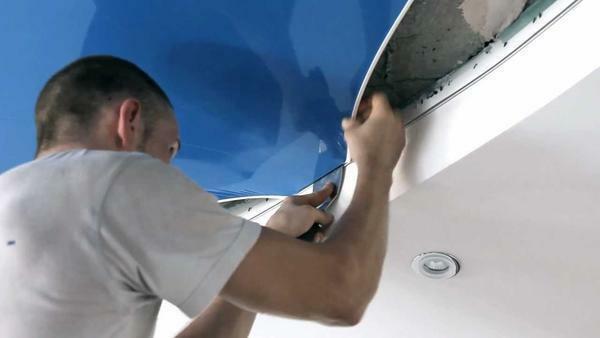
Preparing the ceiling before installing the tension ceiling( video)
It is quite easy to prepare the walls and ceilings for the installation of the suspension. Before installing, be sure to remove any microroughness on the surface. After that, check the operation of the wiring and make the primer of the ceiling. Also, do not forget to take out of the room furniture and equipment. Glue the wallpaper, set the backlight and trim the floor after finishing the installation of the suspended ceiling.