 Armstrong Ceilings in our time have become very popular due to the low cost and durability ceilings type Armstrong are very popular. They are widely spread due to low cost and durability. In addition, the installation of such a ceiling is carried out in the shortest possible time. In order to properly assemble the construction yourself, you should follow simple rules and make preliminary markings.
-
- DIN-rail for ceilings Armstrong:
- mount technology Install suspended ceiling Armstrong with his hands
- How to assemble a suspended ceiling Armstrong: step by step instructions
- mount a false ceiling type Armstrong
- Repair suspended ceilingsArmstrong with his hands
- mounting ceiling Armstrong( video)
DIN-rail for ceilings Armstrong:
mount technology Before Preeceupit for laying tiles, you need to install the supporting rails. It is quite easy to do this. The main thing is to choose the right size rails.
Before mounting the carrier rails, you need to fasten the hangers. These details are needed to ensure that the slats are snug against the surface and not deformed. Suspensions should be fastened in steps of 1.5 meters.
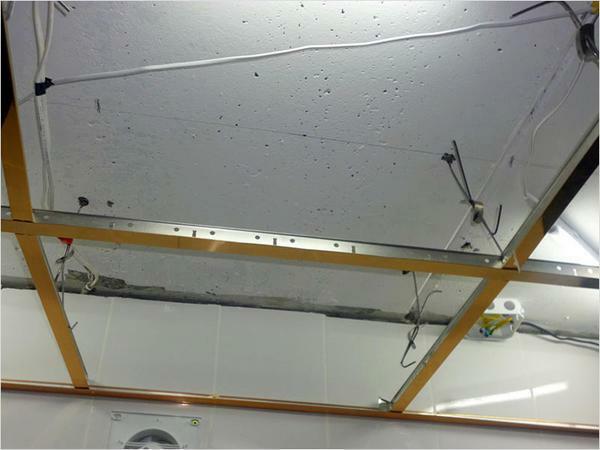 Carrying strips can be connected together and used to set the ceiling in large rooms
experts recommend to opt for rail, which is 3.5 meters in length. They are universal. It is desirable to use locks to fasten the rails.
During mounting suspension consider a number of nuances:
- Cravings with an eye on the need to strengthen the ceiling with the help of an anchor. If you do not have the opportunity to use this part, use an ordinary screw.
- Be sure to attach the hook rod to the carrier rail.
- Be sure to attach the spring suspension. It will help you to regulate the length of the structure.
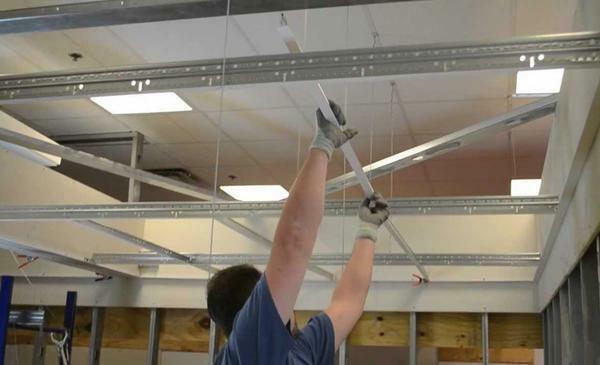
Installing Armstrong suspended ceilings
Installation of the suspended ceiling begins with marking. Initially, it should be noted the horizontal slabs. Remember that rational markup of contour lines will allow you to properly assemble the node. After you have defined the contours, proceed to marking the notches.
Screw marking scheme:
- Set the notches in each corner of the room. During this operation, it is recommended to use the laser level. This tool will help you make more accurate markup.
- Using a tape measure, determine the markings between the floor and the resulting notches.
- After you have measured the distance, alternately connect each notch to each other. To do this, use a specialized tracer.
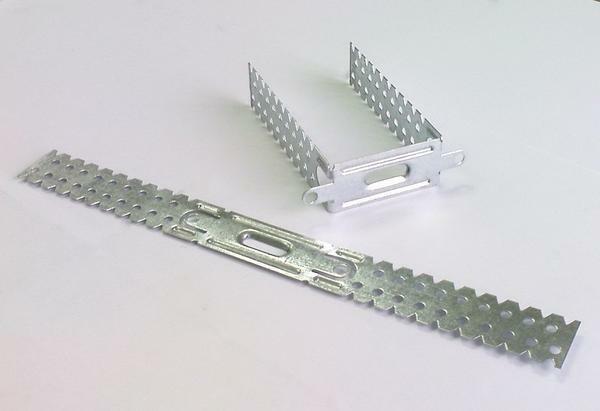
 as fixing materials for ceilings Armstrong, use nodes, suspensions and profiles T-shaped configuration
After you have marked the surface, perform communications and wiring. Remember that the communication nodes should not be snug against the plates. Also, before starting the installation of the frame, select the appropriate lighting fixtures. It is recommended to use spotlights.
Framing technology:
- Trim the wall profile and attach it to the wall. To fix the product, use a dowel and self-tapping screws. If you install the Armstrong ceiling in a wooden house, you can fix the wall profile using nails.
- The load profiles are then installed.
- Install the suspension. Do not forget to align the carrier bars after this operation. Otherwise, the structure may collapse.
- Attach longitudinal and transverse connections. You can use both a cross and a parallel mounting scheme.
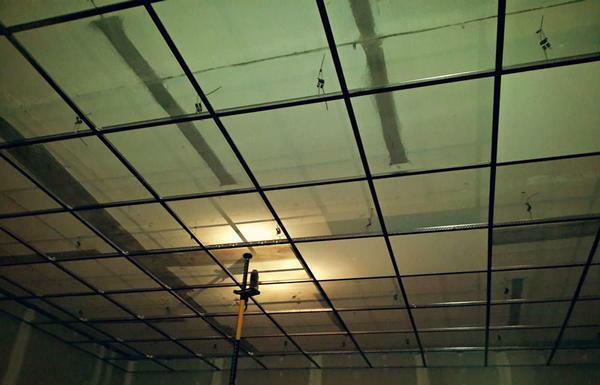
How to assemble a false ceiling Armstrong: Step-by-step instruction
After you have assembled the frame, you need to start installing the plates. Before this, it is desirable to make sure of the strength of the frame.
Installation is made in the following order:
- Alternately lift the contents of each cell.
- Tilt the contents of the cell and enter it into the interstitial space. Then you need to carefully place the plate in the cell. Make sure that the fixing of each tile is strong.
- Install the fixtures and connect them to the wiring. Do this after you have disconnected the wires.
- Install the blind plates.
 If the scan frame you find any defects, it is recommended to dismantle structures and then assemble it again
If you plan to install the raster lamps, which have a high specific weight, they need to be installed on individual hangers. Otherwise, the frame of the ceiling will be an extra load.
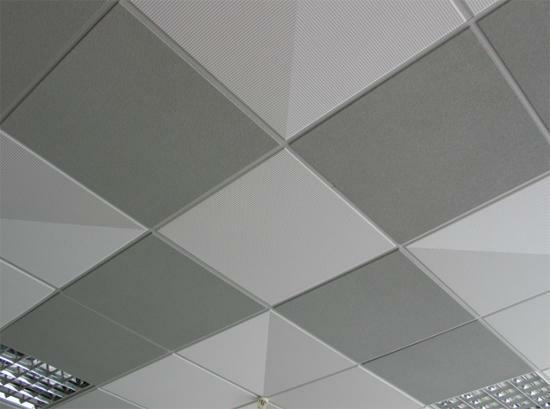
mount a false ceiling type Armstrong
bearing load exerted on the frame made of metal sheets. Usually it has a cellular structure, however, in some cases the frame consists exclusively of longitudinal elements.
Usually, a suspension with a U-shaped configuration is attached to the ceiling. There are special holes in the part. Alternatively, you can use adjustable suspensions. They allow you to adjust the height of each section separately.
 Armstrong ceiling can be fixed by means of suspensions that can be adjusted in height
unit is mounted ceiling type Armstrong using:
- profile. They are made of metal. The profiles are fixed using a spring lock.
- Fasteners.
- Suspension. They are regulated by the height of the blocks.
Repair ceilings type Armstrong with his hands
Repair ceiling type Armstrong - a simple process. Before you start repair work, you need to dismantle the structure. To do this you will need a spatula, a knife, a screwdriver, nippers, pliers.
on the ceiling dismantling instructions:
- Bend the profile, which is set at the last hollow tiles. To do this, use wire cutters or screwdrivers.
- Remove the blind plate.
- Remove the brackets and other plates.
- If necessary, remove the supporting and angular profiles.
 If there are sagging areas on the ceiling, then you need to replace the fastening components. In some cases, it is advisable to replace all staples and embedded hooks
After dismantling the ceiling, you can start repair work. Deformed plates and fasteners must be replaced. If the cause of deformation of the canvas was the flood, then you need to first dismantle the lighting fixtures, and only then disassemble the false ceiling.
Mounting the Armstrong ceiling( video)
Mounting the Armstrong-type ceiling itself is quite simple. The main thing - before the start of assembly correctly apply markings to the ceiling and walls. Also, you need to take care of the installation of communications and wiring in advance. To fix the components, use dowels and screws. When installing the ceiling Armstrong in a wooden house is allowed to use nails.