 Repair is not an easy task, which requires both cash investments and your work. Unfortunately, a lot of repairs from the series "quickly, simply and with your own hands" is completed with defects that you have to correct later. And all because the repair technology is broken. For example, insufficient attention is paid to surface preparation or some points are skipped.
-
- Puttying of ceilings for painting: why do you need
- Than to coat the ceiling for painting: what material to choose
- Putty for the walls of the ceilings for painting: preliminary preparation
- How to properly fill the ceiling for painting:
- Leveling of the ceiling with the starting putty( video)
- Finishing putty for the painting: how it is done
- How to seal the joints of plasterboard sheets
- Ceiling of the ceiling with your hands(Video)
Puttying of ceilings for painting: what is needed for
If you answer correctly, then it is worth considering all types of ceiling coverings to be putty.
Puttying on the following surfaces:
- Old plaster. If plastered ceilings for a long time, defects on them are inevitable. Temperature and humidity fluctuations, mechanical injuries - and plaster crumbles, there are cracks and potholes. Therefore, before painting, the surface must be unsoldered. In some cases, the plaster is removed completely. But if the ceiling is very uneven, it makes sense to replace the painting with a hanging construction.
- New plaster. And in new buildings, ceilings are imperfect. First, the house shrinks - these processes lead to cracks. In addition, the new plaster is a very coarse coating, the basis of which is ordinary river sand. It feels rough to the touch. The putty is fine-grained, which is necessary in order to make the surface smoother.
- Drywall. Sheets, although glued tightly, there will still be gaps between them, which must fill the putty. In addition, if the ceiling is curved, the curved lines will remain broken, and puttying and painting will make them more flexible and soft.
 Ceiling alignment - a necessary procedure before painting
In short, shpatlevanie necessary almost any painting of the ceiling. Is that if you recolor the wallpaper, which is still in good quality, you can skip this step.
Than to coat the ceiling for painting: what material to choose
Fillers are made on different bases, differ in their characteristics. You have to choose the putty that will match the features of the room. For example, in the bathroom and in the kitchen, choose a moisture resistant filler, as after the repair in the room there will be increased humidity. And paint the ceiling better with paint with the same water repellent composition.
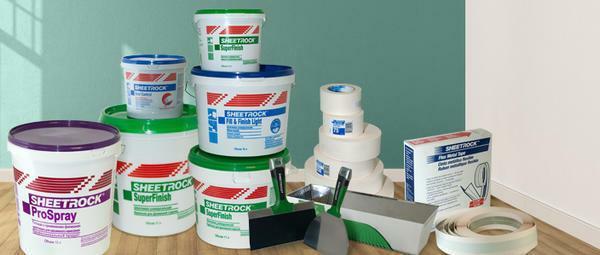
You can purchase the filler both on a gypsum base and on cement. But the composition of cement is harder to wear. Pick up putty can be marked, moisture resistant has the designation LR +, and the usual KR.
 Putty - one of the most basic materials of the ceiling treatment before painting
The repair requires a mixture of both starting and finishing. As for the type of mixture( ready-made or dry), experts advise purchasing still dry, because the composition quickly hardens.
Puttying of walls of ceilings for painting: preliminary preparation
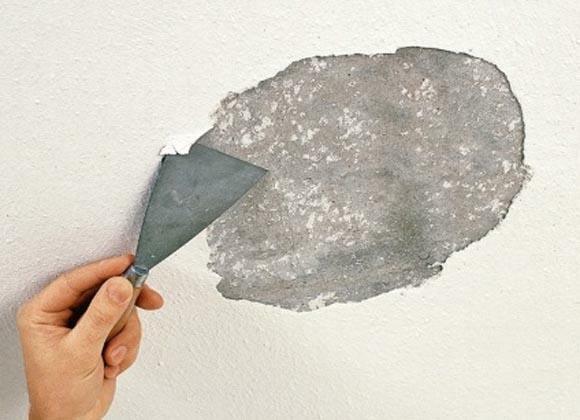
Work begins with cleaning the ceiling. Old paint, exfoliating plaster must be removed.
The ceiling is cleaned in two stages:
- The ceiling is wetted with water two, and preferably three times. It is easier to do this with a paint roller or a conventional sprayer. At the same time, protect furniture and other interior elements.
- Then take the steel spatula, remove all the impurities from the surface, as well as the cracked plaster. If there are areas affected by the fungus, these covers need to be removed.
The next step is the priming of the surface. It strengthens the surface, impregnates concrete and the plaster that remains, with liquid polymers. When they freeze, a thick and durable layer forms on the ceiling, and under temperature fluctuations, as well as "whims" of humidity, it will not break down.
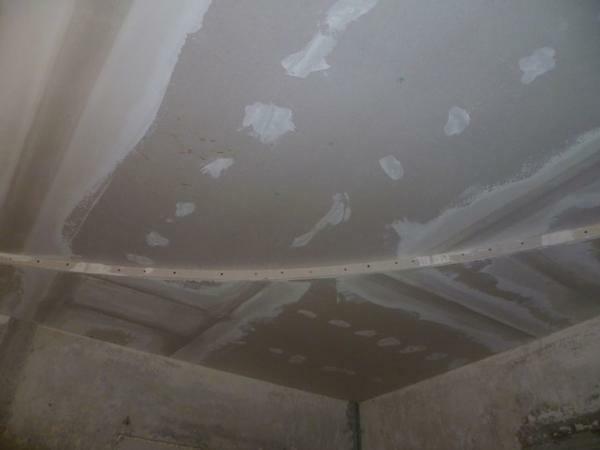
 Before laying the ceiling, it must be cleaned of all previously applied
. The penetrating primers increase the adhesion of the surface with the putty compound. Well, a porous primer, moreover, seriously reduces paint consumption.
How to properly fill the ceiling for painting: start of the work
First, in all indentations you apply the starting putty, do it better with a spatula of medium width. Putty will necessarily give a small shrinkage. Therefore in deep deepenings the procedure will repeat three times. Before each subsequent putty let the first layer dry out.
After this, the ceiling is usually ground. You can do this manually or with a special grinder. All visible defects will be removed. If it is a question of a drywall, joints of sheets need to be pasted with a paper tape.
Well, then proceed to the final or finish putty.
Leveling of the ceiling with the starting putty( video)
Finishing putty for the painting: how it is done
First of all, do not forget to prepare a respirator, any work should be carried out with the necessary respiratory protection.
With sandpaper, the surface must be cleaned so that the putty is better in contact with the surface. It is applied by one or two layers, each layer from about 1 mm. Do it easier with a wide spatula.
Very often, only the defective places are sealed with the finishing putty, but experts advise still to fill the entire ceiling so that the layer is smooth and uniform.
Completes the process of preparing the ceiling for painting grinding and re-priming. And when the surface dries, you can paint, not being afraid that the paint will fall off.
 Finishing putty must be applied quickly and with a thin layer
How to seal joints of gypsum boards
To accomplish this task, arm yourself with two spatulas: medium and wide. Many prefer to work as a grater and trowel, but with respect to drywall it can be said that this will not be very convenient.
The joints are as follows:
- First the joints of the sheets are reinforced so that no roughness or roughness remains;
- The screws are then crossed in a crosswise manner - the mixture is applied along and across to better fill the grooves of the self-tapping screws, completely hide their heads;
- Next, the corners are grounded, first one of the sides of the corner shpakyaetsya standard, when the half of the joint dries, shpaklyuetsya second half of the corner.
In addition to tools and materials, be patient with patience and repairs will be excellent.
Ceiling of the ceiling before painting is a mandatory procedure that will ensure the new coating durability and durability.
Ceiling of the ceiling with your own hands for painting( video)
Ideally, if you select materials of the same brand, so you do not have to doubt their compatibility.
Good repair!