 Beautifully and stylishly to divide space in a room it is possible by means of gypsum cardboard partition Very often some premises demand re-planning, replacement of old walls or creation of new dividing partitions. The most popular material for making structures is gypsum board. This is a very popular finishing material, it is used for both ceilings and walls. Installation of partitions from plasterboard is a rather quick way to build a new wall.
-
- Installing drywall partitions in the apartment
- Types GCR: installation
- partitions Phased installation of drywall
- How to build a partition of plasterboard with their hands
- stepwise installation of partitions from drywall( video)
Installation of plasterboard partitions in apartment
Partitions made of plasterboard are in demand both in apartments and offices. Like office space, apartments often require the separation of existing space, the creation of decorative elements.
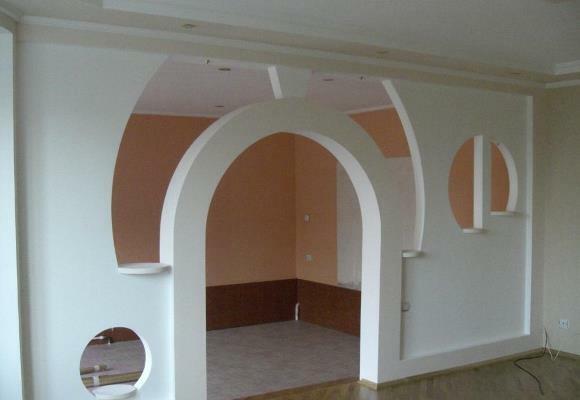
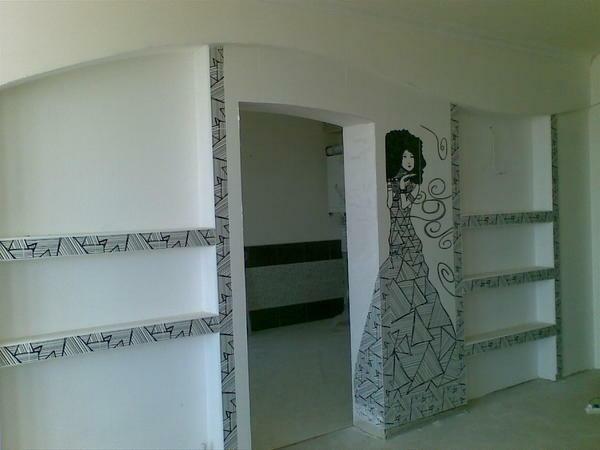 Beautiful partition of gypsum board can easily become an interesting accent in the interior of the room
Installation of gypsum boards in the apartment can be performed:
- As a partitioning room into zones;
- Complete replacement of brick partitions;
- Separation of the combined WC;
- Decorative component of the interior.
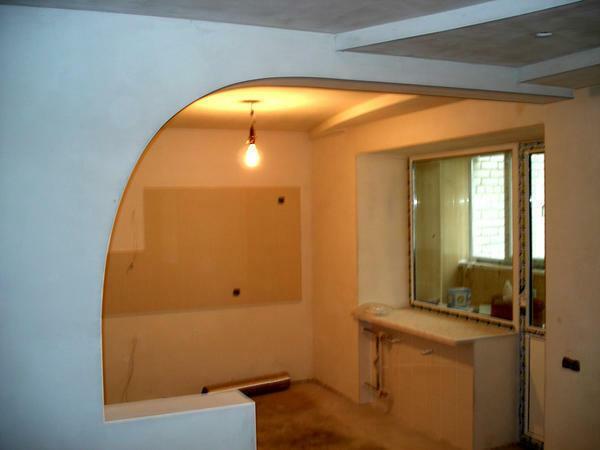
Sometimes the shortage of square meters of the total area of the apartment is compensated for by a fairly large room, which can be divided into two by using a plasterboard partition.
It is also popular to install a partition from the GKL as a decoration in the form of various curly patterns. An excellent option is the separation of the bathroom, the partition is much thinner than the brick walls and accordingly occupies less of the useful area. It is worth noting that the installation of such walls does not take much time, most importantly - the partitions are easily dismantled if necessary. Lightweight materials do not carry a significant load on the construction of the entire building, thus eliminating the dangerous deformation of the floors.
Types of GKL: installation of partitions
GKL are gypsum sheets with cardboard casing on special glue. Drywall exists in two categories of quality - "A" and "B".Category "B" has some geometric inaccuracies, category "A" is ideal from all sides. Factories put labels on each sheet, mainly on the market there are sheets of category "A".
The edges of the sheets are different for easy joint processing:
- Straight edge - applies when there is no need to seal the seams;
- The thinned edge is closed with reinforcing tape and putty;
- Face semicircular edge - the seam is closed with a putty;
- Semicircular face with thinning can be closed only with putty or using reinforcing tape and putty;
- The rounded edge - the seam is plastered.
 Before proceeding with the installation of the partition, all necessary materials must be purchased in advance for repair work.
The type of edge defines the further amount of work. From the GKL, the installation of partitions should be carried out from a certain type of sheet.
Some of its types are completely inappropriate for the installation of partitions, so you should know their types:
- Wall - length 2,3 - 2,5 m, width 1,2 m, thickness 12,5 mm, gray color, core without additives;
- Ceiling - length of 2 - 2.5 m, width 1.2 m, thickness 9.5 mm, gray color, is used for multilevel ceilings, niches and arches;Moisture resistant
- - length of 2.3 - 2.5 m, width 1.2 m, 12.5 mm thick, green color, impregnated with the antifungal compositions and special means;
- Fireproof - length 2,3 - 2,5 m, width 1,2 m, thickness 12,5 mm, gray color with red markings, inside there are reinforcing additives and fibers;
- Arched - length 3 m, width 1.2 m, thickness 6.5 mm, with fiberglass yarns to strengthen the core.
So for the installation of partitions you can use a wall, fire-resistant gypsum board and, if the room is wet - moisture resistant. There are a lot of types of GKL and their price is different, the cheapest one is the ceiling type.
Phased installation of drywall
Popularity walls of plasterboard sufficiently large. They can be done by themselves with the necessary tools. The main thing in the installation observe the instruction and safety precautions.
 Install plasterboard wall you can with your hands, the main thing - to strictly follow the installation instructions
Phased installation of drywall:
- First we need to put the marks on the floor and the ceiling in the place where the partition is planned.
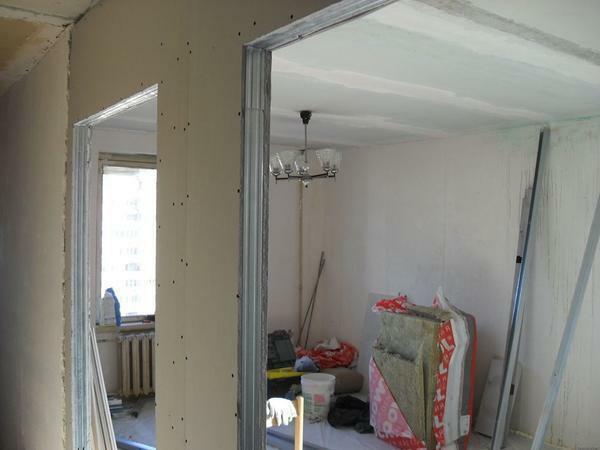
- Install the skeleton from the galvanized profiles.
- Sew one side of the partition with plasterboard.
- Lay communication and insulating material. Seal the other side of the partition.
- .
- Putty the seams and further decorate the septum.
If the sequence of installation steps is followed, the resulting structure of gypsum boards will be strong and even.
The doorway is planned in advance and marked in the markup. In the future, this place is not attached to the frame and do not wind up sheets of drywall. The partition from the GKL can be made in any shape, which will decorate the interior of the room.
How to build a partition of plasterboard with their hands walls
If installation is planned to carry out with your hands, then you need to arm themselves with the right tools, namely, tape measure to perform measurements of 5 m long, level, pencil, screwdriver, screws and self-tapping screws. And also - with a knife, sheets of plasterboard, profiles, scissors for metal. It is also necessary to draw a drawing of the future partition and make a step-by-step installation plan.
 Experts recommend additional component mounting plan and stick to it until the completion of the installation of plasterboard partitions
When everything you need at your fingertips, you can proceed to the main point - how to collect plasterboard partitions:
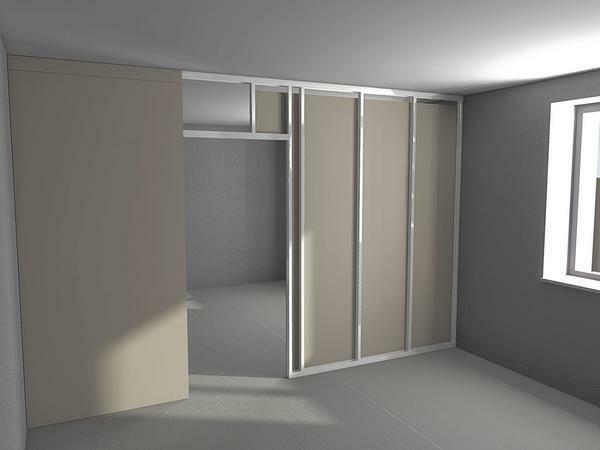
- Any designRequires a foundation, for the partition - this is a framework of profiles. First, guide the profiles to the floor and ceiling.
- Then, rack-mount profiles are inserted into the rails in 60 cm increments and fastened with screws to the rails.
- Further between the rack-mount profiles, it is necessary to fasten the crosspieces.
- Drywall sheets are screwed onto the profile frame first on one side.
- Further, if necessary, communications through technical holes are laid inside the frame.
- Insulation material is laid.
- Screw sheets GKL on the second side of the partition.
After completion of installation, it is possible to install doors, plaster seams and self-tapping screws, and then carry out the designed design of the partition. It's actually very simple to install a partition, the assembly does not take much time and does not require professional skills. The partition will be no worse than the brigade made by the finishers, the main thing is to do everything correctly and follow the instructions.
Step-by-step installation of plasterboard partitions( video)
Such universal building material will necessarily justify the hopes placed on it. Beautiful, smooth partitions will serve for a long time, and if it turns out that you will have to return the room to its former form, then it will be as simple as installing a partition. It is enough to perform the installation in reverse order, removing all the upper trim for the beginning, then using a screwdriver to unscrew the sheets of gypsum board, then take out the insulating material and disassemble the frame. And the room will get the original area with a minimum of labor.