putty plasterboard ceiling is performed for the alignment and correct small defects surface quality plaster ceiling gypsum board plays an important role in otelochnoy work as a whole. You can make the putty yourself. To do this, you need to have the necessary tools. Due to the qualitatively executed work, any defects, cracks and irregularities will be eliminated. The main purpose in applying putty to drywall is embedding joints between gypsum boards as well as masking caps screws which protrude from the surface of the plates. Putty plasterboard has its own characteristics.
-
- Finish plasterboard ceilings for painting express method
- How putty plasterboard before painting quality
- The putty plasterboard before painting best
- Proper preparation of putty for walls and ceilings( video)
- wallpaper for painting on the ceiling of plasterboard: types and technique of gluing
- As drywall putty before painting the ceiling( video)
Finishing the ceiling of gheePsokartona under painting by the express method
Puttying on the paint - an important stage of finishing works. Not always for this there is a lot of time. Therefore, for those who are in a hurry and can not pay enough attention, there is a method of express-putty. It will be acceptable in the event that in the future the ceiling will be painted with several layers of matte paint.
Stages quick putty:
- Prime the surface with deep-penetrating primer. It will strengthen the surface and provide more reliable adhesion of paint and putty.
- Use a narrow spatula to fill in seams and places with grooves putty from gypsum. Align the surface with a wider spatula.
- Corners to glue with a serpent.
- After the putty has dried, wipe the seams with a paint net on the holder.
 Driving directions applying putty to the surface of the drywall
After the work is necessary to remember that fast putty will not give a perfectly flat surface.
Express method allows you to perform fast, superficial filling in the shortest possible time. It is able to eliminate only the most noticeable surface defects.
Thus, the surface of the plasterboard ceiling can be painted, but it is necessary to take into account that small flaws can be seen, so you need to choose a matte paint texture. As
plasterboard putty for painting qualitatively
putty plasterboard need for painting on the surface of a perfectly flat, with no protrusions or dents. When working it is important to observe the technology of plasterboard putty, otherwise all efforts can become vain.
Finishing technology:
- Preparation and priming of the surface. Wait until it dries completely.
- At the joints and corners paste a fiberglass mesh, which has the name of a Serbian. The process of gluing does not take much time, since the mesh has a self-adhesive surface. It is important to ensure that the seam is strictly in the middle of the net.
- It is necessary to raise the filler in small quantities, as it has the property of quickly drying out. When water is added to the dried solution, an irreparable change in the qualitative structure of the material occurs. Putty should be planted for 30 minutes of work.
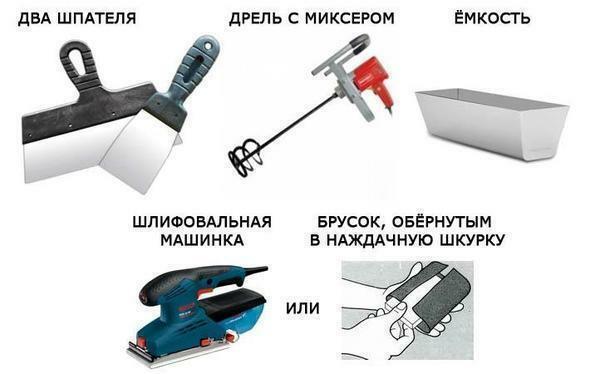
- With two spatulas: narrow and wide. Using a narrow spatula, put the putty on the seam between the plates. A wide spatula needs to be stretched over the entire length of the seam. It is important to accurately fill the seam. It should be ensured that when the joints are sealed, unevenness is not formed.
- Using the crosswise method, plaster the screws. When applying putty along and across, there is a better coverage of the screws of self-tapping screws.
- In two stages to produce the putty corners. Put one side of the corner, then wait for it to dry, then put the second half on.
- External corners, door and window slopes, fix with an aluminum construction angle on the putty or using a construction stapler.
- Insert the putty into the corrugated profile holes with a spatula so that all the holes are filled.
- Use a wide spatula to level the surface of the applied mortar.
- Use sandpaper to clean the unevenness of the formed surface.
- Finish putty to the consistency of sour cream. Using a wide spatula, it is necessary to apply the filler to the entire surface of the wall. This layer needs to be applied most finely and neatly.
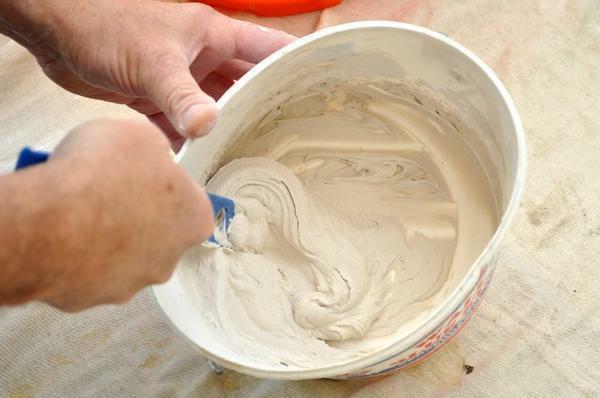 Ceiling putty should be homogeneous without lumps and impurities
All work must be carried out in strict sequence, waiting for each layer to dry before applying a new one.
When calculating the number of required materials, it is important to consider the nature of the surface for processing. With a large number of defects putty will require significantly more.
For an approximate calculation of the amount of putty it is necessary to calculate the area of the entire surface. To do this, you need to know the size of each sheet of material.
The putty plasterboard before painting best
plasterboard before painting shpaklyuyut using construction tools, as materials used construction putty, presented in a large assortment of the construction market.
When choosing a putty, it is important to pay attention to the label on which the manufacturer indicates the method of spreading and applying putty, as well as its interaction with different types of materials.
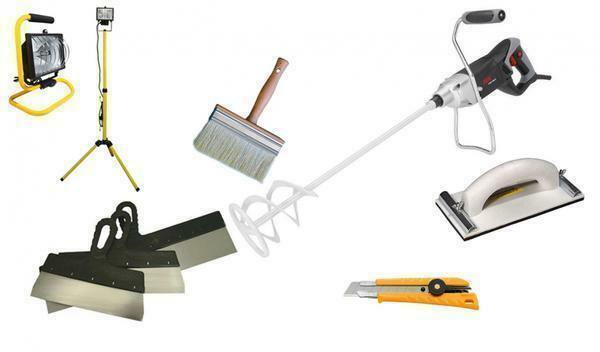
 Before you start you need to prepare a standard set of tools for the sealing of the ceiling
When applying putty is important to use the right tools, this will depend on how the material will be on the surface.
Tool kit
- Rotary hammer;
- Brush;
- Knife Paint;
- Narrow and wide spatula;
- Sandpaper.
After selecting the tools and putty material it is important to pay attention to the time that has passed since the installation of drywall. For the best quality putty, from the moment the surface is installed, at least 10 days must pass before the ceiling accepts the climatic conditions of the room.
Proper preparation of putty for walls and ceilings( video)
wallpaper for painting on the ceiling of plasterboard: types and technique of gluing
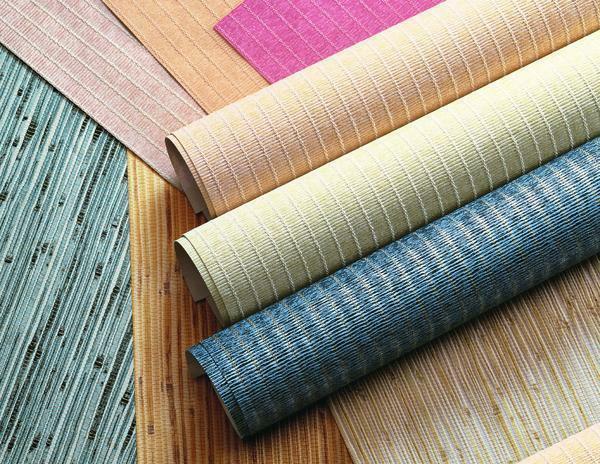
Choose wallpaper for painting on the ceiling of plasterboard is not difficult. In the domestic market there are several types of wallpaper, which differ from each other with manufacturing materials.
Types of wallpaper for painting:
- Wallpaper on a paper basis;
- Wallpaper on non-woven basis;
- Wallpapers on fiberglass-based.
 choosing wallpaper for painting, it should be remembered that for such a design is not suitable for all decorative paintings, but only those that have a specific quality
When choosing wallpaper is important to read the instructions on their use and application to various surfaces.
When deciding pokleit wallpaper on drywall is important to consider some of the nuances. Wallpaper can be glued as directed on the surface of the plasterboard ceiling, and the pre proshpaklevat surface.
However, when wallpapering directly on the drywall should be noted that if you want to make repairs and replace the old location, will have to change and plasterboard as wallpaper on drywall fastened very carefully, and attempts to remove them will lead to the deterioration of plasterboard.
As drywall putty before painting the ceiling( video)
putty gypsum boards for painting should be carefully and meticulously, as the application of paint will facilitate exposure of all defects and surface irregularities. There are several methods of puttying: fast and basic. To create a high-quality finish is necessary to perform a full plaster in several layers, which perfectly align the surface. For finishing you need to choose the most high-quality materials and tools - the quality of the work depends on their quality.