Content
- What is an acrylic liner
- Pros and Cons of an Acrylic Liner
- Liner selection
- Bath preparation
- DIY liner installation
- Conclusion
- Video instruction
The installed acrylic liner in the bathroom is an easy way to update an old cast-iron bathtub, comfortable and sound, but lost its former appearance due to defects in enamel, yellowness and rust. Let's look at the intricacies of the selection and installation of this product, which will help to repair the old bathtub with minimal cost.

What is an acrylic liner
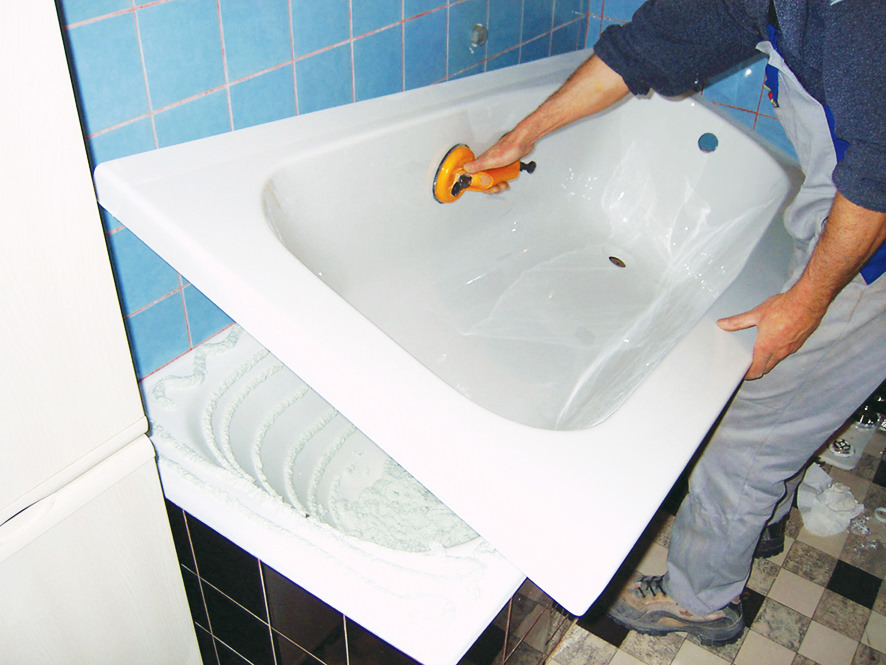
An acrylic insert is a kind of insert, like a bathtub in a bathtub, the main function of which is to renew an outdated coating and cover all damage to the enamel of an old bathtub. Using such a device, you can easily turn the "ancient" plumbing into a new and modern bathtub with your own hands.
The material from which the insert is made has a snow-white, smooth to the touch, easy to clean and resistant to mechanical damage surface.
Acrylic liners are divided into 2 types, depending on the manufacturing technology:
- Cast liners. They are made from sheets of sanitary acrylic heated in a special form. The cost of such a product is 30% of the price of a full bath.
- Composite products. Such inserts have a base made of ABS plastic, torn with a thin acrylic layer. They differ from cast ones in lower price and short service life - 5-6 years.

Note! If a molded acrylic liner is offered at a low price, then it is either made of a thin sheet, which may soon lead to rubbing or even breaking it, or is made of low-quality acrylic, which has large pores and is therefore difficult to laundering. Such a product will not have white, but a grayish or pinkish color.
Pros and Cons of an Acrylic Liner
When choosing between old bath restoration technologies - enamel, liner or bulk enamel, coated with liquid acrylic (glass) - and installing an acrylic liner, you need to weigh all the pros and cons of the latter.
USEFUL INFORMATION:Design of a bathroom with a toilet (32 photos)
The acrylic insert in the cast-iron bath has undeniable advantages:
- installation of an acrylic liner in the bath can be done by yourself and it will take a minimum of time;
- high level of strength, scratch and shock resistance;
- customer reviews are only positive if they did not save on the choice of components;
- long service life. A quality product will last up to 20 years;
- additional heat and sound insulation.

Acrylic liner is well suited for bathtubs made of cast iron. For steel products, its use is justified only if their walls do not bend, otherwise the liner may soon crack.
It is worth considering the disadvantages of this method of restoration. Repairing old bathtubs involves the following difficulties:
- reduction of the internal space of the bath;
- improper installation, the service life of the acrylic insert can be significantly reduced;
- we met with negative reviews about breaks and cracks, but only in cases when cheap composite products were installed;
- risk of water falling under the insert, and odor, the source of which will be the resulting fungus.

We have listed the pros and cons of this method, and you should make a choice: a bathtub or an acrylic liner. Choose the most suitable method for the bathroom and the already installed font.
Liner selection
Before purchasing a liner, it is important to make sure that its dimensions are as close as possible to the dimensions of the bath itself. To do this, measure:
- the width of the old bathing tank on the upper inner edge;
- length along the outer edges and inner along the bottom;
- depth.
To buy a really high-quality product in a cast-iron bath, in the store when choosing an insert, you need to pay attention to several important points:
- The color of the product should be pure white, without any shades.
- The surface is smooth, even, without sag and any other defects.
- The wall thickness should be as large as possible - 4-6 mm. When pressed, the walls can bend, but very little. In the case of a metal bath - thin
- We also recommend that you carefully review the reviews for the selected product. Surely you are not the first person who is eyeing this particular manufacturer.
USEFUL INFORMATION:3D floors in the bathroom and toilet: 9 photos, price, technology

Bath preparation
Before installing the acrylic liner with your own hands, it is necessary to carry out preparatory work, which play a significant role in the whole process:
- If the tile is made of tile or plastic panels, it is necessary to make them dismantling, because there must be the possibility of free access to the sides of the plumbing products.
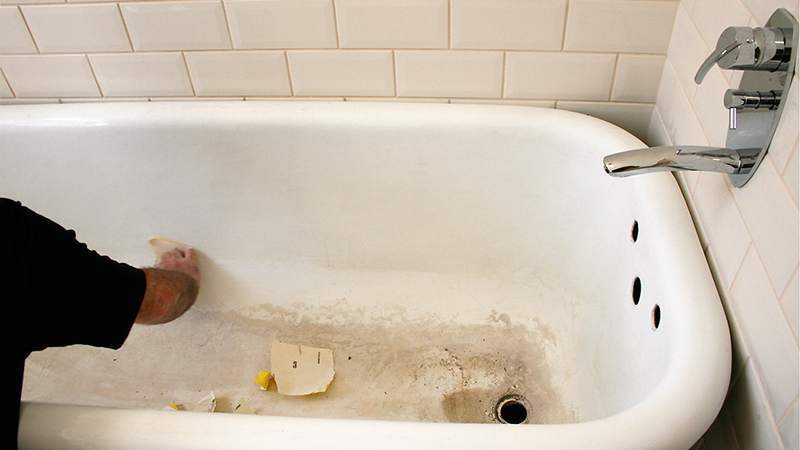
- The product is cleaned from enamel coating. To do this, use a grinder with special nozzle or sandpaper with large grain. For convenience and facilitation of the process, you can mount the sandpaper on a special holder. This step is very important because getting rid of smooth enamel will greatly improve adhesion to the surface of the bathroom.
- Wet cleaning of the inner surface is done. The bath must be washed very carefully so that no particles of enamel and other debris remain.
- Siphon is dismantled.

If you really don’t feel like messing with enamel removal, you can simply wash the bath thoroughly with detergent, degrease with soda, rubbing the surface with it, wash and dry again.
DIY liner installation
Installing an acrylic liner in the bath, the following steps will be required:
- The very first step in the whole process should be trying on the insert insert into the cast-iron bath, followed by fitting. To do this, place the acrylic liner in the bathtub and mark with the marker the excess part that extends beyond the old container. Take out the insert and, using an electric jigsaw or hacksaw, cut off the excess part of the material, trying to prevent burrs.
- It is also required to make holes to drain the water. To do this, you can use an electric drill with a crown nozzle.

To accurately mark the drain and overflow holes, you can use the following trick: rub the edges of the holes in the old bathtub with a construction pencil and press acrylic to it very tightly insertion. Marks should be printed on the surface of the liner.
- To tightly install the prepared acrylic sheet in the bath, you will need silicone sealant and a two-component foam. First of all, you need to put a layer of sealant on the perimeter of the drain holes. This is very important, because this will reduce the possibility of liquid getting under the acrylic liner. Now you need to apply sealant along the edge of the entire bath.
- The entire bath on the inside must be covered with two-component foam. It is important to monitor the thickness of the applied layer. This parameter should correspond to the size of the liner mismatch with the bath parameters.
USEFUL INFORMATION:Features of the choice of plumbing cable for sewage

It is desirable that the foam covers the entire internal area, since when the gaps form, the acrylic sheet will not fully adhere and bend. It is also possible to apply foam in strips with an interval of 4-5 cm.
- the acrylic liner in the bath must be installed as tightly as possible, pressing against the surface of the bath. It is especially good to squeeze the bottom, the areas around the drain and overflow, side;
- siphon installation in progress. It also needs to be fixed with a sealant.
Note! An old siphon may not fit the bathtub thickened by the insert. Check it out in advance.
The installed acrylic liner in the bath can be seen in the photo:

- The drain is closed and a full bath of water is drawn up to a level of 2-3 cm below the overflow hole. In this case, the water will play the role of the main cargo. This will allow more reliable fixation of the insert.
- In this condition, the bath is left for a day. After that, you can use it again for ordinary purposes.
Conclusion
DIY installation of an acrylic liner is very easy. Even a person without experience and qualifications can cope with such work. During the installation process, it is important to follow all the rules and instructions. It is also worth paying attention to the quality of the materials that are used for fastening, since the quality life of the device depends on them.
Video instruction
Detailed instructions for installing an acrylic liner in a cast iron bathtub are provided below. If you still have questions about this topic, ask in the comments - we will definitely answer everyone.

EXPERT SITE
Tsugunov Anton Valerevich
Master Station Wagon
- Since 2003, I have been engaged in the repair and decoration of premises.
- Over 100 completed objects.
- I appreciate the quality, more than the quantity!
Personal page >>>
Friends!
I offer you the service "Friend Builder"
As this site develops, subscribers and visitors are turning to me more and more often asking for help with advice on various issues of repair and decoration.
Questions are sometimes asked very complex and interesting. You can’t write an article for each situation, so I decided to advise you individually.
Thanks to you, friends, a new direction of my favorite work has been born - share your experience and benefit everyone who is undergoing repairs!
Get a one-time consultation from me >>>
Order full apartment repair support >>>


