Arch MDF: types and devices, instruments and materials, assembly
Table of contents
- 1 Types and apparatus of MDF arches
-
2 Mounting of arch
- 2.1 Tools and materials
- 2.2 Assembly
- 3 Output
MDF in our market is a relatively new material, however, has already become widespread. And it began to actively use not only in the furniture industry, but also in construction. In particular, in recent years, this material is often used for decorating the arches, in fact, the subject and the subject of this article.
Below I will detail how to tell you install arches made of MDF with their hands, as well as introduce you to some secrets that will cope with this task quickly and without any effort.
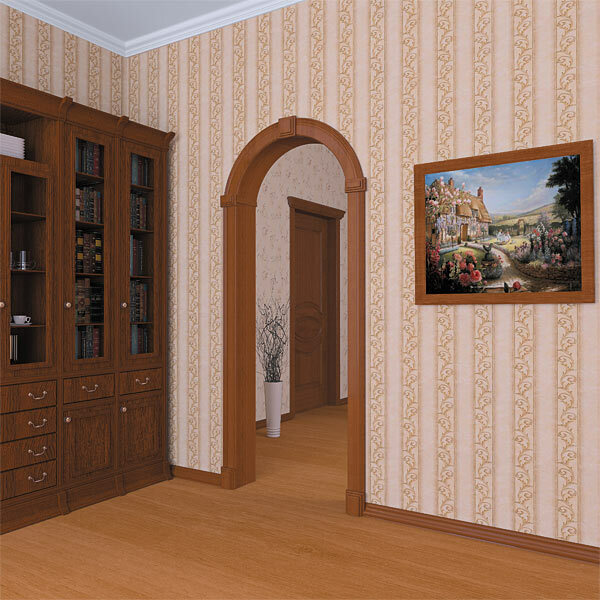
Arch of MDF
Types and apparatus of MDF arches
Recently, the market can meet a variety of arches made of MDF for doorways, allowing them to choose for the interior, decorated in any style.
Depending on the design, they are divided into two types:
| type of construction | Features |
| On the corner fillings | Are the most versatile and convenient in mounting terms. For their installation does not require any manipulation of the door opening, except in cases where the latter was committed does not coincide with the parameters of the arch. To avoid this, it is necessary to measure in advance the doorway. |
| Without corner fillings | For mounting such a construction is necessary to equip the pre doorway performing vault therein. Accordingly, the installation of arches made of MDF should be carried out at the stage of repair facilities. |
Tip!
When choosing the arch should be borne in mind that it should be the same color as the floor.
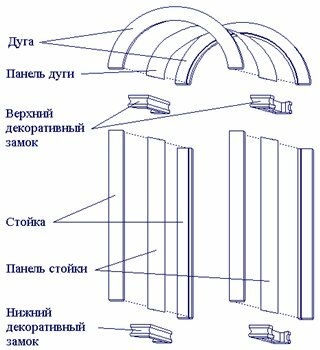
Arch kit without angular aggregates
Regardless of the type of construction and all interior arch MDF are kits which comprise the following parts:
| arch details | Features and purpose |
| Arch (Arc) | Each set consists of two parts |
| The upper decorative locks | Composed of cornices, which are located on the walls from the architraves, cornice and extensions, which are located between them |
| Plat (rack) | Serve as a frame of the door opening |
| Plate (panel) filling | Are installed in the space between the arches and architraves |
| Bottom decorative locks | They consist of the same components as the upper decorative locks |
All parts are joined together with glue and dowels, which are available in the kit. Thus, inner arch going from MDF constructor during installation. Below is a closer look this process.
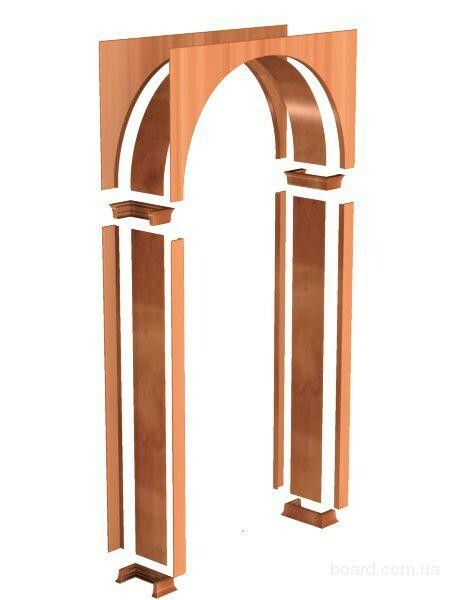
The construction of the arch with a corner filling
Mounting of arch
Tools and materials
Before you begin to install the arch should prepare the following tools and materials that will be needed during the work:
- Roulette for performing measurements;
- hacksaw or hacksaw on wood with fine teeth;
- four clamps;
- PVA glue;
- claw hammer;
- level.
If you install the arch without angular aggregates, it will need more tools and materials to carry out the arch in the doorway. The following details will tell you how it's done.
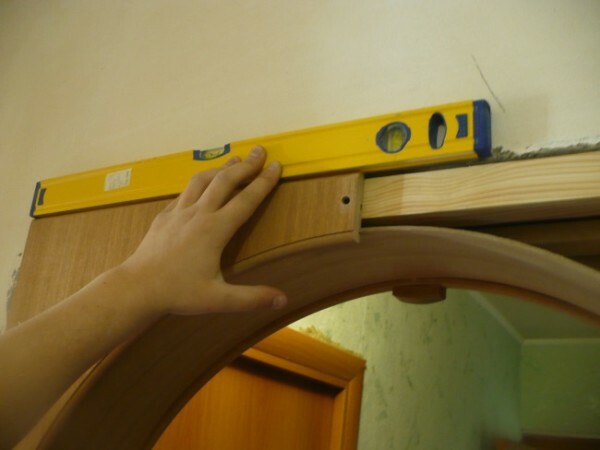
Mounting of arch
Assembly
First, consider how assembles arches made of MDF with the corner filling. This work be divided into several stages:
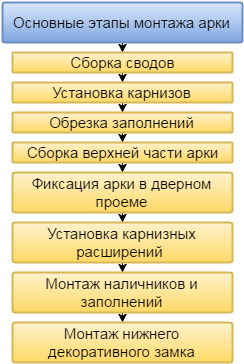
The main stages of the arch assemblies
So, work is carried out as follows:
- you should start with an accurate measurement of the doorway. Moreover, the measurements must be performed in several places;
-
After unpacking the set of arches arches need to stick together. For this dowels are coated with adhesive, is then inserted into the hole of one of the parts, and then docks the second item. To be safe, can be coated with adhesive ends of parts.
It should be noted that the arch can be extended if necessary. To do this, the set includes a special final assembly of decorative elements, which are installed between the two halves of each arch; - further to the vaults on the same principle should be pasted cornices;
-
then need to adjust the plate under filling opening depth, i.e. wall thickness. It should be borne in mind that the thickness of the plates should be 10-12 mm greater than the depth of the opening so that they can enter into the slots of the arches and architraves.
To trim plate to be applied to each of them counting as points, which held a straight line. On it you need to carefully trim plate with a hacksaw. The guide can be used as one of the plates which should be fixed to a trim clamps.
In this case, the cut line will be flat, and therefore, you do not mess up the filling;
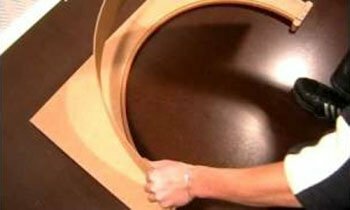
In the photo - insert filling in the vault
-
the shortest plate from the kit, which serves as a filling between the arches, should be cut in length. And mark it should be so that it was part of the eaves to the middle.
To perform marking plate, it must be inserted in one of the vaults. Crop follows the scheme described above; -
then it is necessary to assemble the arches and a plate between them into a single structure. To do this, you need to lubricate the grooves of one of the glue vault. It is then inserted into the grooves prepared plate, wherein it is centered, so that it came into edge rods at the same depth.
Next, by the same principle plate connected to the second arch. The result is a half unit. I must say that the assembly can perform on-site assembly, as shown in the photo above, however, it is less convenient; -
is now ready to install the arch of the doorway. It can attach with glue "liquid nails". To this end, the back side of the arches should be coated with adhesive, and then the arch should be set horizontally on a level and pressed against the wall by pulling vaults clamps.
You can also use self-tapping screws. In this case an arch on the exposed first level, then is fixed by clamps, and thereafter the screws are screwed;
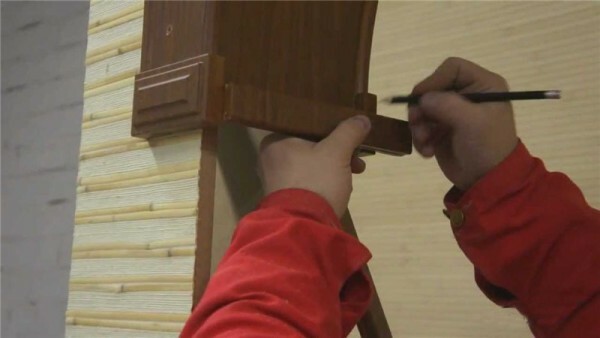
Coffer markup extension
- Next you need to install the curtain extension. Previously they should be cut to length is strictly corresponded to the depth of the opening. The ends of the strips need to smear glue, and then pull the ends of curtain rods, between which the expansion clamps;
- then it is necessary to cut the length of trim. The layout is more convenient to carry out the place, the only pre-casing should be turned over to the sawed located at the bottom end;
- then you need to cut the length of the panel, which will be located between the casings. Their length should be slightly longer than the casings so that they could go to the middle of the upper eaves;
- then you need to install one of the casingsBy connecting it to an upper cornice by means of dowels and glue;
- Further it is necessary to lubricate the glue groove on the back side of the architrave and insert the panel;
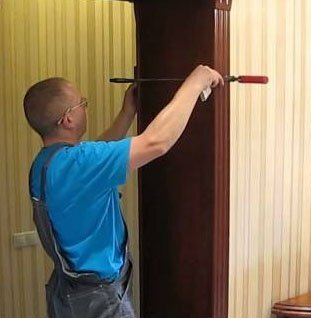
Contractions trims clamp
- on the other side of the wall on the same principle set the second casing and connected to the filling. Both casing need to pull the clamps;
- likewise set and the second pair of casings filled;
- in the completion of the work necessary to establish the lower decorative locks.
Tip!
If you are unsure that you can correctly set the arch, it is better to entrust this work to specialists.
The price of this service is about 1,500 rubles.
On this arch assembly process is completed. If the construction is finished, no additional work is no longer needed. Unpainted MDF arch requires more paint.
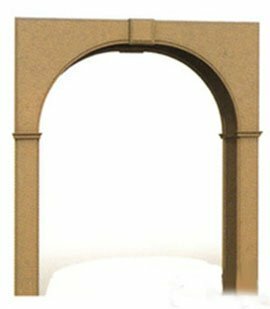
Unpainted arch of MDF
I must say that the painting of MDF is a difficult procedure - to the surface applied several layers of special paint. Wherein after applying the first layer, the surface is polished, whereby wood fibers are risen overwritten.
As for the mounting angle arches without fillings, the procedure is exactly the same. Only, as has been said above, it is first necessary to prepare the window opening.
You can do this in two ways:
- carefully cut the upper portion of the partition in form arches, and then plaster;
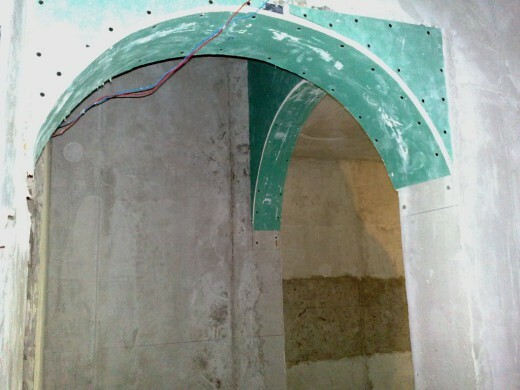
Arch made of plasterboard
- build an arch using the frame and drywall.
After that, the entire wall necessarily puttied and finished. On our website you can find detailed information about how the drywall is installed and executed wall finish.
Here, in fact, the entire installation instructions arches of MDF, which I wanted to share with you.
Output
The process of installation of arches of MDF are generally quite simple and not time-consuming, especially for designs with angular The only fillings, you must follow the step sequence, and perform the work very carefully and attentively. Otherwise, you can spoil the details in the process of cutting or after the assembly design will look untidy.
For additional information contains a video in this article. If you have any difficulty in the process of assembling the arches or some points are not clear, ask questions in the comments, and I will gladly answer.
