Finishing slopes - 4 modern assembly method
Table of contents
-
1 finishing technology slopes
- 1.1 Method 1: Wet process
- 1.2 Method 2: The slopes of plasterboard
- 1.3 Method 3: Plastic
- 1.4 Method 4: wood
- 2 Output
How do I finish slopes of windows? Today I will share their experiences and talk about the four most common types of finishing. You will learn the important nuances and secrets of this work with their hands.

Finish window openings affects the design of the entire premises
finishing technology slopes
How to decorate the slopes on the windows inside? There are several ways:

Methods of finishing
Method 1: Wet process
Wet process finishing is the most traditional. Its essence lies in the plastering of the opening with cement or plaster solution.

Plastering - the cheapest way to finish openings
The process of finishing slopes windows plaster looks like this:
| illustrations | Description of the action performed |
 |
Preparation of materials. Plaster slopes you will need:
|
 |
Priming slopes. Apply a thin layer of liquid by means of a paint brush. To achieve the greatest effect, treat the surface of the ground in two layers. |
 |
layout implementation.
The same principle is done counting for the upper slope. |
 |
Installing racks on the perimeter of the opening. On the side walls of the perimeter of the opening needs to be fixed wooden slats or metal profiles. To do this, use a plaster solution. Installation is performed as follows:
Likewise, set for the upper horizontal rail slope. |
 |
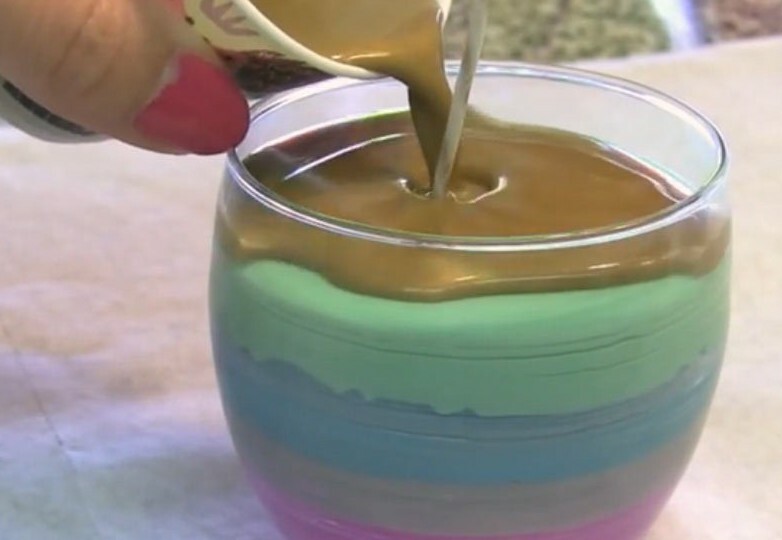
Preparation of the solution. Pour dry plaster mixture into a clean bucket, fill with water and mix thoroughly with a mixer or an electric drill. The ratio of water and the mixture is indicated on the packaging. |
 |
Pre-leveling slopes.
|
 |
Dismantling rails. After setting the solution atdalite own hands slats, prying them narrow spatula. |
 |
Installing the corner.
|
 |
Alignment walls. Level the surface on the side wall of the starting filler with a trowel. |
 |
Applying the solution. Apply the mixture on the surface of the plaster with a trowel or slope Malki small surplus. |
 |
Alignment surface. Remove excess solution wide spatula, Malkov or a laminate pattern as in the photo-example. The principle of operation is the same as in the lining of the walls of the rule on beacons. |
 |
Cleaning solution from the frame. Wipe the frame with a sponge to remove the detergent. |
 |
Shpatlevanie surface. Zashpaklyuyte slopes, taking advantage of the finishing putty. Apply a thin layer using a wide spatula. |
 |
Grinding. Use the jointer with a tight sandpaper P120-150. Work out tool circular motion to wipe all the small bumps and other imperfections. |
 |
Painting slopes. Put on a slope with latex paint paint roller or brush with a thin layer. To achieve best results, paint the surface in two layers. |
On the slopes of this finish is completed.
Method 2: The slopes of plasterboard
Alternative plastering - "dry" finishing options, such as plasterboard lining slopes.

Slopes of plasterboard plastered similarly can be painted in white or any other color
The advantage of this method - the ease and speed. In addition, it is possible to perform the heat slope soundproofing. As a finishing coat of paint, you can use the slopes.
Installation instructions slopes of plasterboard is as follows:
| illustrations | Description of the action performed |
 |
Preparation of materials. For finishing window slopes this method, prepare the following materials:
|
 |
Removal of foam. If you get off the slopes for the new window, cut the foam core using a sharp knife. |
 |
Padding. Prime with the surface of the scheme described above. |
 |
Performing profile location marking. Apply on the perimeter of the frame number of points on each side, stepping back from the edge of one and a half centimeters. Next, these points connect line. |
 |
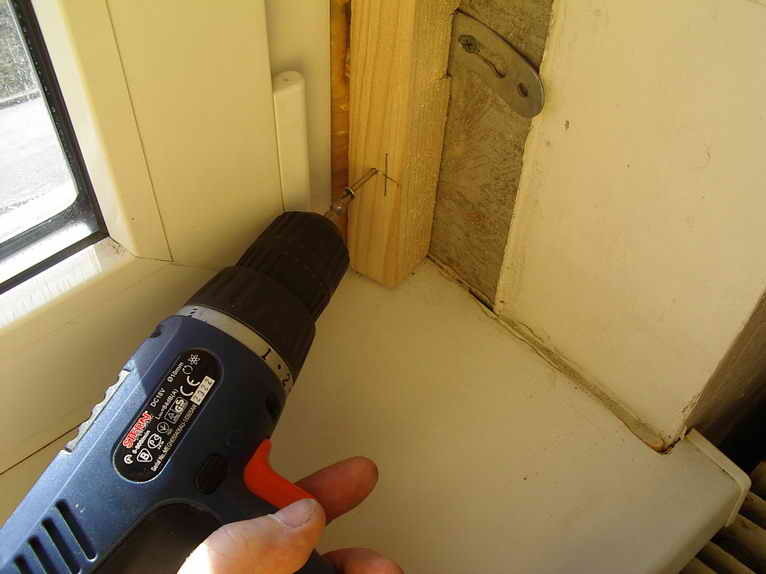
Mounting profile. Secure the perimeter of the frame starting profile, align it with the markup. For these purposes, use self-tapping screws. Twist them in increments of about 10 cm. |
 |
Application Markup surplus on the windowsill. At first, says even the angle from which to fall back a few centimeters surplus. |
 |
Installation of the profile on the window sill. If between the wall and sill has a space as the photo-example, it is necessary to fix a metal sill L- or U-shaped profile. |
 |
Foaming slots. With foam Insulate space between starting profile and the opening. |
 |
Metering slopes. Measure the height of the inner and outer side slopes, as well as their depth. For the top of the slope you need to know it inside and outside of the length and depth. The values obtained record. |
 |
Marking drywall. Apply to drywall layout according to the size of the window to the inner slopes on the windows turned out smooth and symmetrical. |
 |
Cutting drywall:
If you have a jigsaw, you can speed up the process, cutting out the panel with it. |
 |
Application of putty. Apply on the surface of the slope starting putty or a special adhesive for drywall. |
 |
Bonding slopes. Cut drywall attach to the opening, align and press down lightly. The position of the slope should be checked level. According to this principle okleyte plasterboard entire window opening. |
 |
Fixing screws panels. Additionally lock plasterboard sheets with screws, positioning them with a pitch of about 250 mm. |
 |
Mounting corners. Along the perimeter of the window opening stick perforated corners. Their position sure to check the level. |
To insulate the slope, into the space between the wall and the plasterboard can be laid mineral wool.
In this installation of slopes completed. Drywall - a rough material, so the surface must also poshpaklevat and paint.
Method 3: Plastic
Choosing from what to do on the slopes of the windows, many expressed a preference for plastic. In contrast to the drywall, the material does not need a fine finish. In addition, the plastic more practical, as is not afraid of moisture and easy to clean.

Slopes of different plastic glossy surface
Slopes of plastic have a peculiar glossy appearance. Therefore, the choice must take into account the nuances of the design.
Instead, you can use plastic panels sandwich panels. They consist of two layers of plastic, which is located between the heater.
The process of installation of plastic panels begins in the same way as the installation of slopes of plasterboard:
- on the perimeter of the window is cut foam;
- the opening is processed antiseptic impregnation.
Further plastic slopes are assembled as follows:
| illustrations | Description of the action performed |
 |
Preparation of materials:
|
 |
Preparation guides. Measure the window frame, and then cut into the starting profile height and width of the window. |
 |
Installation guide. Secure the perimeter of the window profiles with screws. |
 |
Pruning angular profile.
|
 |
Preparation casings. Finishing profile, which serves as a casing, must be applied to the opening and trim. As a result, you should get two strips equal to the height of the outer opening and one - equal to the width. Clypeus (part of the profile which lies on a wall) should be slightly longer than the U-shaped profile into which the panel. This difference is the width of the jamb. Therefore, it is necessary to trim the profile, as shown in the photo. |
 |
Installation casings.
|
 |
Preparation of plastic panels. The panels should be marked according to the size of slopes, then cut jigsaw or hacksaw. |
 |
Mounting panels. Produced plastic panels just need to fill in the guide. |
 |
Filling the gaps with sealant. Existing cracks in places of joints of panels to gently fill with silicone sealant, pick up the color of the slopes. Excess sealant immediately remove. |
Now the slopes of plastic ready.

Sheathed lining slopes look harmonious with wooden paneling walls
Method 4: wood
In wooden houses usually operate wooden lining of slopes. They are well fit into the interior of a wooden house.
Of course, the wooden slopes can be used for conventional houses if the wall will sheathe clapboard. For example, such a solution can often be found on their balconies.
If the slopes are set for plastic windows, then, as in the previous cases, the work begins with the foam cutting and preparation of the opening. Further instruction is as follows:
| illustrations | Description of the action performed |
 |
Preparation of materials. You need to prepare:
|
 |
Preparing the rails. Slice adjustment slats slope (inner and outer) and also in width. As a result, should get six rods - 4 for vertical slopes and 2 horizontal. |
 |
Mounting rails.
|
 |
Foaming slots. If the strips between the wall and cracks were formed, they need to fill with foam. You can also fill space Mezhuyev foam strips, The price of the mounting foam is quite high, so it is more expedient to use for insulation foam or mineral wool frame. |
 |
Cutting the lining. Cut battens on plank length equal to the depth of the opening. |
 |
Installation of siding. Battens must be secured to the frame. You can do this in two ways:
|
 |
Installation of decorative corners. All internal and external corners, set the decorative corners. To fix them, you can use the window with nails bitten off hats. |
Alternatively bunk can use laminated MDF (fiberboard medium density) panel. Outwardly, they may mimic the precious wood. The principle of their assembly resembles a clapboard cladding slopes.
That's all ways to trim slopes, which I wanted to tell you.
Output
Now that you know how to perform finishing slopes with modern methods. Additionally, check out the video in this article. And if you have any questions, please write them in the comments, and I will answer you soon.