How to assemble the frame of the profiles for the drywall. Types of profiles. for mounting rails. Surface preparation. Mounting frame
Table of contents
-
1 Classification
- 1.1 types of profiles
- 1.2 Mounts
-
2 The assembly battens
- 2.1 surface preparation
- 2.2 Mounting frame
- 3 Summing up
Drywall has become so popular material, without it will not do any repairs. It does not matter whether you need to make the shelf, ceiling, oblitsevat wall mount partition, door arch, a niche - the basis of each design will be a framework of metal sheets under drywall.
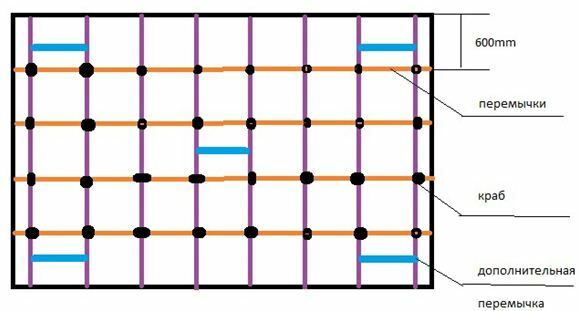
crates scheme for the ceiling of GCR
Note!
Such straps are made of thin, robust steel or aluminum plates.
They have a wide scope of use and invaluable when building elements premises decor.
Profiles give optimum rigidity of the structure of the GCR, without making them too heavy.
Classification
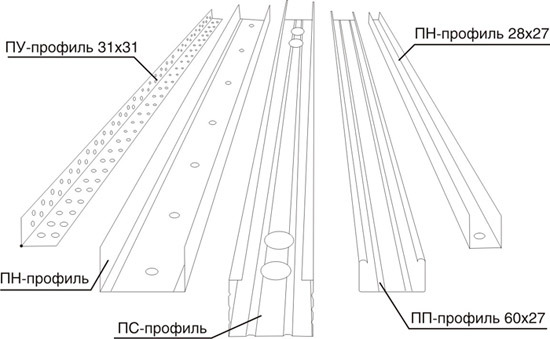
Variety of bars.
Before you create a frame of metal profiles for gypsum board, let us look at classification.
types of profiles
At the moment, there are five main types of metal profiles for GCR.
- Guides (marking - Mo or UW). Standard depth - 40 mm, width - 50, 75 and 100 mm. These strips are the basis for fixing the ceiling or rack crossbars.
- Ceiling guides (PNP or UD). They have similar functions and are necessary for the installation of lathing plasterboard ceilings. Mounted on the perimeter walls.
- Ceiling (GD or CD). They are fixed to the base ceiling anchor clips or suspensions, forming samuobreshetku.
- Rack (PS or CW). They are used for the base of the assembly under the walls and walls of the FCL. Fixed in the guide rails.
- Angle (PU). Their purpose - to strengthen and align the design angles.
Counting the desired number of bars, remember that they have two standard sizes - 3 and 4 meters.
Mounts
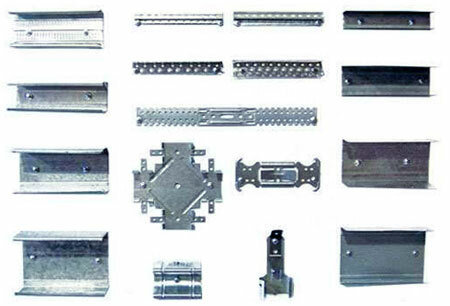
Fixing elements for profiles.
Different types of fasteners for metal lathing allow to collect frame greenhouses profile for drywall or a small shelf for the living room. It remains to clarify the purpose of each of the elements. (Cm. also the article alignment plasterboard walls without frame: features).
- Connectors "crab" need to cross perpendicular to the fixtures;
- extenders;
- Anchoring clamps;
- direct suspensions;
- duplex connectors.
The assembly battens
When the frame is made of gypsum plasterboard profile, the first step is carried out calculation and markup.
surface preparation
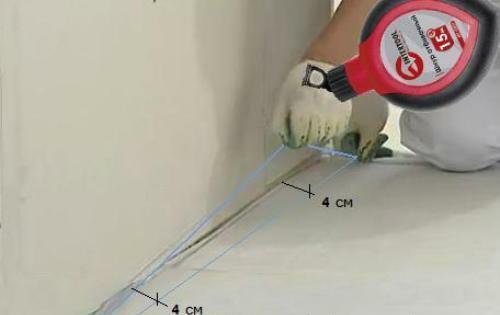
marking
- The first of the lines necessary to fight off the floor, along the wall.
- The gap from the marking-to-wall define, focusing on the width of the guide rails and the distance required for the construction of engineering and communication systems.
- When you consider the degree of flatness of the walls.
- Next, a line you want to transfer to the ceiling. To do this, use a plumb line. It is enough to mention three points: the corners of the walls and in the center.
- Now, these labels must be connected to the line, it will mark the location of the upper slats.
Mounting frame
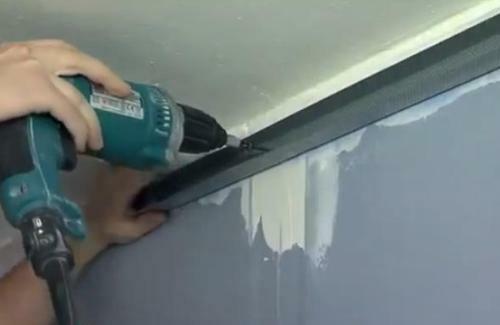
Fixing Mo rails
Assembly instructions crates with their hands:
- Secure the bottom rail to the floor, the upper - to the ceiling. The pitch between fastener elements should be equal to 0.8-1 m.
- Make a layout for PP profiles. For this purpose, several slide vertically spaced lines on the wall. Delay them from any of the adjacent wall, at a distance of 60 cm (a half-width of standard sheet GCR). Why so? Under the one-piece sheet mounted three strips: two at the edges, one - in the middle. If the set length of material with a width of 50 cm, put the intermediate rail is not necessary.
- After the markup for the intermediate brackets, you can start the installation of direct suspensions. When building a frame of profiles for drywall fasteners suspensions is carried out using dowels 100-150 cm increments.
Note!
Before you begin the installation of PP strips, cut them to 0.5 cm, you'll be able to easily insert them in CD-strap.
- Ceiling profiles expose by a broken line and attach to the rails with screws, equipped with press-washers. To the suspension of the rail locking projection plates that can bend inwards and fixed to the profiles by screws. (Cm. also the paper design of the ceiling plasterboard: features)
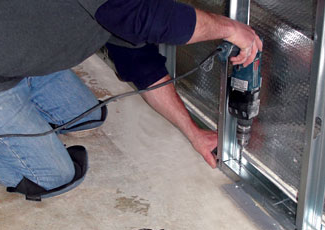
jumper
- To give added rigidity, mount horizontally disposed bridges of Mo-bars. They should be placed along the edges of the sheets GCR.
Summing up
Now you know about the intricacies of assembly and crates on how to sew the frame profile plasterboard. In order to more accurately understand the technological and practical issues on our website provides detailed photo and video instruction, in which you will find the necessary information on the question. Good luck!
