Repair of the ceiling in the kitchen (33 photos): preparation, types of coatings and finishing techniques
Table of contents
- 1 Preparation of the ceiling to the finish
- 2 Types of kitchen ceilings
-
3 Describes how to finish
- 3.1 Whitewash
- 3.2 Painting
- 3.3 paperhanging
- 3.4 Pasting of slabs of expanded polystyrene
- 3.5 Installation construction of PVC panels
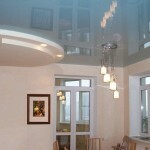
- 3.6 Installation of a stretch ceiling
- 4 Summing up
- 5 Photo Gallery
The ceiling, like the rest of the kitchen is a room high risk. Fumes, smoke and steam are bound to experience over and over again on the strength of the surface even in the presence of a powerful modern ventilation systems. In this article we will look at how you can make the repair of the ceiling in the kitchen. So, first things first.
Preparation of the ceiling to the finish
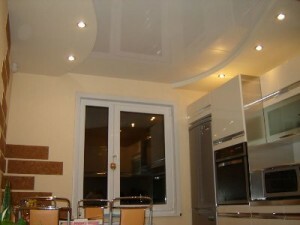 The first step is to remove the old ceiling coating, and then there are a few scenarios:
- Preparation for painting, whitewashing, wallpapering. In this case, you need to carefully inspect the repaired ceiling for cracks and irregularities, remove poorly retained sections of plaster, clean the surface with a brush or broom, primed and leave the surface to dry completely.
Now you can begin to remedy the defects. Seal the ceiling cracked plaster and prime with again. Large cracks and joints of concrete slabs further seal the mesh-serpyanku or conventional bandage.
The following apply the final layer of putty obschevyravnivayuschy, allow it to dry, and then process the small fraction sandpaper. The surface is ready for lining application.
Tip! Thickness of filler should not exceed 1.5-2 mm. If necessary, the application of a thicker layer, do it in a few steps, allowing to dry completely to each previous layer.
- Installation of suspended ceiling. Is used in the case where the base of the ceiling surface is very uneven, and bring it into proper form is fraught with significant cost and time savings.
The process of executing an underroof structure:
- Produced ceiling layout by fixing metal hangers, which are mounted to the ceiling by means of dowels.
- On the perimeter of the kitchen attached U-shaped profile rail.
- The slot rack cross beams are inserted profile, fixes to the suspension and by rail.
- The whole structure at each stage aligned using a spirit level.

The design of the ceiling
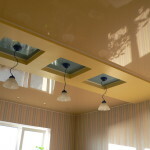
- If you choose a stretch ceiling, we can safely abandon the pre-treatment. Design tension ceiling, by professional craftsmen, involves its own system, which will hide all the bumps and unsightly raw ceiling.
Types of kitchen ceilings
Now select some useful tips on kitchen remodeling, describe the types and methods of embodiments of the kitchen facing the ceiling surface.
The ceiling in the kitchen can be finished in several ways:
- whitewash;
- paint;
- wallpapered;
- okleit slabs of expanded polystyrene;
- set design PVC panels;
- a suspended ceiling.
Each of the options renovated kitchen has a right to life, has its own advantages and disadvantages. Let us consider each of them in detail.
Describes how to finish
Whitewash
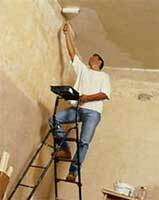
whitewashing the ceiling
Whitewashing is one of the most uncomplicated and cheap way to headlining their own hands. Lime or whitewash can Molev whitewash, but remember that the surface whitewashed with lime, chalk whitewash can not be solution.
Preparation of solution:
- Chalky. In 5 L heated to 40-50 ° C to dissolve the water 3 kg sifted chalk and 30 g of wood glue. To give a bluish tint in the can add bluing or ultramarine.
- Lime. 3.2 kg of slaked lime is diluted in a small amount of warm water, was added 100 g of salt and dye. Composition stirred thoroughly, gradually adding water up until the total volume reaches 10 liters.
When whitewash recommended to moisten the surface with mortar.
Painting
Paint the ceiling in the kitchen must be water-resistant paint of good quality. Consumption of ink depends on its properties.
For coloring use foam roller, brush or spray gun. It is recommended to apply at least 2-3 coats of paint.
Tip! Note that the last layer of paint should be applied toward the light source subsequently to avoid unsightly traces of the brush on the surface.
paperhanging
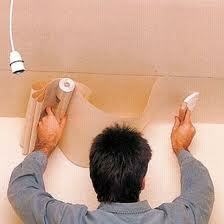
Wallpapering the ceiling
For finishing the ceiling in the kitchen best option from the variety of wallpaper ceiling will be washable wallpaper. They are not afraid of moisture, vapor, soot, and respond well to wet cleaning. Pasting process requires adherence to a few rules:
- The length of the strips of wallpaper should be 15-20 cm longer, which will cover the ceiling with wall.
- Pieces of pre-cut wallpaper for fine adjustment pattern, then numbered and alternately glued.
- Wallpaper paste should be parallel to the window in the direction away from the window.
- From the beginning of the process and pasting until completely dry wallpaper doors and windows in the kitchen should be kept closed to prevent drafts and peeling wallpaper.
Pasting of slabs of expanded polystyrene
The main advantage of this material is easy to work with him and, of course, low cost.
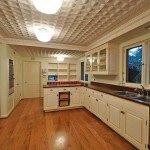
Before you start pasting the ceiling should be marked in such a way that the central tiles accounted for strictly on the center of the room. In addition to the aesthetic appeal of facing the future, it will immediately determine the number nepolnomernyh tiles and prepare them by cutting into pieces the size needed.
same fining process itself is quite simple - a spatula on a tile adhesive layer applied at least a thickness 1.5 cm, then the tile is applied in its designated cell in the markup and gently pressed to ceiling.
Installation construction of PVC panels
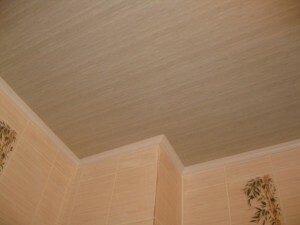
The ceiling of PVC panels
As mentioned above, the construction of PVC panels mainly presupposes the existence of a basis of a false ceiling, and which are assembled PVC panels.
The process of installation of suspended ceilings already been described, and the mounting plate circuit itself is quite simple.
- To the profile prepared crate with screws attached one after the other PVC panels, pre-cut into pieces of desired length.
- Compound together occurs through a groove disposed on one side of each panel.
- On the corners of the kitchen with a view to close the bare edge of chopped panels installed special facial area.
Installation of a stretch ceiling
This work it is still recommended to professionals who not only fulfill all your wishes, but also to give a guarantee. Price per square meter - from 390 rubles.
The ceiling is ready! Kitchen renovation and decoration could be continued ennobling walls and floor.
Summing up
We hope our article has been helpful to you. In order to more accurately understand the technological and practical issues on our website provides detailed photo and video instruction, in which you will find useful information on the question.
Photo Gallery
