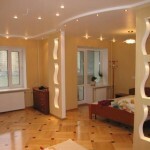
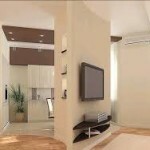
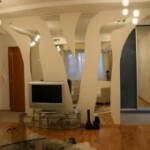
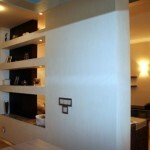
Interior partitions from drywall (33 photos) - rules of construction
Table of contents
-
1 The construction of the frame
- 1.1 marking
- 1.2 Fasten adjacent profiles
-
2 Mount rack profiles
- 2.1 Doorway
- 2.2 uprights
- 3 frame cladding with plasterboard
- 4 Finishing work
- 5 conclusion
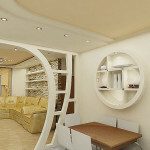
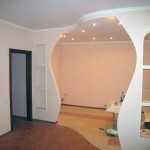
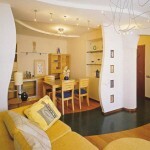
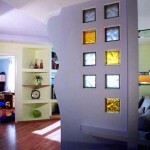
- 6 Photo Gallery
Drywall - a great building material. Since it is simple to operate, it does not require heavy equipment and special tools. It is possible to construct interior walls of plasterboard with their hands as simple as wallpapering or laying laminate flooring.

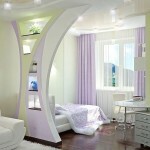
Gypsum plasterboard partition walls will help you to completely change the layout.
The construction of the frame
marking

The layout should be done with the help of a spirit level or plumb.
Before you build the interior walls of drywall, should be marked and draw a line that will define the place of contiguity to the walls, floor and ceiling.
- Along one of the walls measure off the required distance equal to the width of the future premises.
- Using the measuring tape Measure out along the wall, ceiling line right away and mark a point.
- We transfer point plumb down to the wall-floor (point A) of the line.
- From point A in any direction along the wall postpone distance of 150 cm and mark point B.
- Take the string length 200 cm and traits from point A in the direction perpendicular to the circumferential wall portion (arc).
- Take the 250 cm long string and a dash of points in an arc so that it intersected with the arc segment constructed from point A.
- The point of intersection of these arcs (point C) is perpendicular to the wall, if you hold the AC line.
- We draw a line on the floor through the points A and C, connecting the two walls.
- Draw a line from point A upwards along the wall, connecting it to the original point on the ceiling.
- From a point on the opposite wall with a plumb line or spirit level hyphenation points to the ceiling.
- Putting points on the ceiling and on the opposite wall.
- We got four lines on the walls, ceiling and floor, along which will be fixed profiles for plasterboard walls.

We stretch the tape measure parallel to the wall and keep.
Tip!
Should not delay simple perpendicular angle bar, so you can easily make a mistake.
Not very robust and the method of laying equal segments along the walls.
Fasten adjacent profiles

Profile fastened to the floor, walls and ceiling fixings.
Drafted on the lines attached to the wall, ceiling and floor U-profiles using dowels. For this drill hole through the profile, and twists hammering dowel screw and washer.
Mounting doing increments of 30-40 cm. The walls can be used as a rack-mounted, and the guide profiles.
Important!
Do not forget to glue the profiles of the sealing tape on the rear side.
The tape plays an important role in sound insulation plasterboard partitions, in addition, it is believed that because the wall is better to "breathe."
So, we got a box of attached to the walls, floor and ceiling profiles. This will be the basis of our walls.
Mount rack profiles

Racks should stand vertically.
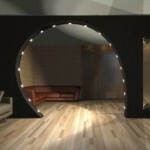
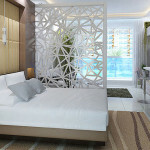
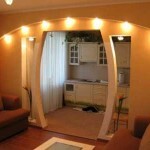
Interior walls of plasterboard with their hands allows you to create both simple classic design, and intricate archway.
- For frame profiles using grade 100 or 75.
- Racks are putting in steps of 40-60 cm.
- The doorway amplify double profile and inserting the rack guide profiles into each other and fastened together by screws to press the puck (one side, one above and the other below).
- The weight of the door leaf should not exceed 40 kg to 100 th profile if the door will be heavier, have to use a reinforced profile thickness of 2 mm.
- Rack profiles are installed in a certain direction, to rib looked in the direction from which the lining begins.
- First, forming a doorway, then expose it from the remaining rack profiles.
- Upper horizontal jumper doorway connect one or two segments of the ceiling.
Doorway

The doorway is formed at the stage of the frame construction.
We define the place where the door is located. At this point, the lower profile that is on the floor should be removed if it was solid. Lower profile should disperse to the sides from the opening to the walls, but in the doorway he should not be. (cm. also features an article door installation in plasterboard wall).
We expose reinforced rack profiles on the sides so that the opening was wider than the door frame 4-5 cm. Fasten them with screws.
Then, at the height of the door frame plus 2cm fasten horizontal jumper for one side, expose it horizontally on a level and a second edge fastened.
The horizontal bridge fastened to the ceiling 2 vertical jumpers, as in the photo.
Tip! Companies that make the walls often reinforce opening additional racks, standing next to the door.
It is better to strengthen the rack as described above, it saves time.
uprights

Rack profiles are installed after the door opening in increments of 40 cm.
Important!
If the ceiling height is greater than 3m, door pillars should be strengthened with wooden bars from floor to ceiling, or wall will vibrate and did not serve.
After the opening is formed, we proceed to the mounting racks. Retreating 40 cm from the door pillar and install the profile. We remember that the profiles have to look in one direction.
A small amount of displacement of the pitch for the convenience of docking integral sheets GCR. Fasten the rack to the ceiling and bottom profile with screws.
These instructions must be performed in this order, an arbitrary rearrangement of steps will make a lot of confusion and lead to damage of the material and extra work.
frame cladding with plasterboard

With work on the skin can be managed independently.
As already mentioned, we start facing from the side where looks ribs rack profiles.
If the door is close to the wall, the first sheet can be placed, and then cut the opening. Clipped over the opening so that the sheets docking took place on the profile. The universal rule for drywall - the docking is performed only on the profile!
If the ceiling height is greater than the height of the FCL, the lower mount first single sheet, then stitched horizontal profile and thereon butted to the upper extension plate.
The following list are doing the opposite - at the bottom of the extension and the top piece. Next, we change them every once in a checkerboard pattern. Cross joints are not allowed!

An example of how not to do.
In places docking sheets, as well as the junction to the ceiling and walls do chamfer on 2/3 of the thickness (if the sheet is cut manually). Factory chamfer do not touch.
Fasten the sheets on the screws in increments of no more than 15 cm, it is possible in most places jumpers. At the junction of the screws should be vrazbezhku if the edge of the factory - back down to 10 mm if cropped - 15.
Cap screws do not pierce the cardboard, but they should be slightly utaplivat.

The reverse side is sewn up after the installation of insulation.
When one side is finished lining, pass to the second. Before you make the interior walls of gypsum board, consider what will be built in the wall of communication.

The switches should be determined in advance.
The racks have special holes for wiring, but in the opening of the GCR to be done in advance. Now we proceed to the insulation.
For noise reduction is better to use mineral wool. The price of this material is not too high, and the rate damping sound vibrations are good enough.
So laid mineral wool in two layers (or one thick one) and proceed to the final paneling. This time, starting from the opposite side.
The width of the first sheet should be 40 cm differ from the corresponding sheet on the other side of the wall, the seams do not coincide. The same applies to the order of alternating upper and lower plate extension.
The rest operate under the same scenario as in the previous paragraph.
Finishing work

The first thing treat seams and joints.
When the walls are covered completely, you are ready to finish. The first step is processed seams. To do this, use a putty type «Fugenfuller Knauf» or «Uniflot".
Spatula fill the seam, remove excess putty. Paste the tape-reinforced serpyanku and top again shpaklyuem. The joints must not protrude above the surface of the sheet, but only to fill the chamfer.

Seams fill from the bottom up, not much we press.
Important!
When working with sutures do not press on the joint, or the wall can be deformed.
Angles also shpaklyuem and sizing serpyanku. For this work is convenient to use a special trowel corner.

Corner trowel greatly facilitates the work.
When all joints and seams are processed, are sealed space mounting screws, take a break until the next day and proceed to the drawing of the starting layer of putty.
Starting layer should form a smooth coating on the finish is the finishing layer is applied.
Tip!
Beginners finisher better not to use too wide spatulas, as they work more complicated.
conclusion
For a better understanding of the work process is highly recommend that you review the video, presented in this article. Good luck in the difficult repair business.
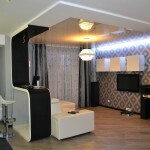
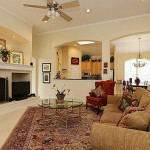
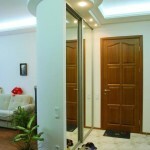
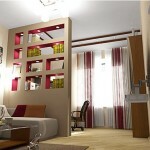
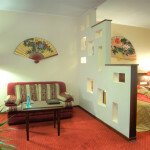
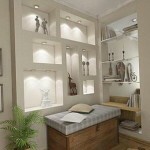
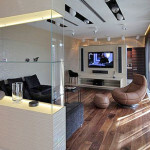
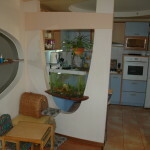
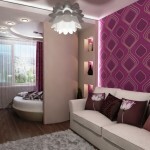
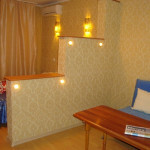
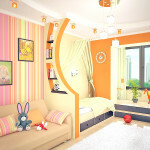
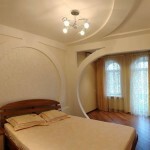
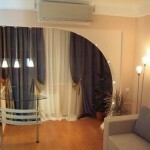
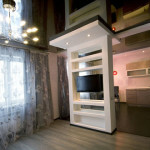
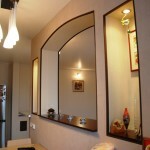
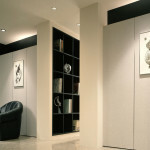
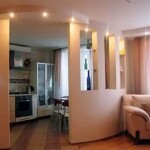
Photo Gallery