Frame for plasterboard: lath for partitions, walls, ceilings, arches, shelves and unusual designs
Table of contents
- 1 The basis for the partition
- 2 Lathing on the walls
- 3 The basis for the ceiling
-
4 custom designs
- 4.1 arches
- 4.2 shelves
- 4.3 Sheathing unusual designs
- 5 conclusion
In fact, the frame for plasterboard with their hands to make a snap. It is necessary to understand the general principle of the assembly and the assembly to consider the nuances of the design of various types.
Let's take a look at those cases in which the frame actually do the calculation for gypsum board and that it is important to remember.
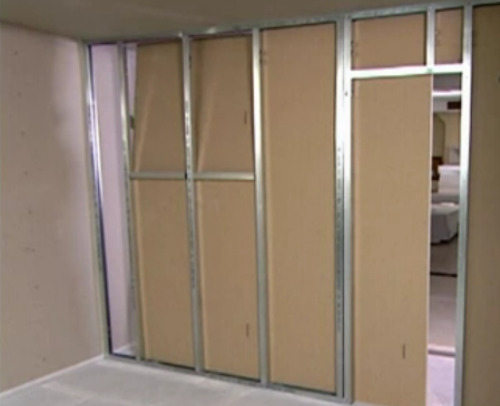
example crates
So, let's begin.
The basis for the partition
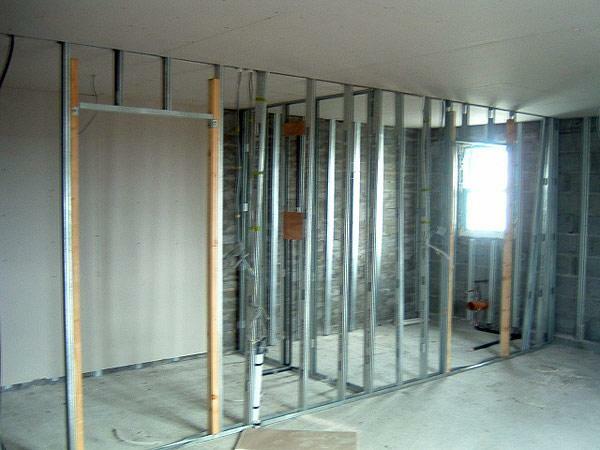
Ready basis for partition
Instructions for the construction of their own hands:
- On the ceiling to draw a line along which will be the guide rail.
- Using a plumb line on the floor tolerated.
- On the wall using the upholstery cord connects the upper and lower points.
- Along the lines of the floor, ceiling and wall fasten guide rails to install partitions.
- We measure the distance from floor to ceiling, carrying cut the strap of the same size and insert them into the lower slots and top guide profile so that the center of each vertical rack was at a distance of 60 cm from each other.
- Fastening using metal screws.
Screws for gypsum board batten are of two types - acute and end with a drill. We recommend using the product without a drill. This is due to the fact that only the tip penetrates the metal, without increasing the diameter of the hole. Screws, screwing into the structure, slightly wrapped around the metal itself, forming an additional reinforcement.
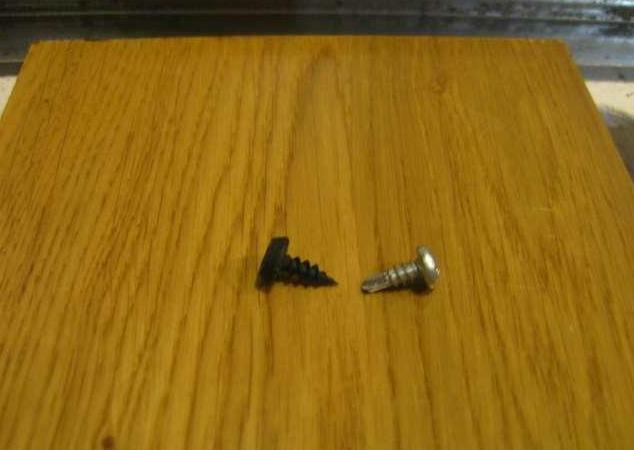
Types of self-tapping screws for metal
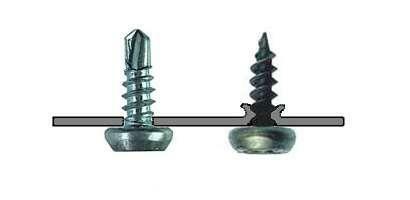
Fixation in metal screws with a drill and without him
However, remember that no self-tapping screws with a drill can not do in the case where the base consists of a fairly thick metal.
Lathing on the walls
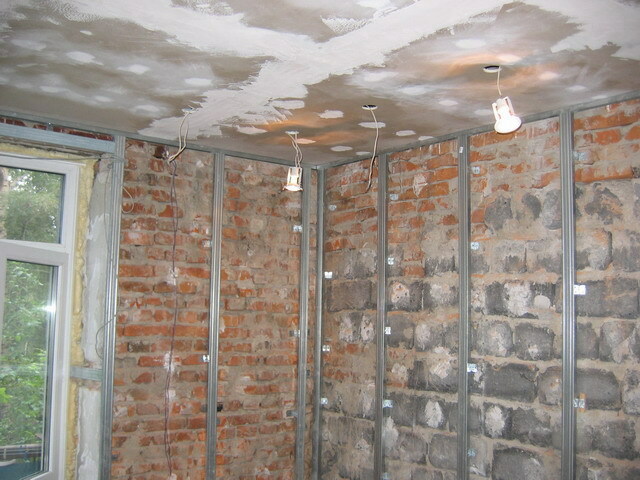
wall crate
So, make the frame for the walls:
- Retreat from the wall a few centimeters, we look, whether on the plane of the larger projections put a mark on the ceiling in the left corner.
- In the right corner of the ceiling back down the same distance and set a mark.
- We transfer point on the floor.
- Putting them all over the perimeter wall.
- Mount along the lines of the guide rails obtained.
Mark up the wall hangers for mounting:
- Along the upper and lower horizontal rail set marks every 60 cm.
- Putting points on the wall using upholstery thread.
- Along vertical guide rails on both sides of the wall Stamp upwardly through every two feet.
- Repeat step 2.
As a result, the wall mesh should happen at the intersection of lines which need to be fixed suspensions.
After the hangers are fixed, take the carrier rails and insert them into the slots of the lower and the upper guide rail.
And now the walls of the frame you want to align in the plane. Easier to do it the conventional building threads, which pull between two vertical profiles every two feet. On this wall frame for plasterboard with their hands ready.
The basis for the ceiling
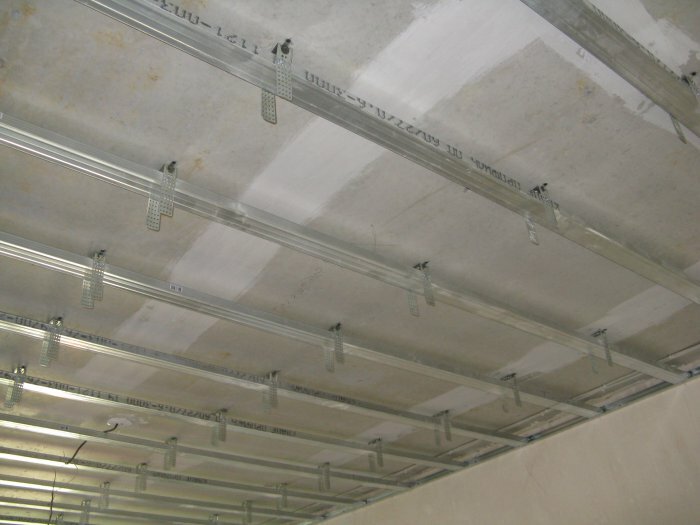
The basis for the ceiling
Box on the perimeter of the ceiling:
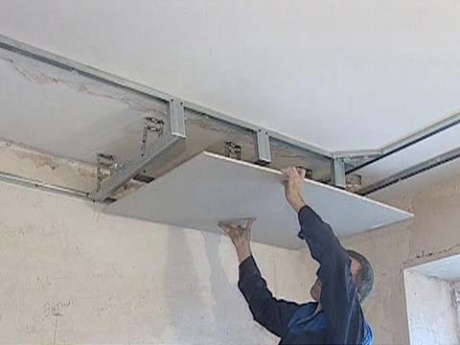
Boxes profile
So, the answer to the question of how to make a frame for boxes of plasterboard.
assembly instructions with their hands:
- Pull back on the wall from the ceiling plane of 5-7 cm, put an end to one of the corners of the room.
- Focusing on the dotted by water level set point to all corners of the room.
- Lines connecting points.
- Fasten along the lines of the guide rail.
- Retreat along the ceiling from the wall a distance that is the width of the box, set point and repeat the operation around the entire perimeter.
Tip! If you do not know how to get the angle of the lines correctly, use the square building.
- Along the lines of all fasten the guide rail.
- If a box of 50 cm wider, set along the rail on the perimeter wall at a point a distance of 0.5 m apart.
- The profile on the ceiling measure the distance to the horizon of the future box and in accordance with this value sliced carrier slats with "lip".
- Insert the finished pieces in the slots on the ceiling "lip" down and connect metal.
- Take the guide and fasten them around the perimeter on the "lip" to the walls of the grooves.
- We put on these guide marks every 0.5 m and connect them to the ceiling (cord paint) with the marks on the walls. In the center of each line is attached to the ceiling suspension.
Now it is possible to measure the distance from the rack on the wall of the guide profile, which is attached to the vertical pieces of a "lip". On the basis of the obtained numbers, cut a piece of the carrier rack and insert it into the guide grooves and screw. This operation is repeated around the perimeter.
When aligning the plane of foundations guided by the rule or standard level.
custom designs
Very often frame for plasterboard with their hands to create irregularly shaped designs - niches, arches.
It should be noted that not only the ease of installation and great features made popular drywall material, but also the fact that the price of raw materials, even for very complex designs pretty low.
arches
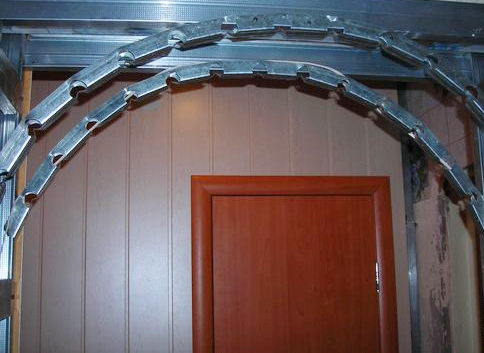
arch assembly
can often be seen in an apartment or a house frame plasterboard arches - and this is understandable, because such complex geometric opening in the wall or around the windows, made from scratch from a different material will be much more difficult.
If the basis for the arch is made around the window or door, for covering is better to use water-resistant sheets.
shelves
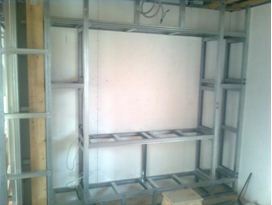
Shelves profile
Profiles and sheets are very convenient to use for the installation of shelves, because such a design allows independently design any desired size, area and even the shape of the product.
In addition, the finish of the shelves - it's limitless possibilities in the choice of color and texture of the material.
Sheathing unusual designs
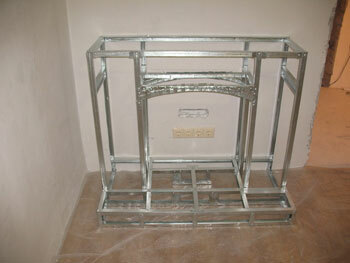
framing the fireplace
No problem, you can make a frame made of plasterboard for the fireplace, this portal will look natural and solid.
Note!
Structure around the chimney is desirable fire resistant sheathing sheets. But in the bathroom is better to use water-resistant sheets.
Such sheets are a little more expensive than usual. Remember, if you use not intended for this material for the cladding of specific objects, it can not only affect the life of the structure, its beauty, but simply to be dangerous.
conclusion
Now that you know how to build a crate for plasterboard with their hands. In order to more accurately understand the technological and practical issues on our website provides detailed photo and video instruction, in which you will find the necessary information on the question.
We wish you a successful renovation!


