Repair toilet in Khrushchev (45 photos): replacement of communications and toilet, floor and wall finishing
Table of contents
- 1 Assessment of the scope of work and preparation
- 2 Replacing communications
- 3 The floor and walls
- 4 Replacing the toilet
- 5 Summing up
- 6 Photo Gallery
One of the most complex and controversial problems that may stand in front of the master, is the repair of toilets in the Khrushchev.
Indeed, small size and often deplorable state of communications is converted repair a small room in a rather complex puzzle.
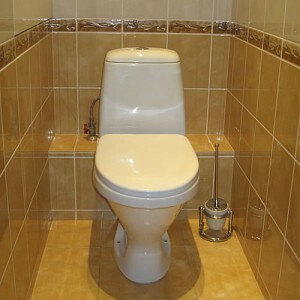 Do not despair, nothing is impossible in this case not with due diligence in a panel Khrushchev repairs will be completed in the shortest possible time.
So, let's see in detail how it will be renovated bathrooms in the Khrushchev?
Assessment of the scope of work and preparation
In this article we will describe as much detail as being renovated one-room Khrushchev, and you get to work will always be able to make adjustments, as they say in the scheme, "the place".
First we need to decide what state our bathroom. To do this, we conduct thorough and impartial inspection. Evaluating the state of a floor covering, before the finished ceiling and walls, and plumbing pipes. Something may need to be replaced, and some items may well last for more than one year.
On the basis of the assay is the plan of work (installation of pipes, plumbing, laying floor tiles, glazed tiles), and, based on "rough" apply our rough estimate.
Note! As practice shows, laying tile in the bathroom close Khrushchev (and other toilets in the Khrushchev does not happen by definition!) Is impossible without dismantling the toilet. And to put an old toilet with a new tile, few people agree. Therefore, the estimates for laying tiles and will have to include a new toilet.
Preparation includes toilets dismantling finishes, removal of old plaster and tiles, as well as the dismantling of the bowl. Dismantling of pipes is carried out immediately before the replacement since the risers have to be turned off and a long time to keep them in a disabled state, you can not.
Replacing communications
The first phase, which begins directly toilet repair Khrushchev - a change of communications. Depending on the condition of the pipes, you can replace the riser and the entire system or simply to limit the installation of plastic pipes.
Ideally, the replacement of the riser should be done around the house at the same time, but still not at your expense. However, this happens very rarely, so you have to ensure disconnection of the riser at least an hour and quickly install section of pipe in your apartment.
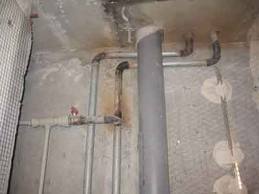
Replacing the riser and pipe
After the riser is installed, you can proceed to the tubes.
Note! To the tube is not "sweating", they are put on the pipe insulation that prevents the formation of condensate. Price - 80 rubles. pcs.
The floor and walls
The queue for finishing the walls and floor. Repair the walls of the Khrushchev involves their alignment. And on the floor with their hands have put a new tie, pre providing reliable waterproofing. Let toilet and bathroom, but still protect it from leaks do not hurt.
Once the screed has dried completely, proceed to the laying of tiles:
- Floor tiles in the bathroom often laid in parallel rows, but the variant with offset stacking ( "vrazbezhku"). Before laying using cutters or grinders for a tile need to make respective tiles notch water pipes and the riser.
- Tiles laid on the floor according to the standard technology using tile adhesive. Apply the adhesive using a float on the floor portion, and forming grooves on the prepared adhesive portion laid tile. Laid tiles rattling special tile hammer.
- Once the tile is laid and jammed joints, proceed to the wall covering. For facing tile use a lighter shade compared to the floor. This will allow us to visually enlarge the space.
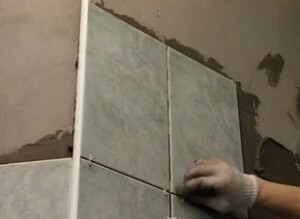
Wall covering
- Tiles should be laid on the previously leveled walls. The correctness of tile rows is controlled by a level. To the joints between the tiles are the same size, use plastic spacers crosses (they need to be removed prior to the final solidification of the adhesive).
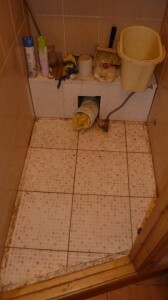
Everything is ready for installation of toilet
Replacing the toilet
Installation and connection of the toilet - a stage that ends the toilet repair Khrushchev.
- Once trimmed toilet, put the toilet seat to the desired position without fastening. Then, on the floor mark up the location to drill the mounting bolts and the installation location taffeta (gaskets).
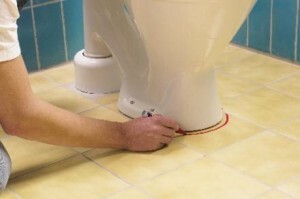
floor markings under the toilet
- Fastened to the floor taffeta, drill holes for fasteners.
- Return the bowl in place, fasten it with the cap screws.
- Connect a drain tank to the bowl. Mount float flush valve system.
- We connect evacuation tube to the exit of the riser and connected sewage pipe to the drain cold water tank. Carefully seal the connection points.
Once the toilet is connected and successfully tested, toilet repair Khrushchev can be considered complete!
Summing up
We hope our article has been helpful to you. In order to more accurately understand the technological and practical issues on our website provides detailed photo and video instruction, in which you will find useful information on the question.
Photo Gallery
