 With patterns you can significantly improve the aesthetics of the ceiling in modern interior ceiling has long ceased to play the role of a highly practical and functional element. The original design of the surface can make the interior complete, unique and unique, emphasize the style of the room. One of the simple and affordable ways to make the ceiling interesting and unusual is the drawing on the surface of various patterns and drawings. How to prepare a ceiling for work, and what methods of drawing patterns by their own hands exist for today - read below.
-
- patterns to a ceiling surface preparation
- Geometric patterns ceiling
- How to make a complex pattern on the ceiling under the stencil
- Prints using
- projector ceiling with patterns: other methods of application drawings
- Drawing patterns on the ceiling( video)
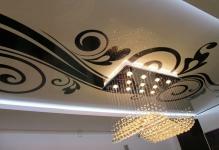
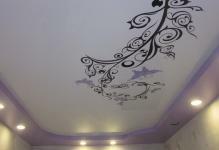
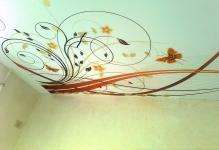
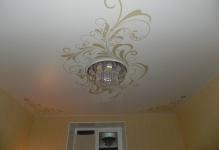
- Examples of patterns on the ceiling( photo in the interior)
patterns on the ceiling: surface preparation
patterns on the ceiling can be quite timebubbled from simple but effective geometric and plant, to complex volumetric drawings. You can paint the ceiling with your own hands. In order to make the drawings qualitative and attractive, the surface must be prepared beforehand for application.
ceiling preparation process includes the following stages:
- Deleting old finish( wallpaper, whitewash etc.).
- Priming of the surface and leveling of small irregularities, elimination of defects( such as for example joints between ceiling slabs) with plaster.
- Grouting of the surface with emery paper.
- Application of the finishing putty with a thin layer in order to make the ceiling smooth and smooth.
- After drying the putty - paint the surface in the desired color.
 Before you apply the patterns on the ceiling, it should be painted
better for ceilings with patterns to choose neutral, pastel shades: so that the color of the ceiling will not distract from the design, and the patterns will look neater.
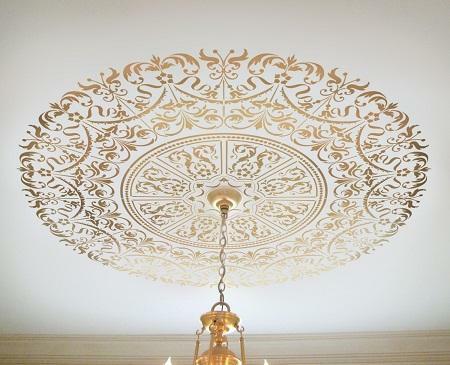
Geometric patterns for the ceiling
The simplest type of patterns that you can do yourself, even without the presence of artistic skills - is a geometric ornament.
To ornament turned clear and smooth, it is possible to use such variants deposition:
- Make drawing on paper and transfer it to the surface with a pencil to scale.
- Paint the ceiling in the color of the future ornament( for example, white), using thick paint tape to form the whole surface of the ceiling in an arbitrary order of the shape or line. Paint the ceiling over the scotch in the right color and remove the adhesive tape after the paint has dried. As a result - unique, smooth and clear lines and shapes.
In addition, you can use a stencil for applying simple patterns.
How to make a complex pattern on the ceiling under a stencil
The stencil can be either normal or reverse( only the outlines around the element are outlined).The template can be purchased on a specialized site, order an item on your own sketch or make your own hands from cardboard, plastic. To make the drawing clear, you need to firmly fix the stencil on the ceiling. This can be done with the help of paint tape or tape.
 to qualitatively perform a stencil pattern on the ceiling, is recommended to watch instructional videos
Apply the paint through a stencil can be in several stages:
- Using a roller with paint. This option will give a quick and clear picture. Before applying the pattern to the ceiling, it is recommended to test the technique on a similar surface in order to adjust the force of the pressing and the amount of paint.
- Using the brush. This method is good if the stencil contains several elements that need to be executed in different colors.
- Using an aerosol can. Drawings in this way come out very light, have clear lines and quickly dry up.
- Using a foam rubber sponge. Sponge will absorb excess paint and transfer to the surface exactly as much as necessary. In addition, in this way you can perform patterns not only with one color, but also create spectacular smooth color transitions within the boundaries of one element.
If the edges of the drawing are poorly traced, they can be corrected manually with a thin brush with the paint of the desired color. With the help of the stencil, you can apply a three-dimensional image( no more than 3 mm high).To do this, instead of paint, you should use decorative putty.
Prints using a projector
Prints using the projector requires the artist more time and patience than other methods, but the image resulting in a highly artistic and worth all the spent forces. In addition, in this way you can perform any drawing you like. In order to transfer the picture, you need to build a projection on the ceiling, avoiding distortions, tracing it around the contours and coloring according to the chosen color palette. In order for the image to be smooth, the projector must be firmly secured.
 Using the projector can be applied to the ceiling pattern of any complexity
thus can be transferred at the ceiling as small and simple drawings and more complex, beautiful images. Working with paint is important to make the middle of the picture lighter than the outlines.
In order to avoid fading under the sun's rays and retained for a long time, it should be fixed with a transparent acrylic lacquer in several layers.
ceiling with patterns: other ways of image
In addition, there are many other methods of applying patterns on the ceiling, the implementation of which will have to be reserved by special tools or materials. But, each of these methods guarantees quality and simple application.
 very common for ceiling decoration applied to the surface of printing, which can differ in shape and color
K simple methods are deposition patterns:
- Using textured roller. Building and decorative arts and crafts, today, offer their clients rollers with a variety of textures: from simple geometric to detailed images of flowers, birds, animals, etc. The technique of drawing drawings is simple: the roller is soaked in a container of paint and rolled over the surface of the ceiling in one direction( the re-holding can close the picture, making it sloppy).
- Application of stamps. Patterns in this case are applied through rubber molds, which can be made by hand, ordered on specialized sites or purchased in stores for hand-made. It is very simple to transfer the drawing with a stamp, the main thing is to cover the mold well with paint and to press it firmly against the decorated surface.
- Use of stickers. Modern production of polygraphic products makes it possible to select any pattern and print it on sticky paper. In this case, the drawings can be either ordinary or fluorescent( glowing in the dark).All that's left is to paint the ceiling in the right color, or decorate the surface with wallpaper, and paste the patterns.
If you want to glue patterns in a certain order, it is first necessary to mark the ceiling squares, and the location of the label outline with a pencil.
Drawing patterns on the ceiling( video)
patterning - is a simple and affordable way to make each unique ceiling. Choose any of the options you like, and create beautiful patterns with your own hands for the joy of all family members!
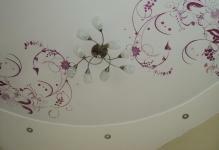
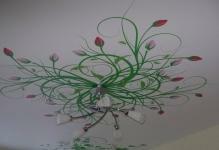
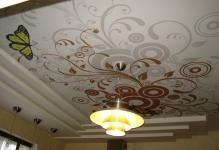
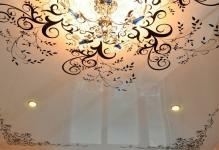
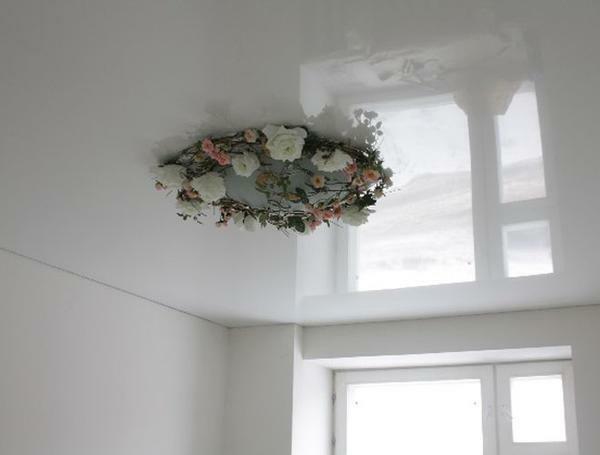
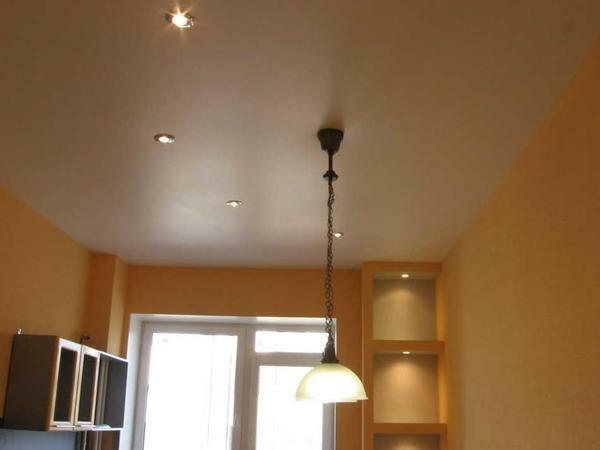
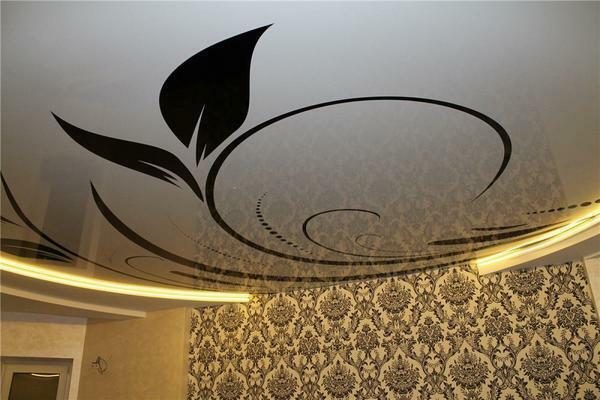
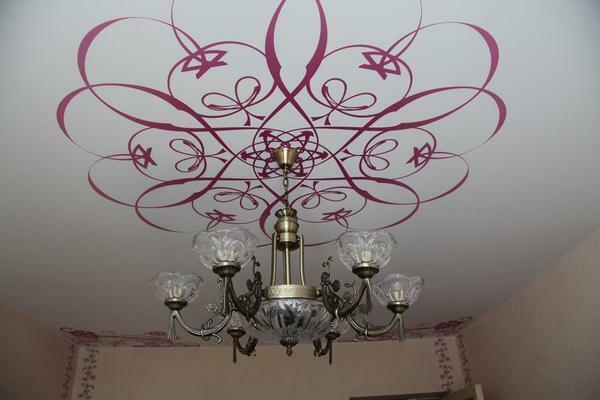
Examples of patterns on the ceiling( photo in interiors)