As for the color range of plastic lining, it is very large. You can choose any, most importantly, what you need to pay attention to, so that all the purchased vagonki were from the same lot and the same tonality. Of course, you must always pay attention to the quality of the material. To do this, take the wagon in hand and carefully consider it. The thicker the material, the better. The next thing that we pay attention to is the presence and number of stiffeners, as well as their condition. And the last criterion of quality is defined as follows. The edge of the panel bends and returns to its original position. If after that there was a trace, then the material is substandard.
Preparing tools and materials: finishing the loggia with the lining
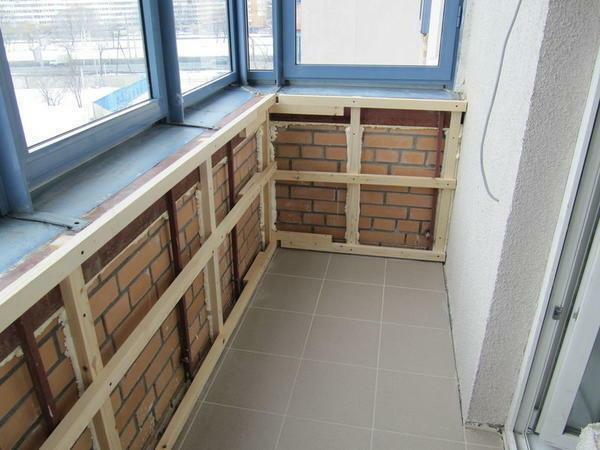
Before you finish and sew the balcony, you need to do a number of preparatory work, including measurements, preparation of the necessary tools and materials, as well as preliminary work with the walls.
The last item is especially important. This is done to protect the walls from the appearance of mold or fungus.
Works with interior finishing always begin with the removal of sizes and materials. Here, difficulties should not arise and you can manage yourself. It will be enough to measure the length and height, and then calculate the total area of the balcony or loggia. Then the doorways and the size of the windows are measured. In the end result, we can obtain the data of the area, which will be lined with lining.
Once all dimensions have been received, you can send for the materials.
 Before proceeding to finish the loggings with a lining, you should prepare the room and the necessary materials for the operation of the
For work you will need:
- Insulation material, at least 40mm thick;
- Antifungal treatment;
- Membranes superdiffusive and single-layered vapor permeable;
- Varnish;
- Spiked board about 20mm thick;
- Wooden bars with dimensions 60x40 and 60x15.Used for a crate, which will hold the vapor barrier.
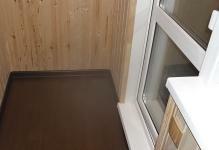
As for the slopes, a planed board may also be needed here, but its thickness should be less, approximately 15mm, and the width should be equal to the walls on the slopes. As a heater, you can give preference to stone wool, which has a number of positive properties in comparison with polystyrene.
Tools to be used:
- Impact drill;
- Screwdriver;
- Hammer;
- Roadman;
- Hacksaw;
- Kianka;
- Brush;
- Roulette;
- Level;
- Marker or pencil;
- Liquid nails;
- Clamps for fasteners;
- Self-tapping screws;
- Dowels;
- Nails.
Take care of the availability of all materials in advance. This will help in the future not to be distracted from the workflow and finish the job much faster.
Practical advices: how to sew the balcony yourself with the lining of the balcony
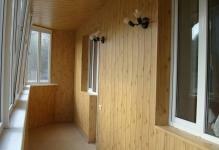
The work on the plating inside begins after the skeleton and the crate have been prepared.
There are only 3 types of fastening of the slats:
- Vertical;
- Horizontal;
- Diagonally.
Which one to choose is a personal matter for everyone.
 If you decide to independently finish the balcony with a lining, then you can use the vertical method of securing the ASD100DD
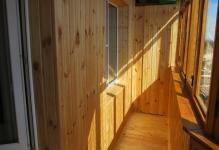
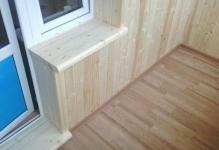
. Installation begins with the process of cutting the slats in order to obtain the required length for the area under the windows. After this, the bar is taken, which has already cut off the thorn and is applied with a cut to the wall. Fixation can be carried out in several ways: with a klyamer, diagonally hammered with a nail or with a through fastening with a plug.
The next bar is wound up behind the spike of the previous one. She, most likely will not become independently on the place, therefore it is necessary to take kiyanku and finish it. After that, it is fixed in one of the above ways. This procedure is repeated for all bars. The last lining should be cut so that it freely enters the space and thus does not leave any gaps.
After the work with the small bars has been completed, you can proceed to larger volumes. The algorithm is as described above.
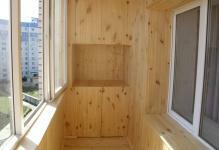
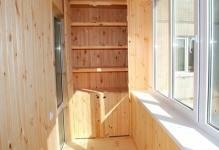
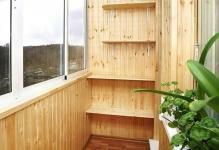
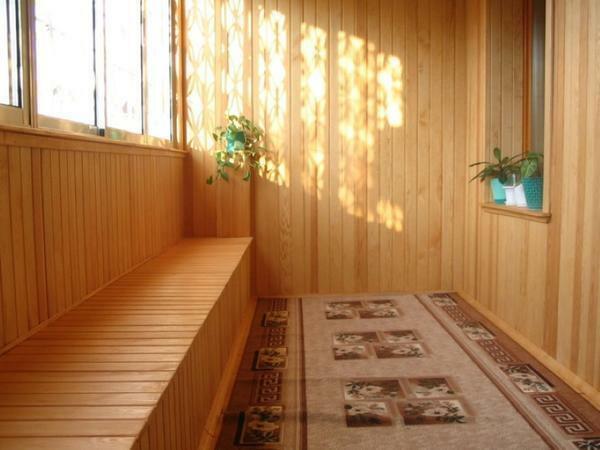
If you use plastic lining, working with them is no different from the previous work. It is much faster, and the panels themselves are attached to self-tapping screws. On the Internet, you can see the video and photo results of people who have lined their balconies and balconies with their own hands.
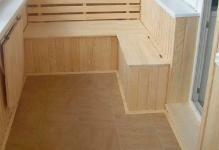
Basically, when it comes to talking about lining, many imply the material of wood, today in this article it was revealed that it can also be plastic panels. Create a cozy place and atmosphere on the balcony or loggia is very simple, for this purpose people decide to use the lining. Yes, there is a lot of work to be done, but it is not that difficult, even a beginner can handle it.
balcony design, covered with clapboard( photo examples)