Contents
- 1 How to properly prepare the surface for laying tiles on the drywall
- 2 How to glue the tile on the plasterboard in the bathroom
- 3 How to tile the tiles on the surface of gypsum board
Gypsum boards are widely used for leveling surfaces, preparing it for laying various finishing materials. As the finishing materials are used not only wallpaper of different types, but also a parquet board, cork or laminate panels, tile. Consider how to glue the tile on gypsum board. Since the basis of the gypsum board is G-4 gypsum, which has the ability to regulate the moisture, then gluetiles on gipsokartonny sheet is not difficult.
How to properly prepare the surface for laying tiles on drywall
Gypsum boards are available in several types.
Tiled tiles can be laid on any type of drywall. But in damp areas it is recommended to use moisture-proof plasterboard of GKLV type, GVLV.
Before the tile is applied, the surface must be prepared.
Step 1
Docking joints of gypsum boards must be shpaklyuyutsya butt putty.

Filler of butt seams
It is recommended to use a butt filler for gypsum board Knauf. It is better to use dry mixes of Unifloff, Tiefengrund or Fügen Fuhler.
From other mixtures, it is possible to recommend the filler of UNIKMA company under the name Ceresit, putty of the Finnish company Kiilto under the name Kestonite.
From domestic materials it is best to use the putty of the brand Gipsomontazh made by the company Forward.
Filler characteristics Hydraulic installation:
Represents a dry white mixture based on gypsum with polymeric, hydrophobizing additives.
Easily mixed in water, forms a highly ductile, highly adhesive mortar. The water absorption of the solution does not exceed 5%.
It is used for the installation of gypsum boards, their plastering and gluing to smooth surfaces. In combination with the reinforcing tape is used when sealing gypsum board seams.
By the way, putty joints and the surface of gypsum cardboard sheet under the tile can be glued with mortar for laying tiles.
When the putty dries, the surface must be cleaned. This is done with a wide spatula. The spatula is held at an angle of 30º to the surface and is found along it. This removes any irregularities, particles of plaster, putty.
Step 2

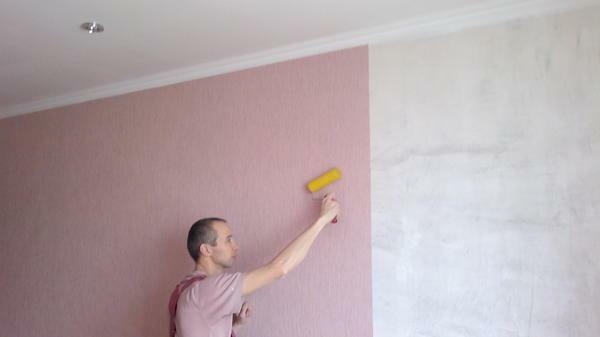
Primer sheet
The surface of gypsum boards is primed with two layers. The second layer of the primer is applied only after the previous layer has dried completely. As a primer, it is recommended to use a deep penetration primer produced by the well-known Knauf firms, UNICMA.For example: Rotband Grund, Betocontakt.
From domestic primers it is best to use a Monolith primer.
Characteristics of the primer Monolith:
- - high penetrating power;
- - creates high adhesion;
- - gives the surface increased water-repellent properties;
- - promotes uniform coloring of the surface;
- - prevents the appearance of fungi and mold;
- - quickly dries;
- is ecologically safe and odorless.
Before applying the primer, the monolith surface is cleaned of chalk, dust, greasy stains. Before use, the primer Monolith must be mixed thoroughly. Primer can be applied by spray, roller, brush.
The primer can be applied at a temperature of at least + 5 ° C.It is not recommended to apply the Monolith primer to frozen surfaces.
Step 3

And how to put a tile on a drywall?
Tile tiles start to be laid on the drywall, as soon as the last layer of the primer has dried thoroughly.
It is possible to lay tiles on plasterboard with various materials:
- - tile sticker with cement base;
- - use as a glue composition of liquid nails;
- - application as an adhesive special elastic tile adhesive.
Cement-based adhesives are recommended to use Ceresit CM 11, CM 12, CM 17;Master Standard and Normal.
As liquid nails, it is best to use acrylic adhesives on a water-based basis. But liquid nails on the basis of organic solvents in the household should not be used.
With liquid nails, it is possible to glue a tile with a light weight.
You can glue the tiles on drywall using various methods:
- - laying tiles opposite each other;
- - laying a new row with a half-tile shift of the previous row;
- - laying the tile with herringbone;
- - laying tiles with a diagonal;
- - laying the tile with herringbone with a nail;
- - laying tiles with a modular mesh.

It's best to glue the tile on a drywall using a special tile adhesive. You get a quality surface for many years, although you will lose a few in money terms.
But any method of fixing tiles on a plasterboard surface allows you to obtain high quality results.
It is recommended to use glues Ceresit, Tim-35, Elast, Plitonite from adhesives for laying tiles on a gypsum board.
By the way, glue for tiles is produced both in the form of a dry mix, and in the finished form. Here is the list of ready-made adhesives: Neomide glue, Terraco glue.
From domestic brands it is possible to recommend such adhesives as the same Neomid or as a dry mix of Volma. Calculation of the amount of tile adhesive.
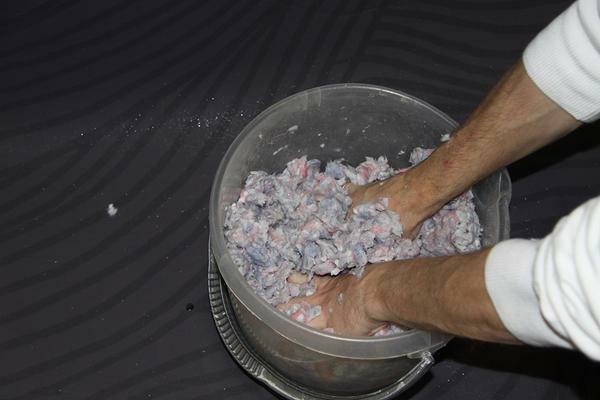
When mixing dry mixtures, it is necessary to strictly follow the requirements of the instructions for preparing the solution, to strictly maintain the specified proportions of water and dry matter.
Correctly prepared glutinous mixture will not over-wet the cardboard. And this is very important, because excess moisture leads to deformation of gypsum boards.
How to glue tiles on plasterboard in the bathroom

Glue tile in the bathroom
It should be remembered that for preparing the surface and laying tiles on plasterboard in the bathroom it is recommended to use materials for rooms with high humidity. The basis of such materials is cement.
Before you glue the tile in the bathroom, you must prepare the surface.
Joints of gipsokartonnyh sheets are sealed with special putty, the surface is cleaned and primed.
After complete drying of the primer, the layout is laid out from the tile, the required number of whole tiles in the row is calculated.
The bottom row is marked with a level, the support strips are installed.
The tiles are laid starting from the second row. Online calculator calculating the right amount of tiles for the bathroom.
Do not forget to control the flatness after laying each two rows and the vertical level of the upper row.
Know! The life time of glue for tiles does not exceed 20. .. 30 minutes.
You need to prepare as much glue as you can use faster than the specified period.
The thickness of the adhesive should be within 5 mm. The glue is applied to the wall, a comb is used with a notched trowel. Excess glue is removed, where there is not enough, it is leveled. Tiles from the inside are necessarily tipped.
When applying the tile, do not forget to install restrictive crosses.
Give an excerpt at two o'clock and proceed to clean the tiles from the adhesive. This must be done necessarily, otherwise the traces of glue will be difficult to remove.
And the last step, the application of the trowel. Calculator calculation of grout for tiles.
In the video below, the process of sticking tiles to plasterboard sheets in the bathroom is discussed in detail.
Conclusions:
- - it is recommended to use a deep penetration primer such as Rotband Grund before laying the tile for priming the surface;
- - putty joints are best suited for this purpose solutions from dry mixtures such as Uniflot, Tiefengrund or Fügen Fuhler;
- - it is recommended to use special ceramic tiles such as Ceresit, Tim-35, Elast, Plitonite for tiling;
- - for a budget variant, mixes of domestic manufacturers.
Here is a list of some auxiliary materials for laying tiles on gypsum board produced by domestic manufacturers:
- primer for deep penetration: Monolith, Color, Lacra, GKL-1 primer;
- putties for joints of gipsokartonnyh sheets: Palaplaster firm Paladyum, putty firm Kreps;
- adhesives for plasterboard: Kreps, Petromix, Perel, ANTs "Alit".
The order of laying tiles on the surface of gypsum boards
Begin to lay tiles from the second row.
To do this, by level mark the position of the tile in the bottom row, mark the upper boundary.
Knowing the height of the tile laying, the size of the tile laid, it is not difficult to calculate at what height the marking line must pass.
On the marking line, fix a wooden strip or metal profile, which will serve as a support for the second row of laid tiles.
After laying the row, allow time to seize the glue and proceed to laying the next row. For one day is not recommended to stack more than three rows.
When all rows are stacked, remove the support rail and glue the bottom row. Tips on how to quickly apply tile glue to the tile.
Try it and it will work out!