Design loggia (51 images): best finishes
Table of contents
- 1 applications
- 2 styles
- 3 Loggia, combined with a kitchen
-
4 warming of the loggia
- 4.1 Why should insulate the loggia?
- 4.2 The sequence of work
- 5 Summing up
- 6 Photo Gallery
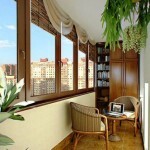
Dimensions of the apartment are rarely satisfied with its owner. A few extra square meters can be used in very different ways, to think a beautiful and functional design the loggia.
Here is a simple to arrange extra mini-room or make a sitting area, where you can come warm summer evening, breathe fresh air, and if the windows are located in the park area, and even enjoy nature.

In this article we will talk about what are the uses of loggias, as well as some design decisions are appropriate.
applications
Before you create a design project of the loggia, you need to decide on its future purpose. Basically it depends on the layout of the apartment, or rather from the lack of certain facilities, as well as from the balcony Location.
The most common application of embodiments are:
- resting-place;
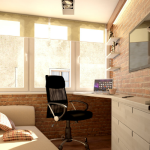
- study;
- continuation of the kitchen;
- continuation of the bedroom;
- pantry.
Once you have decided on the appointment of balconies, you can go directly to the design.
styles

Style of "country"
If you are thinking how to make cheap repairs yourself and plan to leave the partition separating the loggia from the rest of the apartment, renovated our school can offer you 8 design options.
Each of them is a representation of certain expressions of style. You can combine a few ideas and create your own design.
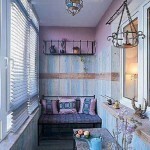
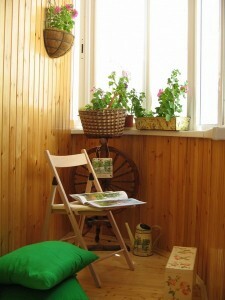
- Vintage. Decorating should be possible to remind the 50-60s. Wooden floor, the walls "Brick" (you can use wallpaper, tiling or laying natural bricks), used in the decoration of the trapezoidal headlight and natural plants in pots.
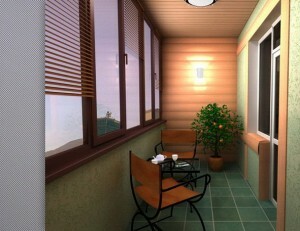
- Romance. Walls decorate light pastel colors, you can place a table for a romantic get-togethers, LED lights mounted on the ceiling.
-
resort style
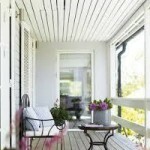
Terrace. Plastered wall (brick or peach color) laid on a floor linoleum, simulating any paved surface, such as paving tiles. The interior is complemented by a garden bench and wall lanterns.
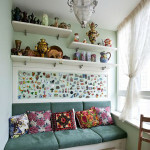
- Swedish. The walls are sheathed with plastic or wooden paneling, set wide windowsill of furniture placed a soft corner.
- Japanese. The solution in the style of "minimalism", linoleum on the floor "under the tile" The walls are painted or poshtukatureny in bright colors of the furniture only chairs or stools, dark color. This is the most popular design of small balconies, as bright trim and space make the room visually larger.
- Country. The walls are trimmed with wood paneling, wooden floor, there is wicker furniture.
- Resort. On the floor laid linoleum "under paving slabs" or "decorative stone" walls are covered with light plastic lining of furniture - a sun lounger and a small table.
Loggia, combined with a kitchen
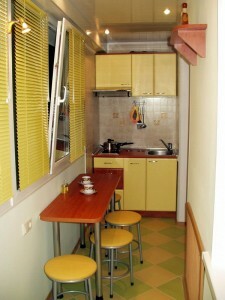
Open plan kitchen with a loggia
Kitchen design with a loggia should be made in the same style, even if you decide not to make alterations, but simply to place on the territory of the balcony of the kitchen units.
Intermediate solution of the basic idea to repair one-bedroom apartment is a partial demolition of the walls, where the batteries remain in the same place. In this case, you will also avoid problems with the redevelopment.
Repairs carried out as follows:
- dismantle balcony unit and the old frame;
- in the presence of its nut knock;
- Tap sill boiled at 30 cm from the line handrail;
- set of metal structures on the stem;
- outside takeaway sheathe siding.
Near the window, you can place the high bar stools and use the window sill as a table.
Tip! you can place a table-top and turn the remnants of walls in the working surface on the site of the dismantled balcony unit frame.
And finally, the most radical solution - a complete demolition of the walls. With such repairs kitchen design, combined with a loggia should be absolutely identical, if it were not for two rooms, a single unit.
warming of the loggia
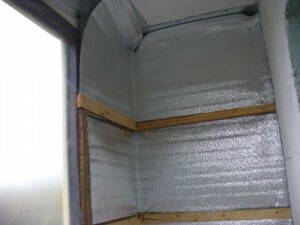
Lathing, fixed on the first layer of insulation
Why should insulate the loggia?
All the above options require additional insulation, or you can use the room only during the warm period, which is unacceptable in the case of the demolition of walls.
The sequence of work
- Set of metal and plastic frames, installation of which, like the very manufacturing, entrust in the hands of specialists.
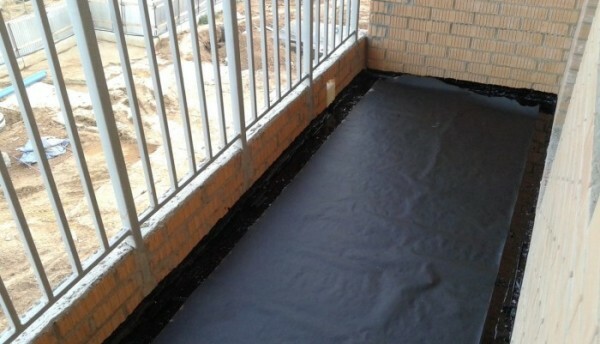
- The concrete surface is treated with a special primer for improving the adhesion to a heater.
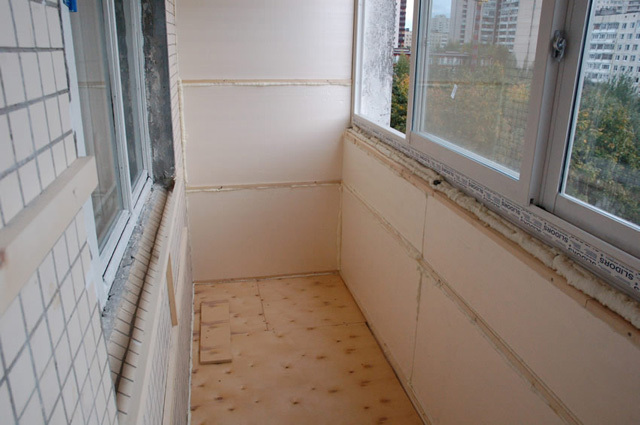
- The walls, ceiling and part of the outer wall under the frames glued foiled izolona foil inside.
- Joints glued sheets of insulation tape foiled.
- If you combine a room with a bathroom and a bedroom with balcony design involves placing a bed in the vicinity of the frame, insulation does double.
- The first layer with dowels screwed wooden batten bars thickness of 3-6 cm.
- Second layers of insulation foil is fastened with staple gun foil inside.
- Joints glued again foiled tape.
- On top of the insulation lining the walls obbivayut or sheathe plasterboard followed by a fine finish.
- Install the system "warm floor" or veiled Penoplex floor and covered with linoleum or laminate.
Tip! If the windows of your lodge offers a very scenic view, can be ordered "French balcony" with glazing above and below the railing.
After the completion of the warming can safely begin to embody the design invented by a loggia in reality.
Summing up
We hope our article has been helpful to you. In order to more accurately understand the technological and practical issues on our website provides detailed photo and video instruction, in which you will find useful information on the question.
Photo Gallery