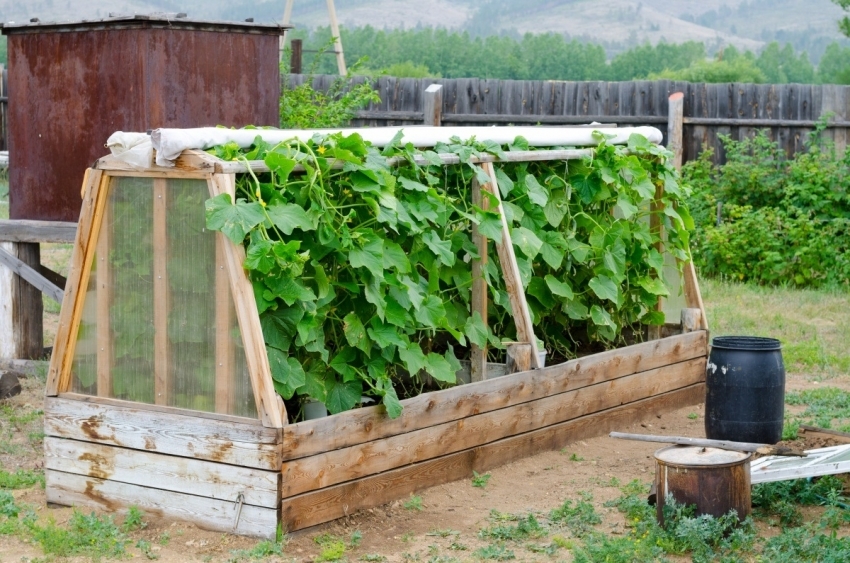
The garden and the garden need timely watering, especially in the hot summer months. The system of drip irrigation is a real rescue for summer residents, who do not want to spend the lion's share of the weekend to drag the irrigation hose through their plot. Drip irrigation is the most rational way of supplying plants with moisture, not it allows the root system to dry up and lack nutrients, and also does not allow the formation of a solid crust on the soil surface or the erosion of the fertile layer.

Drip irrigation system with own hands
Drip irrigation system
The principle of the drip irrigation is the dripping of water directly to the root system of plants .Depending on the equipment used, moisture can be applied either to the surface of the soil - with the help of a drop tape or hose, and into the depth of the fertile layer - using droppers.
According to the type of water supply, the system can be gravitational or forced. In the first case, water comes under the influence of gravity from a pre-filled tank of the required capacity, in the second - from a water pipe or from a pump connected to the well. Drip irrigation systems are designed for a pressure of no more than 2 atm. Therefore, a pressure regulator must be installed in the forced system - a reducer. To create the necessary pressure in the gravity system, the tank is raised to a height of at least 1.5-2 meters.
Water from a tank or water supply system is fed to the irrigation site through trunk pipes having branches. As a branch, standard fittings for drip irrigation are commonly used, described below. Trunk pipes are laid along the fence, the walls of the greenhouse or simply in the furrow, fixed with holders.

System for watering the garden
Tapping lines connecting the rows of plants to the entire length of the bed are connected to the branches. As drip lines, you can use a flexible drip strip with holes or a conventional plastic pipe, to which droppers are connected through the splitters. The ends of the drip lines are closed with plugs or rinsing valves.
To prevent clogging of the system, a fine filter is installed at the outlet of the tank or at the connection point to the water pipe, as well as a valve cock or a reducer, through which the water supply is regulated.
Designing the drip irrigation system
For qualitative watering, drippers should be placed at a distance of 30 cm from each other, while the humidification of the fertile layer takes place 1-2 hours. Further watering is undesirable, as it leads to waterlogging and decay of the root system, as well as to water over-consumption. During this time, consumes about 15-30 liters of water per square meter.
To achieve this irrigation mode, you need to correctly calculate the total length of the system or its individual sectors, as well as the capacity of the storage tank in the gravity system. In the forced system you can not do without manual or automatic control of irrigation. Manual control is suitable for gardeners living in the country: just open the tap and, while you rest or harvest, the system will moisten the soil to the desired depth. If you are on a summer residence rarely, it is worth buying a controller that can be programmed for any period.
The volume of the storage tank can be calculated quite simply: it is necessary to multiply the area of the irrigated area by 20 liters, necessary for humidifying one square meter - this amount of water is enough for a single drip irrigation.
Example of tank volume calculation:

The tank must be installed at such a height that a stable pressure is maintained in the system. When the tank is raised to a height of 2 meters, the pressure in the system will be 0.2 atm., Which is enough for irrigation of about 50 m2.If the area of the site is larger, in the gravitational way of water supply, it is advisable to divide the irrigation system into sections and feed water to them in turn, or to install a separate tank for each section. Solve the problem will also help the pump, increasing the pressure - in this case it must be maintained on the order of 2 atmospheres.
To ensure a stable pressure in the system, factors such as the diameter of the main pipes and drip lines are also important. The pipe with a diameter of 16 mm passes 600 liters of water per hour, it is enough to irrigate a 30 m2 plot. If the area of the site is larger, it is better to choose a pipe with a larger diameter: a pipe of 25 mm will allow to pass 1800 liters per hour and water a section of about 100 square meters, a pipe of 32 mm has a capacity of about 3 cubic meters, which is enough for a plot of 5 hundred parts, and a pipe of 40 mm- 4.2 cubic meters, or 7 acres.
The length of each drip line should not exceed 100 meters at any throughput of the main pipes. Typically, the drip lines are connected in parallel at a distance equal to the distance between the rows of landings. In the case of watering fruit trees or bushes, drip lines are placed around them at a distance of 0.5-1 meter from the trunk.

Equipment and fittings
Before beginning installation of the drip irrigation system, it is necessary to draw a layout plan for the pipes and calculate the required number of materials, connectors and equipment.
For the installation of the water supply system, the following is required:
- Plastic or metal tank of the required volume or pump supplying water from the well;
- Valve cock;
- Controller - in case of installation of the automated system;
- Ball valve;
- Pressure reducer;
- Fine filter;
Adapter for connection to the irrigation system.

Equipment for the drip irrigation system
The irrigation system includes the following elements:
- Plastic pipes from 16 to 40 mm in cross-section for main pipes;
- Drip tape or drip tubes complete with splitters and droppers;
- Fittings: cranes, tees, mini-cranes, start-connectors, adapters for connecting the dropping tape, plugs.

Elements for docking the irrigation system
Mounting technology
- Install the tank at a height of 1.5-2 meters or connect to the water supply system. An adapter is inserted into the tank, onto which a valve valve is wound using a FUM tape - it is necessary to regulate the water supply. If water enters the tank from the water supply network, it can be equipped with a float type shut-off valve, as in a drain tank.

Install the tank and connect it to the water supply system
- After the crane, install a programmable controller that regulates the water supply depending on the program set. You can set it up for daily activation or watering every few days, and set the watering time. After the controller set the ball valve, which allows you to block the flow of water.

We connect the controller regulating the water supply
- To regulate the pressure in the supply system, put a reducing gear or a pump that increases the pressure. The working pressure is 1-2 atmospheres, as it increases, leakages can occur at the junctions of the tubes and droppers, the water will flow unevenly when the water level drops. For water purification, the system is equipped with a fine filter - this will avoid clogging.
- To the feeding system through the splitters and adapters, connect the plastic trunk pipes, cut into segments corresponding to the distance between the drip tubes. Pipes are connected with tees. The last main pipe at the remote end is equipped with a washing tap - it will come in handy if the system is clogged.

Connect the
- main pipes through the adapters. To the tees, drip tapes or tubes are connected through the adapters. The drip band is a flexible hose with perforations, drip irrigation is carried out through the holes. The tape is easily cut with a knife, its ends are bent and put on them special clips, playing the role of a stub.

To the tees we connect drip tapes
- The drop pipe is a plastic pipe, usually its diameter does not exceed 16 mm. In the tube from the top at a distance of 30-60 cm make holes for a splitter with a diameter of 3 mm. They insert rubber seals and splitters, which can have from 2 to 4 branches. In the branch, insert the hoses of droppers - plastic tubes with holes. Droppers are stuck in the ground next to the plants.

Drip pipe for irrigation
- Test the system and determine the required pressure, which is regulated by a reducer or a valve cock on the tank.
Installation of the drip irrigation system by its own hands is not difficult, with proper calculation, drip irrigation allows to reduce the laboriousness of garden and garden works and increase the yield by 1.5-2 times. For the winter, the system is easily dismantled: pipes and droppers are removed, water is drained from the tank, control equipment is removed. If necessary, the system can be expanded or rescheduled. Its application is not limited to a garden plot, it can be successfully applied on flowerbeds, balconies, lawns and in a greenhouse.