Two-level ceiling from gypsum board - decoration of any room. However, afford this beauty can only owners of apartments with high ceilings, as suspended structures significantly reduce the size of the room. How to make a two-level ceiling from gypsum board with ?
content
- Create
- first level creates a second level
- Photography bilevel ceiling plasterboard
- Video bilevel ceiling mounting of drywall
create a first level

Initially, a first layer is created suspended ceiling structure. As the first level, you can use the old ceiling, while saving money on materials and saving such precious millimeters of room space. This option is possible only when the surface of the old ceiling is almost flat, has no noticeable curvature. If the ceiling is not particularly smooth, it is recommended to mount the first layer of a conventional suspended structure.
create a second level
In order to create a beautiful two-level ceiling of plasterboard with their hands, you need to be clear what form the second level you like and fits your room.

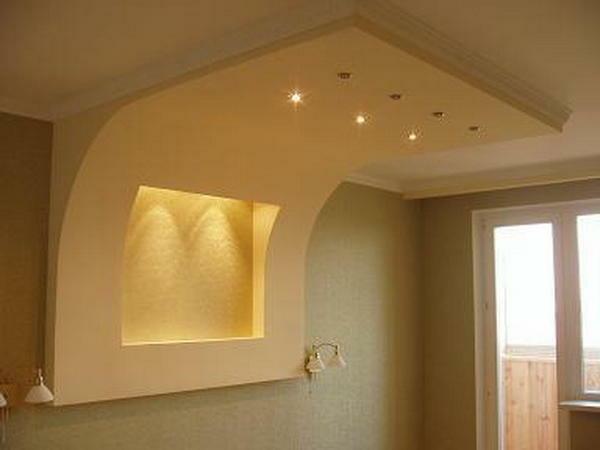
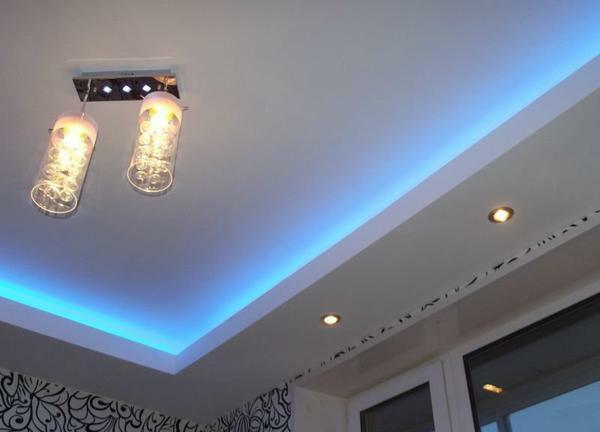
In our article there are many different photo and video materials suspended ceilings of various shapes. Choose an option that can satisfy all your aesthetic and functional needs. As a rule, light fixtures are mounted in the second layer, an additional source of illumination over a piece of furniture - a bed, a sofa.

So by mounting a two-level ceiling of plasterboard with their hands, watch video , which greatly facilitates the process. For example, take the second level of the ceiling in the form of a semicircle.
- To install the second layer you will need a special mortgage profile. Its main task is reliable securing the second level to the main, the first. To do this, take the SD profile with perforations and secure it to the desired radius of the semicircle. If at hand you did not have such a perforated profile, you can do it yourself - cut the side walls of a conventional profile so that it bends well.
- We retreat ten centimeters and mount the main profile that performs the guiding function on the wall. This will be the basis of the second tier. Take the SD profile and attach it with one side to the guide profile, and the second - fix with special hangers at a distance of 50cm.
- profiles of which is mounted the second layer should be 4 cm shorter than the distance of the semicircle and go directly below the upper tier of the main profiles.
- Vyrizaete semicircle of a sheet of drywall with a small allowance - 6. Excess centimeters after assembly or knife cut the jigsaw.
- The next step is to install the side wall of the semicircle. At the bottom of the lower tier a UD profile is attached. Cut out the gypsum cardboard strip of the right size. To properly bend the drywall, lower it into the water for a few seconds, or moisten with a sponge. After 30 minutes, the strip becomes flexible and can be attached to the structure.

Congratulations! A two-level ceiling made of plasterboard is ready with your own hands! After that, you are expected no less interesting processes - the finish of the ceiling, its painting, the installation of fixtures. But the result in any case you will be pleasantly surprised. Multi-level ceiling structures as in the photo - this is a kind of works of art. Photo
two-level ceiling of plasterboard