- The first step in the construction of a gable roof with your own hands is laying the Mauerlat. The selected bar is marked along the length of the walls and joins at its corners strictly at an angle of 90 degrees, shifting it to the inner side of the walls. To the brick walls, the Mauerlat is fastened by means of anchors, having previously laid the roll waterproofing material on the wall in two layers. The Mauerlatt bar must be thoroughly treated with an antiseptic. On the inner walls lay down, as well as laying between the wall and wood waterproofing coating.

Mauerlat structure
- Above the mauerlate or in specially designed grooves in the walls lay beams overlapping from the board 50x200 mm or thicker. The board is placed on the butt - this increases its rigidity to the deflection. The beams are stacked in a strict order: first the extreme ones, then the tight laces are intermediate. The distance between the beams can be anywhere from 50 to 120 cm, but if you plan to insulate the ceiling using modern materials, it is recommended to leave a distance of 60 cm between them, equal to the width of the insulation. The height of the beams of the ceiling is regulated with the help of wooden pads. For convenience, overlapping floors can be laid on the attic floor of any solid boards - the installation of the roof will be greatly facilitated, the safety of the work will increase.
- Vertical racks, depending on the structure of the floors and the presence of internal partitions, are placed either on the joists of the ceilings or on the lodges passing clearly along the center of the roof. The beams are made of square or rectangular cross-section bars. They are put in place and leveled on a plumb line, and then fixed in an upright position with the help of temporary supports and mowing. To the floor or beams of the ceiling, the posts are fastened with metal or wood lining. The number of racks on the gable roof should be such that the distance between them does not exceed 2 meters. In any case, the rack is installed at the edge of the roof, which forms a vertical gable, and at the junction of the filed rafters with the ridge.
- On the racks put the ridge beam and fix it with the help of corners and linings, having preliminary checked the distances to both cornices and to the corners of the hip ramp. The roof must be absolutely symmetrical.
- The side rafters of the gable roof are layered rafters, the upper end fixed to the ridge beam, and the bottom - to the Mauerlate and the beams of the ceilings. They are performed according to the pattern: the board is applied in the place of attachment of the extreme rafter's leg, marks are marked on it, which serve to support the ridge beam. According to this pattern, the necessary number of rafters is cut out and fastened first to the ridge beam on the corners, and then, at the place marking the bottom notch on each rafter foot, and to the Mauerlt. Rafter legs are placed on the Mauerlat next to the joists so that they can be pulled on the studs - this will increase the rigidity of the truss. The step of the rafters is equal to the step of the joists.
- Side rafters reinforce by struts from the boards, installed on joists at an angle of 45 degrees to the horizon. The thickness of the struts is usually equal to the thickness of the beams and the rafters - 50 mm. In this case, the upper part of the struts are attached to the rafters with the help of studs.

Strengthening the side rafters with
- log strips. The cantilever rafters are marked in place: they support the boards or bars in the rack and mark the upper oblique fillet, cut it out, then apply it to the mauerlat at the corner joint and mark the bottom notch. Fasten the load-bearing rafters with the help of corners and linings and additionally strengthen the narodniki - the supports forming the hip ramp and resting on the lower end on the Mauerlat, and the upper one - on the rafters.

Assembling the rafters for the truss roof
-
 For longer lengths, the extra rafters are reinforced with racks installed under them and secured to the floor beams by spigots.
 - After the installation of the rafter system, remove the temporary jigs and proceed to the execution of the battens. The material for the battens, like its step, depends on the chosen roofing. Under profiled sheeting and metal tiles, a thin crate of 25 mm board is necessary, under the ondulin and soft roof - continuous plywood.

Assembling the roofing on a gable roof
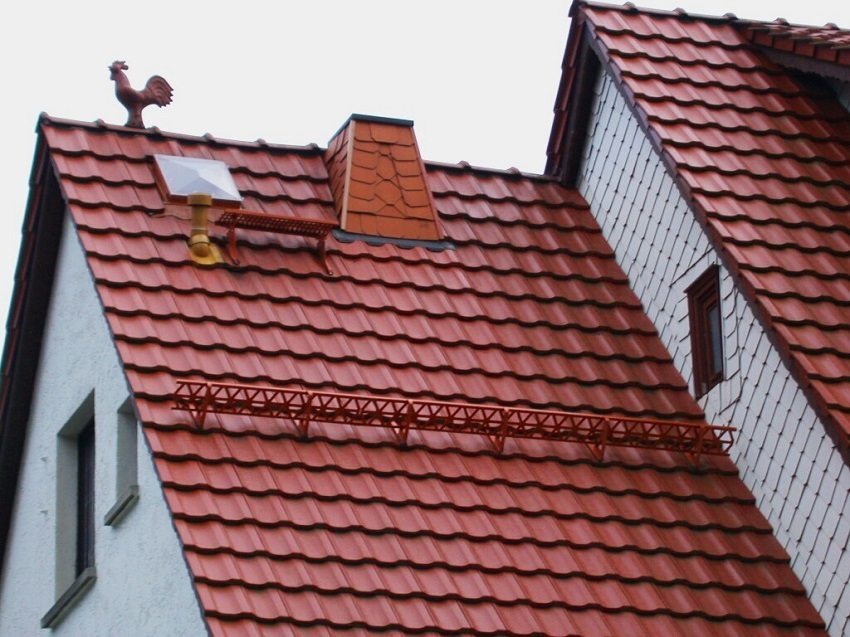
- A tiled roof can become an ornament not only at home, but also gazebos, baths or other structure. When orienting the hip ramp toward the prevailing wind load, the roof's ability to withstand strong winds increases significantly.

trench roof technology
Elements of a gable roof and their function
The frame of a gable roof is formed by the following elements:
- Mauerlat - a bar laid along the perimeter of the outer walls and redistributing the load of the roof onto the walls;
- A ladder is an intermediate beam laid on the inner bearing walls;
- Floor joists - boards laid on the Mauerlat and serving as a skeleton of the floor between the floor and the attic or attic;
- Racks - vertical support bars that hold the roof frame;
- Ridge bar - stacked on vertical racks of a beam, serving as a support for the rafter system;
- Rafters - boards laid with a certain step and resting on the ridge beam and the posts at the top and on the mauerlat at the bottom. The rafters of the gable roof are divided into side and foot;
- Sprenger - vertical support supporting the rafters;
- Braces - boards, installed at an angle of about 45 degrees to the horizon and serving as spacers between rafters and beams of floors or lying.
Connection of elements is carried out with the help of metal corners and lashes fixed with the help of nails, screws or threaded studs with nuts.

Rigid roof frame and its structure
Materials for the gable roof
Traditionally, for the construction of a rafter system and a lath, coniferous sawn timber, dried under a canopy with a residual moisture content of not more than 15-20%, is used. When choosing lumber, you need to check it for the absence of rot and mold traces, darkening of wood. Timber for the construction of the rafter system is covered with an antiseptic, and to increase the fireproof properties and fire retardant composition.
Mauerlat, the legs and racks, as a rule, are made of a bar section 100x100 or 150x150 mm. Beams overlapping and rafters - from a board with a thickness of 50 mm and a width of 200 mm, while laying them with a narrow side down to reduce the sagging of the elements. Cantilever rafters bear considerable load, they are recommended to be made of a bar of rectangular cross-section 100х150 mm. It is also possible to carry out trussed rafters from two interlocked boards: between them lay the scraps of the board and pull them together in this place onto the studs.
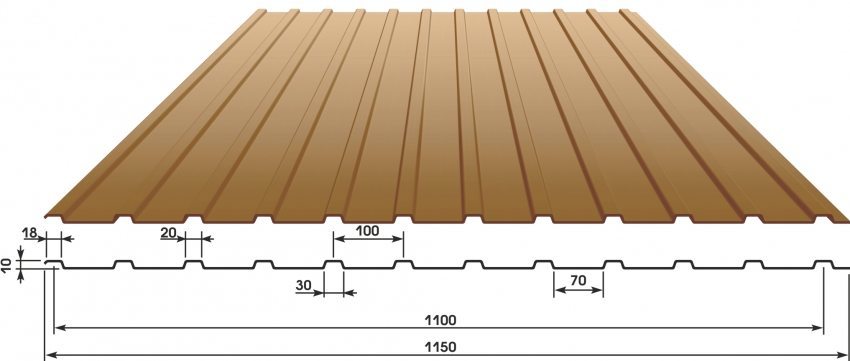
An important element of the roof is the lath - board thickness of 20 mm, laid on rafters with a certain step parallel to the ridge beam. For a masonry roof, the crate is made solid - from plywood. In addition to lumber, the roof is covered with roofing, hydro and windproof films, insulation and vapor barrier.
A tiled roof is an original architectural solution, suitable both for the construction of the entire roof structure and for individual elements of the complex roof. It is a hybrid of a common gable and hip roof and consists of three ramps: two of them - in the form of trapezoids joining in the area of the ridge, and the third - an equilateral triangle, otherwise known as a hip ramp.

Tilted roof with own hands
The device of a three-pitched roof is not much more difficult than a gable roof, its difference consists in installation of two accumulative rafters forming a hip ramp, and also constructions supporting these rafters. Cantilever rafters are usually much longer than the side rafters, so for their implementation it is necessary to choose a board of greater thickness and length, or to join the existing standard lumber.