Content
- A few important points
- Necessary materials and tools
- Restrictions on the use of GCR
- Preparatory stage
- Profile mount
- Fixing drywall to the frame
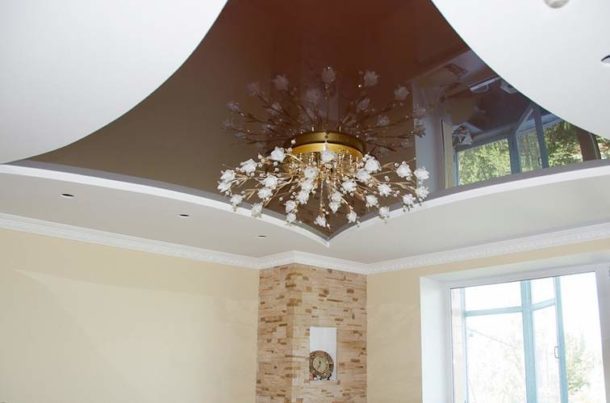
Drywall is one of the most versatile materials. With its help, with equal success, you can align the curved walls or install partitions, equip a niche, make an arch or ledge. Drywall sheets will allow you to close any irregularities, and working with them is much easier than with plaster, so they often mount drywall on the ceiling. In addition, this material gives unlimited scope for design imagination: with its help you can to build multi-level structures of unusual shape, to make special niches for fixtures and much another.

A few important points
During installation, you need to know some important nuances:
- To install GCR on the ceiling, you must use the appropriate profile: UD and CD. Metal products used for the construction of partitions and walls are not suitable here.
The optimum thickness of drywall for the ceiling is 9.5 mm. It is such a material that is strong enough not to sag under its own weight, but does not overload the floor. But you can use a standard wall drywall thickness of 12.5 mm.
- If the distance from the drywall sheets to the base ceiling is small (up to 12 cm), direct suspensions are used. Attach a multi-level structure, more than 12 cm distant from the ceiling, to spring suspensions with a clip. With their help, you can install sheets even at a distance of 1 m from the base.
- The minimum distance from the base surface is 5 cm. If recessed fixtures are to be used, this distance is increased to 8–12 cm, depending on the size of the lighting fixtures.

Necessary materials and tools
You need to prepare for work. To make GKL ceiling, you will need the following tools:
- scissors for metal;
- drill;
- level;
- putty knife;
- drywall knife;
- screwdriver;
- sandpaper;
- hammer;
- roulette;
- pencil.
-
Knauf 60%, 111 of votes
111 of votes60%
111 votes - 60% of all votes
-
Volma 13%, 24 vote
24 vote13%
24 votes - 13% of all votes
-
Giprok 12%, 22 vote
22 vote12%
22 votes - 12% of all votes
-
The one in the store 12%, 22 vote
22 vote12%
22 votes - 12% of all votes
-
"Magma" 4%, 7 of votes
7 of votes4%
7 votes - 4% of all votes
Total Votes: 186
Voted: 153
15.03.2018
×
You or from your IP have already voted.HELPFUL INFORMATION:How to hem the ceiling with drywall do-it-yourself (video tutorial)
Materials for the ceiling:
- guide profiles (UD);
- bearing profiles (CD);
- drywall sheets;
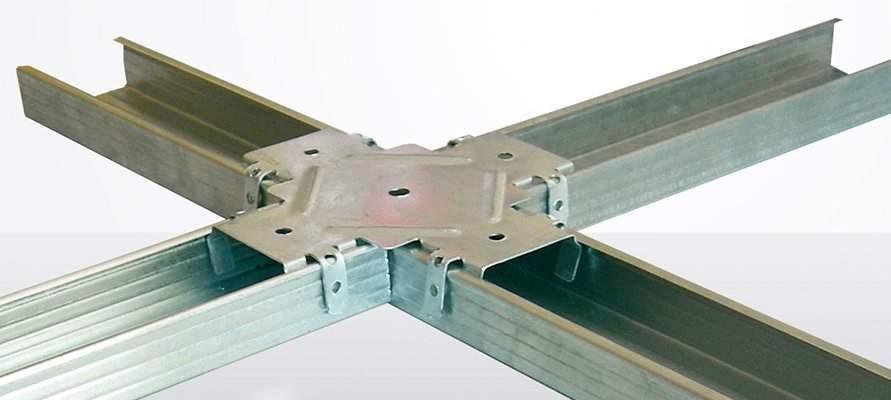
- crab connectors;
- suspensions (with a large distance to the ceiling - spring suspensions with a clip);
- self-tapping screws;
- screws;
- dowels.

Restrictions on the use of GCR
Drywall for the ceiling is used in the construction of suspended structures. They are very popular due to the fact that they well hide irregularities, allow original to design a room, do not require careful surface preparation, are quickly erected and allow noticeable to save. However, there are several points that can negate these advantages:
- Ceiling height. Typical houses do not have high ceilings. In most cases, this parameter is within 2.5–2.7 m. Often, the construction of a multi-level structure is undesirable for this reason.
- Neighbors on top. If tenants a floor higher often flood you, then you should not use drywall for the ceiling. This material is sensitive to water, even moisture-resistant modifications swell and deform after serious flooding, and then the entire ceiling will require replacement.
- For the above reason, it is not recommended to use GCR for the bathroom and kitchen.

Preparatory stage
Work begins with the calculation of the necessary materials.
- First, perform a sketch of the ceiling structure.
- Then calculate how many materials will be needed.
- With the data received, they are sent to the building materials store, where they purchase everything according to the list. It is advisable to take materials with a small margin of about 10%. At the same stage, they decide which drywall is better to buy: regular or moisture resistant.
- Now they begin to mark the ceiling. First find the lowest angle. The distance from which it is planned to lower the ceiling recedes from it and they put a point from which a line on the walls is drawn along the perimeter. Guide profiles will be installed here.
- Then draw a marking under the bearing profiles. The distance between them should be 60 cm. The distance from the extreme profiles to the wall should be the same, therefore, it is better to do the marking from the center.
- On the received horizontal lines mark the places where the suspensions will be installed. The step between them is 50 cm.
HELPFUL INFORMATION:Drywall screwdriver bits: with and without limiter

Profile mount
We proceed to the installation of suspensions, a guide and a bearing profile.
- First, suspensions are attached to the ceiling at marked points. Dowels must go strictly vertically upward, not at an angle. Then the wings of the suspension are bent down. The standard plate length is 12 cm. If the distance from the drywall to the ceiling is less, then the excess length after installing the profile is cut with scissors for metal or simply turned up.
- Then they proceed to the installation of the guide profile around the perimeter of the room. It needs to be well fixed in the wall. Install the profile on the dowels.
The step between the fasteners is not more than 50 cm, but at the same time, less than 3 dowels cannot be attached to 1 profile.
- Now you can install the carrier profile. It is inserted into the grooves of the guide and the level of the installation is checked for level. Then, with metal screws (it is most convenient to use screws with a drill end), the ceiling profile is attached to the suspensions. For each plate, 4 self-tapping screws with a press washer will go. Spin tight so that the structure does not hang.

Fixing drywall to the frame
If frame assembled correctly, the GKL mount will not cause special difficulties. Sheets for installation must be prepared, often they have to be cut to the desired size.
- On the sheet make markup.
- Then, along the line several times with a sharp knife for drywall. To make the cut smooth, you need to lead the knife along the ruler. In order for the blade to go deeper into the sheet half its thickness, you have to draw the knife several times along the line.

- GKL is placed on a flat surface (for example, a table) so that the incision falls on the edge, and break it off. The movement should be sharp and strong, then the edge will be smooth.
HELPFUL INFORMATION:Is drywall harmful? The composition and environmental friendliness of the material
It will be difficult to work alone further, because the drywall will need to be lifted to the ceiling and held at a certain height. For this you need helpers or a special lift. Sheets are fixed to the supporting profiles with special self-tapping screws for drywall every 15 cm. When joining sheets, the formation of even crosses should not be allowed: GKL must be fixed apart.
When all the sheets of drywall are fixed on the ceiling, you can begin decorating. Most often, they use water-based paint for the ceiling, but drywall can also be used. wallpaper or use other materials to give an attractive look to your home.

EXPERT SITE
Tsugunov Anton Valerevich
Master Station Wagon
- Since 2003, I have been engaged in the repair and decoration of premises.
- Over 100 completed objects.
- I appreciate the quality, more than the quantity!
Personal page >>>
Friends!
I offer you the service "Friend Builder"
As this site develops, subscribers and visitors are turning to me more and more often asking for help with advice on various issues of repair and decoration.
Questions are sometimes asked very complex and interesting. You can’t write an article for each situation, so I decided to advise you individually.
Thanks to you, friends, a new direction of my favorite work has been born - share your experience and benefit everyone who is undergoing repairs!
Get a one-time consultation from me >>>
Order full apartment repair support >>>


