Content
- The benefits of using drywall when creating partitions
- Necessary materials
- Instruments
- Wireframe layout
- Frame assembly
- Drywall Mounting and Processing
When redevelopment in an apartment or a private house, there is a need to create additional partitions that divide the room into separate zones or rooms as designed by the designer. Previously, such structures were erected from brick or wood, but recently they have given preference to drywall. This available material has many advantages, and even a novice master with minimal construction skills can make a partition from drywall.
The benefits of using drywall when creating partitions
What are the advantages of using GCR for the construction of additional walls in the room?
- The construction of it is much easier than brick or concrete, which minimizes the load on the floor. This is quite relevant for premises in apartment buildings.
- In the cavities of the drywall partition, you can additionally place a noise insulation layer or insulation, as well as stretch the electrical wiring. Unlike stone walls, this can be done without the dusty and laborious strobing operation.

Drywall itself has good soundproofing properties, so even without additional materials such a wall will prevent the spread of sound.
- GKL is environmentally friendly and fireproof.
- The resulting plane after minimal processing is ready for further decoration. The sheets form a smooth surface that can be painted, wallpapered, coated with decorative plaster or even ceramic tiles.
- Easy assembly. Almost everyone can install a partition from drywall with their own hands, observing a simple step-by-step instruction. It does not require specialized skills or expensive professional tools.
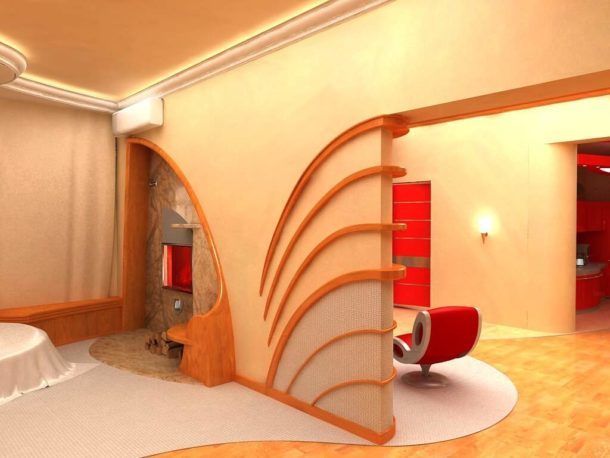
- Drywall allows you to easily implement various design ideas: you can arrange a partition in the form of an arch, make a niche for a TV or other household appliances, build built-in shelves and much another.

Of course, there are also disadvantages. The main one is the relative fragility of drywall: it is much easier to damage such an interior partition than, for example, a brick one. In addition, even moisture-resistant GCR does not tolerate prolonged exposure to excessive humidity.
Before assembling the structure from drywall, you will have to decide on the location of all the interior details on the future wall: the places of their fastening must be strengthened even at the stage of assembly of the frame.
Necessary materials
First of all, drywall itself will be needed. The partition, of course, is not a load-bearing wall, but must have a certain strength. Therefore, sheets are taken with a thickness of at least 12.5 mm. Moisture-resistant and refractory varieties of this material are used only when necessary.
For the formation of the frame, a galvanized metal profile is ideal. For most partitions, two of its types will be required:
- rack-mount;
- directing.

The guides have a standard length of 3 m. The size of the required rack profiles is selected based on the height of the room where the partition is being built.
HELPFUL INFORMATION:PVC decorative panels: great features at the lowest cost
The horizontal lintels, which give rigidity to the structure and form the doorways, are also made from the rack profile. Therefore, the exact amount of this material is calculated only after drawing up a detailed diagram of the frame, taking into account the required stock.
In addition to the GCR and the profile, for work you will need:
- Dowel-nails for attaching the guides to the walls, ceiling and floor of the room. In a wooden room they are replaced by wood screws.
- Sealing tape to improve sound insulation. It is glued to the back side of metal profiles, it prevents the transmission of sound vibrations from the main walls to the frame.
- Bar for strengthening the doorway. In size, it should fit tightly inside the rack profile - this will facilitate its installation.
Professionals advise fastening profiles together using cutter. But this tool is still not widespread, therefore, they often use small metal screws, called “fleas” or “bugs” among the people.
-
Knauf 60%, 111 of votes
111 of votes60%
111 votes - 60% of all votes
-
Volma 13%, 24 vote
24 vote13%
24 votes - 13% of all votes
-
Giprok 12%, 22 vote
22 vote12%
22 votes - 12% of all votes
-
The one in the store 12%, 22 vote
22 vote12%
22 votes - 12% of all votes
-
"Magma" 4%, 7 of votes
7 of votes4%
7 votes - 4% of all votes
Total Votes: 186
Voted: 153
15.03.2018
×
You or from your IP have already voted.The resulting gypsum plasterboard surface is prepared for further decoration, so it’s useful:
- Reinforcing tape (serpyanka) and putty for processing and strengthening the joints between the sheets of drywall.
- Primer for GKL.
- Perforated corners for processing corners.

If you plan to fill the voids in the partition with insulation or soundproofing, then they are purchased.
Instruments
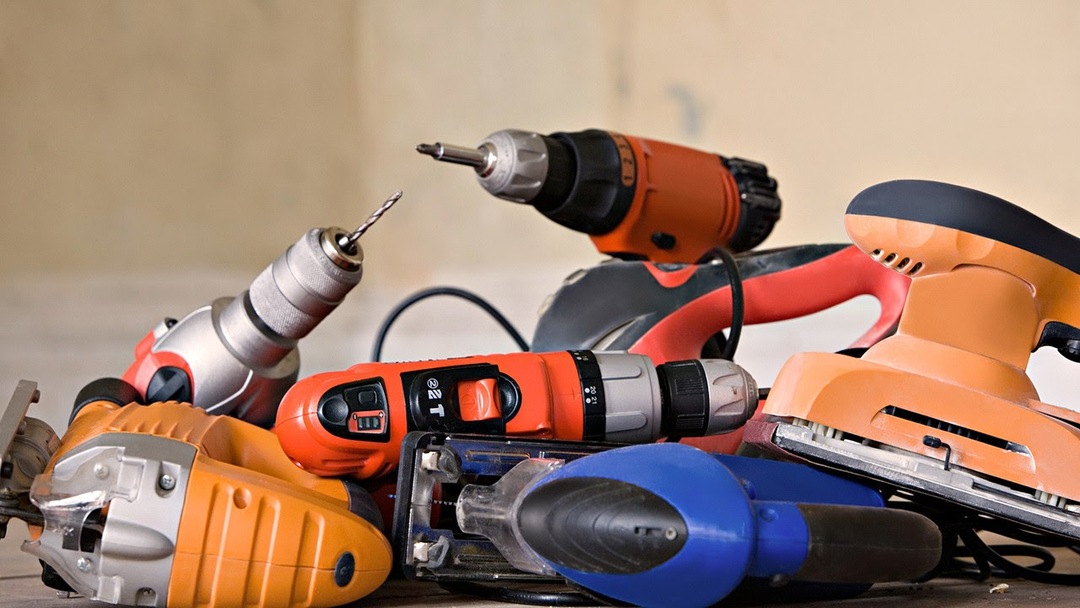
The list of necessary tools includes:
- Hammer drill with the right drill. The most popular dowels are 6 mm in diameter.
- Scissors for metal.
- A screwdriver with a set of bits.
Recommended to purchase drywall bit with limiter: it will not allow self-tapping screws to push through the GKL surface. It costs a little, but it makes the job great.
- Hacksaw for cutting drywall, paint knife.
- Set of crowns. Allows you to accurately arrange the holes for sockets and switches.
- Brushes and roller for priming.
- Spatulas.
- Marking tool: tape measure, plumb line and level.

HELPFUL INFORMATION:What is the best primer for wallpaper walls?
Wireframe layout
It is not possible to build a partition correctly without creating a drawing. It will be required already at the stage of procurement of material. And it’s impossible to calculate in the mind all the subtleties of placing profiles and attaching GKL. The drawing will help to use the material more rationally and to avoid its undesirable losses.
The dimensions of the future partition are defined as follows:
- The required size of the room to be separated or the room area is laid on each wall. This is done twice: at the level of the floor and ceiling.
- The resulting lines are connected vertically, their location is controlled by a plumb line.
Such an algorithm is needed due to the fact that in apartments, overlappings are rarely even and located at right angles.
- The verticals on the walls are connected by lines on the ceiling and floor surface, resulting in a contour of the future wall.

The drawing is transferred to paper, it is planned to arrange rack profiles and partitions, as well as a doorway. The following rules are observed:
- Vertical posts are spaced 400 or 600 mm apart. This will allow you not to resort to unnecessary cutting of drywall sheets: they will dock on profiles.
To give structural rigidity, sheets on both sides must be connected on different racks. For example, on the front - on odd profiles, on the back - on even ones.
- The space above the door is further enhanced by at least a pair of rails.
- At the same stage, the mounting locations of all additional accessories, such as a TV, are determined. These areas are also increasing.
- The number of required horizontal jumpers is calculated. GKL are joined on them if the partition is greater than their length. But even when the sheet completely covers the opening in height, it is recommended to fix a couple of horizontal profiles to give rigidity.
And one more important point. If a sliding door will be installed in the partition, the doors of which, when opened, will enter the drywall wall, the profiles should be arranged in 2 rows, as in the photo.

Note! In this design, jumpers, wires and any other communications and obstacles should not be located along the door leaf movement.
The following photo shows a simpler solution. A standard wall with an opening is made, and a sliding door is located outside, on one side.

The framework for the partition with niches depicted in the following photo has a more complex structure. Self-made niches are described in detail in this article.

According to the drawing, the required amount of material is calculated. After purchasing it, you can proceed with the installation of the frame.
Frame assembly
At the first stage, we construct a frame of guide profiles:
- Using scissors for metal, we adjust the elements along the length.
- Usually they already have holes placed with the desired pitch. If they are not, then we need to drill holes for fasteners every 50-60 mm.
- On the back of the profile we glue the sealing damper tape.
- We apply profiles in place and outline the holes for the dowels. It is necessary to ensure that all guides are on one side of the marking line.
HELPFUL INFORMATION:Gypsum plaster: align the walls correctly
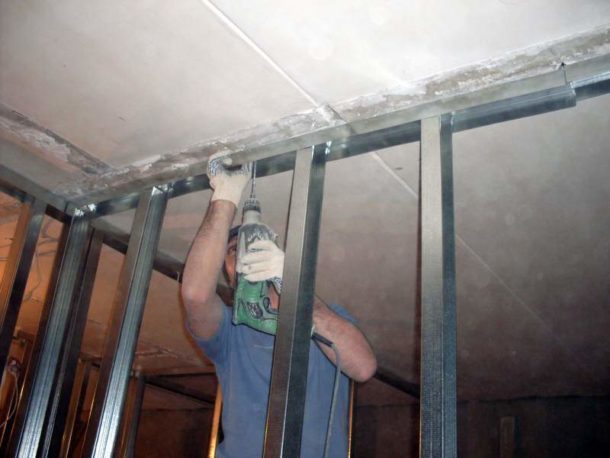
- We form holes with a puncher and drive in plastic dowels. Then we fasten the profiles, hammering the dowel-nails with neat hammer blows.
In the case of wooden walls and ceilings, the procedure is simplified: the dowel-nails are replaced with wood screws with a wide hat.
Fastening racks and horizontal jumpers is easy:
- We cut the vertical elements so that they are 8-10 mm less than the height of the room.
- After installation in the guides, we fasten them using small screws or a notch.
Using a cutter has an important advantage: the junction is completely smooth. Hats of self-tapping screws will prevent a snug fit to the frame of drywall sheets.
- The verticality of the installation of each rail is controlled by a level.
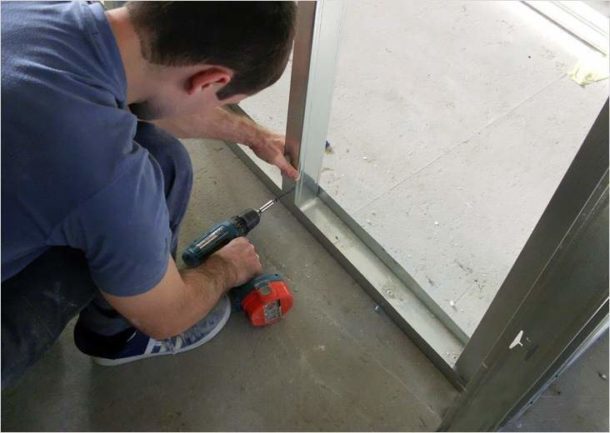
- We cut the horizontal jumpers into elements whose length exceeds the distance between the posts by 100-200 mm. At the ends we remove the side walls, forming a flat “tongue”. Then we fasten them with screws to the racks.
A more reliable, but also more laborious method of forming horizontal jumpers: having cut through the side walls, we bend the excess on the profile at a right angle. After that, we put the obtained “ears” on vertical racks from above and fix it. This is usually done when forming a doorway.
- The doorway is necessarily enhanced. This can be done by twisting two profiles between each other or by putting a wooden beam inside the metal elements.
In more detail, the process of creating jumpers and assembling the frame using the cutter is presented in the next video.
Drywall Mounting and Processing
GKL fixation is standard:
- According to the marking, we cut the necessary fragments using a hacksaw or a paint knife. We cut cardboard with a knife along the marking line on one side of the sheet. Gypsum cardboard is gently cracked and turned over to cut cardboard from the back.
- At the joints at the fragments there must be bevels. It is recommended to form them before fastening with an edge planer or a paint knife.
- Drywall is fixed to the frame with metal screws. A special GKL bit for a screwdriver will greatly facilitate this process. The step between the fasteners is 10-15 cm.

On the joined sheets, the attachment points are spaced apart.
- In the drywall surface, if necessary, drill holes for sockets and switches.
- The joints are glued with reinforcing tape and putty putty. After it dries, the surface is wiped and primed.
At the end of all operations, a solid and even partition is obtained, ready for further finishing.

EXPERT SITE
Tsugunov Anton Valerevich
Master Station Wagon
- Since 2003, I have been engaged in the repair and decoration of premises.
- Over 100 completed objects.
- I appreciate the quality, more than the quantity!
Personal page >>>
Friends!
I offer you the service "Friend Builder"
As this site develops, subscribers and visitors are turning to me more and more often asking for help with advice on various issues of repair and decoration.
Questions are sometimes asked very complex and interesting. You can’t write an article for each situation, so I decided to advise you individually.
Thanks to you, friends, a new direction of my favorite work has been born - share your experience and benefit everyone who is undergoing repairs!
Get a one-time consultation from me >>>
Order full apartment repair support >>>
