Content
- What is a drywall guide profile
- Types of guide profiles
- Sizes of guide profiles
- Cost
- How to choose a quality product
- How to fix guides correctly
- Markup
- Installation
Installation of drywall constructions is one of the most popular ways of preparing rooms for interior decoration. Using GKL, you can align the walls, prepare the basis for the stretch ceiling, and even build interior walls and partitions. In order for these structures to have sufficient strength and evenness, it is necessary for them to mount a frame of various types of metal profiles. For covering the surfaces of the ceiling or walls, the basis of the frame will be guide profiles. Below we will focus on how to choose a high-quality metal profile, what sizes they are and how to fix the drywall guides correctly.

What is a drywall guide profile
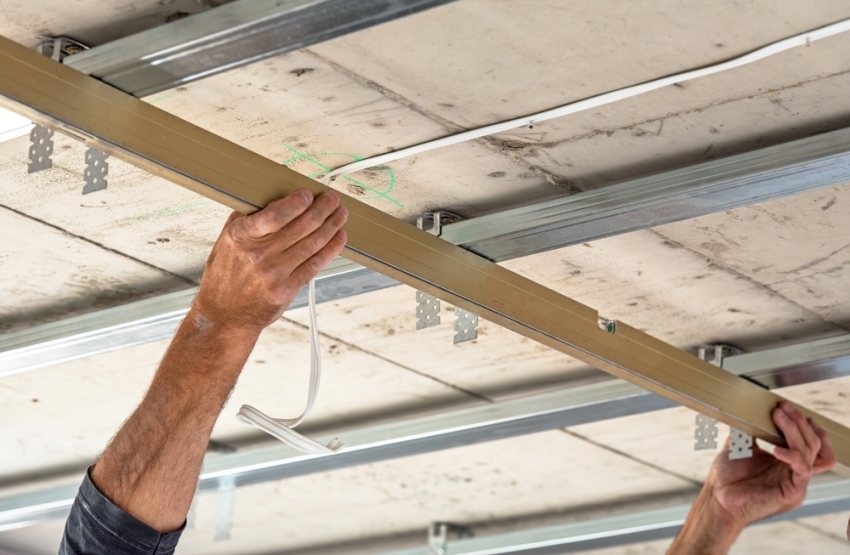
You can guess the purpose of the guides for the GCR from their name. They serve as the basis for mounting rack and ceiling profiles, set the desired direction for the entire drywall structure, and are also used to create jumpers.
Types of guide profiles
There are two types of guiding metal profiles for drywall, used for:
- wall cladding (PN or UW profile);
- laying the foundation for ceiling installation (PPN or UD profile).
These two species differ in their size.

Sizes of guide profiles
The dimensions of the guide profiles for walls vary in height (50, 65, 75 and 100 millimeters) and product thickness (from 0.5 to 0.6 millimeters). The width of the shelf remains unchanged - it is 40 millimeters.
USEFUL INFORMATION:Dowels and anchors for drywall: screwdriver Driva, KNAUF-Hartmut, Molly, spring
The ceiling guide metal profile has a size of 28 by 27 millimeters.
The length of the guides is usually 3-4 meters, since they are used to create structures in large areas. If necessary, the length is easily reduced by cutting off excess with scissors for cutting metal.

Cost
The price of such profiles depends both on the brand-manufacturer and on their size. A guide metal profile for the ceiling can be purchased on average for 50-100 rubles, for walls - from 100 to 250 rubles apiece.
How to choose a quality product
In order not to make a mistake when choosing metal profiles in the store, pay attention to the following tips and recommendations:
- Check metal thickness and other product dimensions. This can be done using a special tool (vernier caliper), or by comparing several metal profiles from different manufacturers. If the thickness of the product is insufficient, during installation, the screws will constantly scroll due to torn threads, and incorrect sizes will complicate the process of mounting a flat frame.
- If rust is visible in the packaging on at least one product, it is better to refuse such a purchase. This means that the corrosion process has already begun, and it is impossible to fix such a profile to the surface.
- Abundantly oiled profiles usually indicate that the seller is trying to hide a poor-quality metal coating.
- Beware of products with uneven rolling - any curvature will greatly complicate the work with them. It is quite easy to identify such a defect, because when looking along the profile, any deviations from the straight form will be immediately noticeable. For the same reason, it is worth carefully transporting metal profiles, as they can easily bend.
- Do not buy products that have burrs and chips. This may result in cuts during installation.
USEFUL INFORMATION:Mounting profiles for drywall on the walls: how to set your profile with your hands

The choice of profile is just the case when you should not save on quality. Any errors will lead to poor-quality work, and subsequently you will have to overpay for the correction of all the “jambs”.
How to fix guides correctly
Before installing the guides under the drywall, you need to prepare the walls or ceiling for work. Namely:
- clean the surface of the old finish;
- remove from the surface all protruding objects such as fittings or screws;
- putty on the ceiling for its preliminary alignment (in the event that there are deep cracks or depressions);
- primer the surface.
Guides for the ceiling are located on the walls around the entire perimeter of the room, for walls - horizontally around the perimeter of the room on the ceiling and floor. When attaching, they must be rotated so that they can insert a rack or ceiling profile.

Markup
For the ceiling:
- The lower point of the ceiling surface is located, the distance is laid off from it, by which the ceiling will lower, taking into account the size of the fixtures, communications, and the thickness of the insulation.
- With the help of a level and a swing cord, a line is drawn along the perimeter of the room, along which guides will be set.
For walls:
- On the ceiling, with the help of a level and a paint cord, mark the location line of the future drywall, transfer it to the floor using a plumb line.
- The gap between the wall and the profile should be minimal, but sufficient for laying wiring or insulation, the angles between the lines for adjacent walls should be straight.
USEFUL INFORMATION:Do-it-yourself installation of a ceiling box made of drywall

Installation
The guide profile for drywall sheets must be fixed as follows:
- We lean the guide against the wall, while we focus on the perimeter line drawn using a plumb line. It is most convenient to start work from below, stepping back from the edge of the profile about 30 centimeters. We drill holes with a depth slightly more than the length of the dowel, and fix it.
- The same holes are made in the middle and bottom, dowel nails are also inserted into them.
- Now we check whether the guide profile corresponds to the line, and then we hammer the dowels with a hammer.

- To the distance remaining to the wall, add a couple more centimeters, take the desired number of profiles and begin to fasten them with an overlap. For this, the sides of the profile are cut off with scissors, then the product bends in the opposite direction, the middle is cut off, and the edges are aligned with pliers.
- All profiles are set strictly according to the markup, at the joints we drill holes and fix them with dowels.
- According to the same principle, the guides are mounted on the remaining walls, as well as on the ceiling.
- Along the perimeter, the structure can be further strengthened by drilling holes with a pitch of 20–40 centimeters and inserting a dowel-nails into them.
Such frame will allow you to easily install a wall or ceiling profile to create the basis for plasterboard lining.

EXPERT SITE
Tsugunov Anton Valerevich
Master Station Wagon
- Since 2003, I have been engaged in the repair and decoration of premises.
- Over 100 completed objects.
- I appreciate the quality, more than the quantity!
Personal page >>>
Friends!
I offer you the service "Friend Builder"
As this site develops, subscribers and visitors are turning to me more and more often asking for help with advice on various issues of repair and decoration.
Questions are sometimes asked very complex and interesting. You can’t write an article for each situation, so I decided to advise you individually.
Thanks to you, friends, a new direction of my favorite work has been born - share your experience and benefit everyone who is undergoing repairs!
Get a one-time consultation from me >>>
Order full apartment repair support >>>


