Finishing with plasterboard with their hands: installation instructions
Table of contents
- 1 wall cladding Technology
- 2 What is drywall
- 3 Additional tools for mounting
-
4 Stages of finishing walls and ceilings
- 4.1 Step 1. marking
- 4.2 Step 2. Mounting profiles
- 4.3 Step 3. communications cabling
- 4.4 Step 4. Training
- 4.5 Step 5. Mounting
- 4.6 Step 6. finishing
- 5 sophisticated design
- 6 Summing up
On the walls of old houses piled up a lot of jokes, but funny as long as you are not in front of them there is a problem of alignment. Multilayer plaster? Long and expensive! There are far more effective and modern way to bring the curves of the walls cracked in order - Finish plasterboard with their hands.
wall cladding Technology
T
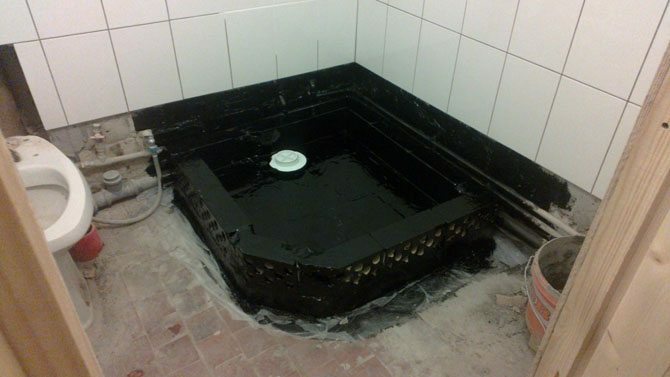
 AK What is this technology? In fact, this fastening of panels on a metal or wooden frame. The latter is less preferred since the tree can behave unpredictably, especially in areas with high humidity, for example, in finishing the bathroom with their hands.
Thus, the most effective is the technology of attaching sheets to metal profiles. Of them is going to frame which is fixed to the ceiling or walls plastered.
What are the advantages of this method? The fact that there is no need to mount the panel on the mortar, which is quite problematic, especially in older homes.
What is drywall
For those who care about their health and environmental areas, drywall fits perfectly. It is a mixture of gypsum coated cardboard.
Types of sheets:
- moisture-proof;
- nevlagostoyky.
The principal difference between the two species is available: moistureproof sheet has a special coating which allows its use in areas of high humidity, particularly in bathrooms and balconies in finishing its hands. In addition, it is possible with the help of finishing the attic with his own hands.
Mounted on the surface sheet of any material, whether brick, wood or reinforced concrete slabs. Has unlimited scope, trim them both residential and industrial premises.
Additional tools for mounting
Of course, none of the construction or repair can not do without the appropriate tools and fasteners.
Thus, in addition to a sheet of drywall fasteners will need:
- metal profiles (straight and angled);
- crabs (the price - 15 rbl.);
- suspensions.
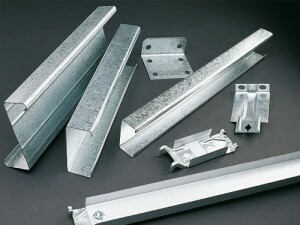
Fasteners Drywall
Their size and number depend on the state of the ceiling or walls, as well as the building structure itself. Often, the sheet is mounted on the wall with a special adhesive for plasterboard.
And now more about the components of the frame. There are several types of profiles.
Classification of profiles:
- guide profile (Mo);
- rack profile (FP);
- finishing profile (software).
The length of the profiles may vary from 2.5 to 6 m. Made of galvanized steel profiles, wherein the thickness may be 0.5-0.7 mm. The different profiles of PS and PI on the profile of the software? The fact that the PS and PN have a cross-sectional shape channel, and on - the L-shaped section. ON is recommended, provided that 1 square meter of the wall load is not more than 25 kg.
To fix profiles and attach the sheet need tools:
- Drill with a drill made of metal carbide, diameter dowels;
- Screwdriver Set;
- putty knife;
- special cutter for gypsum board, tape;
- construction level;
- scissors for cutting metal;
- pencil.
Stages of finishing walls and ceilings
Now that all the tools at hand, it is time to proceed to finish the walls and ceiling plasterboard.
Step 1. marking
How to decorate the walls with plasterboard? First of all, pick up a pencil and level. Decorating the walls of plasterboard with their hands requires markup, because without it the right to sheathe the walls impossible.
The layout should be done with the help of a plumb line or spirit level. Rascherchivayutsya line for attaching a metal profile and the dimensions are taken with a tape measure or ruler.
Step 2. Mounting profiles
Tip! Before starting the installation of rails and profiles, they recommend sticking special rubber bands, the so-called sole, which in this situation will create the effect of the seal.
According to preliminary lined on the walls or ceiling lines are fixed frame, it is enough to drill in the ceiling and on the floor of the hole of the required diameter. The profiles themselves these holes has already been done.
The vertical profiles (PS) or fasten the brackets with screws in the guide profiles (PN), which are already fixed in the ceiling and on the floor. PS is attached to the wall with a step 0.5-1 m. The better the recorded profiles, the more reliable the sheet is fixed.
Often under the sheet stack silencers and special insulation: mineral wool or foam. They do an excellent job with their tasks, adding decorated apartment with his hands even more comfort and warmth.
Step 3. communications cabling
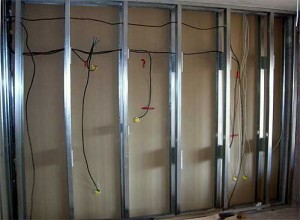
Distributing of communications in drywall
Drywall is not only a great way to align the wall, but also to "hide" the wires, and utilities for the wall. All work on the wiring should be carried out before the installation of sheets, otherwise you will have to dismantle the sheets.
Step 4. Training
Well, we got to the bottom, and the answer to the question of how to install drywall to the ceiling or wall. For fastening need a screwdriver, use it to work will not only be easier and faster, but also more efficient.
Tab surfaces starts with their alignment.
Attention! In order that the sheet is perfectly flat, it is necessary to pre-cut Enclosures and holes for mounting light bulbs.
To sheet edges were more equal, each edge trim recommended jigsaw or plane. Where vertical sheets of drywall abut necessary chamfer, wherein the angle is 45 degrees. When drywall putty all joints are perfectly hidden.
Step 5. Mounting
The sheets are ready to install, which means it's time to proceed directly to the installation. Fixing sheets should be done with screws which fasten with a pitch of 20-25 cm.
If on the wall that disposes plasterboard, there is a window or door, a profile for the sheet to be fixed on the edge of the opening to attach a sheet properly.
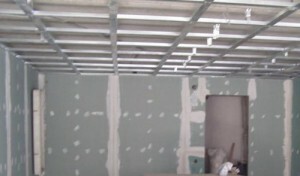
Ceiling furring for gypsum board
How many will take time installation of drywall? It all depends on the room size, number of employees and the break. A sufficiently large space is required 2 days.
When the installation of sheets is completed, you can proceed to the installation of sockets, switches and light fixtures.
Step 6. finishing
Hurrah! Finally, the hardest part is over and the eye opened cardboard, but perfectly smooth walls covered with wood screws. So, it's time to perform finishing. Typically, the most difficult - is the joints of sheets. For their finishes before coating putty reinforcing strip is attached.
The secret of the masters! Modern technologies allow to do without reinforcing mesh. There is a special coating, which copes with this task is not worse.
Once the wall is brought to perfection, you can start wallpapering or decorative plastering their own hands. It all depends on personal preferences, some prefer to simply paint the wall.
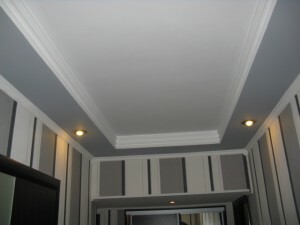
sophisticated design
In addition to the simple walls and the ceiling in order to eliminate defects, there are more complex structures of plasterboard. They make it possible to create a whole variety of forms.
It can be:
- arches;
- suspended ceilings in several levels;
- shaped structure;
- niches, shelves.
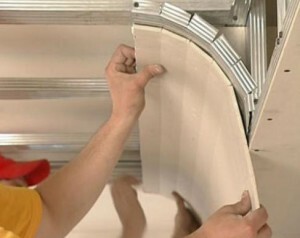
Creating curved structures made of plasterboard
For the manufacture of ready-made arches, you can use the bent sheet or "bend" their own, making the necessary cuts grinder. Their number depends on how much will bend the sheet, the more, the more cuts. Also with the help of curved drywall can be made curly partitions between rooms.
For multi-level ceilings using technology to create curved designs. It is sufficient to produce a desired pattern, to transfer it to a sheet, and then using the grinder carefully cut.
In the manufacture of niche you need to remember that in most cases have to "steal" the size of the room. However, this technique is effective enough that it is worth it. For mounting niches require alignment of the frame of the profiles.
Sometimes craftsmen create a built-in furniture made of plasterboard: This material is much more effective and easier to use than chipboard or MDF, and the furniture of it in an environmentally clean and unusual.
Summing up
So, a little effort and repair one-bedroom apartment in the Khrushchev or in a luxury country house is ready. And all using a safe, fire resistant material - plasterboard. By the way, even without the use of all kinds of insulation and sound insulation, drywall can reliably protect against noise, wind and dampness.
We hope our article has been helpful to you. In order to more accurately understand the technological and practical issues on our website provides detailed photo and video instruction, in which you will find useful information on the question.