How to make insulation of the foundation for reasonable money in 2 versions
Table of contents
-
1 Insulated foundation guarantee longevity Home
- 1.1 Warming of the basics - a nice bonus, or an urgent need
- 1.2 Choose the basic material
- 1.3 Where better to insulate the base from inside or outside
-
2 Options for self-warming basics
- 2.1 Option number 1: expanded clay as a more affordable material
- 2.2 Option №2: extruded polystyrene insulation monolith
- 3 Output
If before the insulation of the foundation it was not considered a mandatory part of the building, with the appearance of new types of insulation every good host is committed to qualitatively insulate the foundation of the house. In this article I will discuss in detail why you need to insulate the foundation of what materials are currently used for this purpose and how to arrange a warm foundation with his hands in the 2 options available.

Construction of concrete foundation.
Insulated foundation guarantee longevity Home
Construction of a private house basement in terms of technology the task is not complicated, but very responsible, because of the quality of laying the foundation depends on the durability of the entire structure. But before you understand the intricacies of the process, I want to clarify, why do you need to insulate the foundation.
Warming of the basics - a nice bonus, or an urgent need
- To cool floors in private houses all, it would seem, we have long been accustomed to and reconciled with them as a natural disaster. Someone To Lay rugs, someone walks around the house in slippers, but it appears the problem can be solved by following the quality external insulation of the foundation;
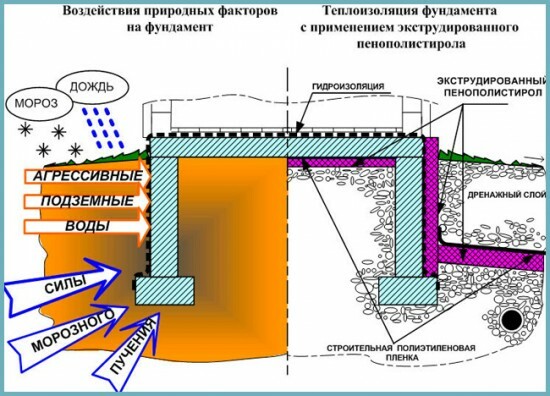
The balance of forces acting on the foundation.
- It has been estimated that the cold concrete foundation takes up 20% of heat. That is not insulated foundation annually will steal from your family budget fifth of the heating costs;
- Of course the concrete piece is very strong, but, as you know, the water wears away the stone. Not protected by the foundation will freeze in the winter, which means that over time will begin to appear cracks, the outer part will crumble and an average of 15 - 20 years of construction will require major repairs;
- Another enemy of all foundations groundwater, and modern insulation, among other things still provides good waterproofing monolith;
- In our country, a lot of areas with heaving soils, mainly clay and loam. So these soils during freezing exert pressure on the monolith laughing and melkozaglublennye foundations frost heave even able to push out of the soil, thus warming the foundation completely eliminates this problem.
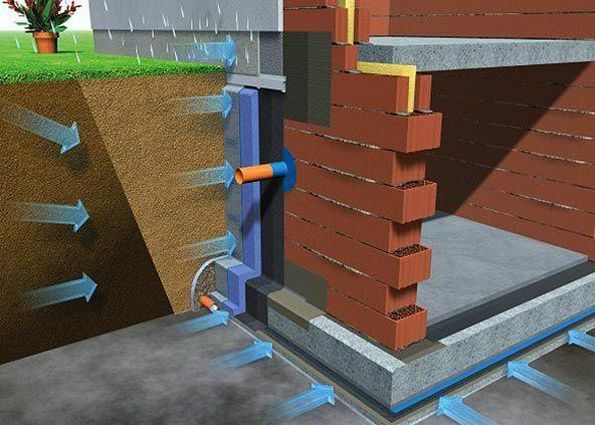
Groundwater pressure on the foundation.
Choose the basic material
Now heaters market range of products is quite large, but not every material is suitable for laying in the ground, And then I will briefly go over each type.
On such a popular material today, as mineral wool can be forgotten immediately. The fact that no wool is not capable of withstanding a long time a lot of pressure over the entire area, plus any wool is hygroscopic.
I met the owners, who for reasons of economy tried to perform insulation strip foundation foam with high density, and not to be crushed soil, laid on top Stone partition.
So, this version does not hold water, both in quality and cost-saving.
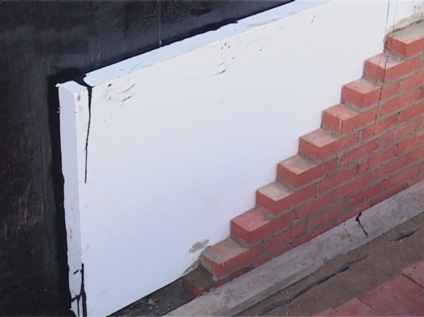
Protection foam using masonry.
- Even dense foam in 5 - 7 years, under pressure from the ground inevitably will begin to sink;
- Foam plate, figuratively speaking, is a resort for mice. When rodents get to such a heater, they will build it the whole town and the "smoke" them out to be very problematic;
- Now a few words about the economy. The foam has a really affordable price, but as you understand, bare plate in the ground lay the impossible, and if impose a foam brick, the expenditure, even if to do everything with your hands, such warming will "Gold".
In fairness it should be noted that the only place in the monolithic concrete foundation, which can insulate foam is the base (part of the foundation located above the ground). But in this case, the foam will need to be further reinforced and plastered.
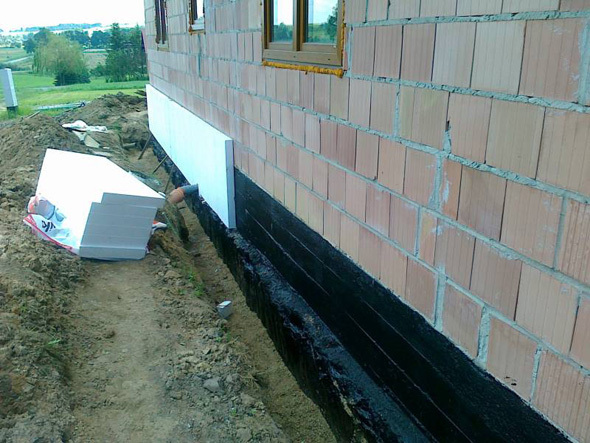
Construction of base foam.
The next contender is expanded clay - foam and baked clay, the material is very durable, and most importantly cheap.
In theory, of course expanded clay can be used for laying in the ground, there is no complicated instructions and I will tell about it a little later, but expanded clay has 2 significant flaw:
- Expanded clay granules are able to type in the moisture, respectively, need a good waterproofing, which in turn complicate the installation and make it more expensive;
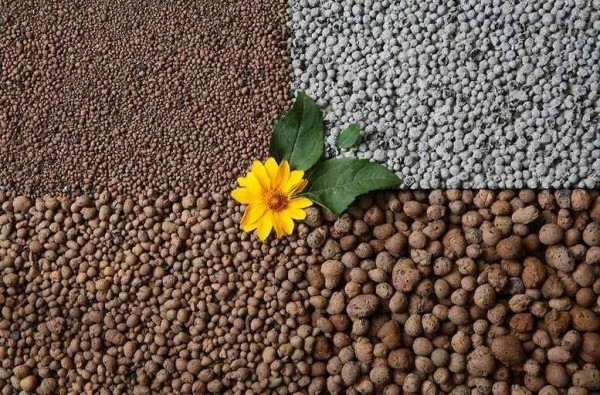
Types of expanded clay granules.
- Insulating properties in expanded clay mediocre, so as to make high-quality thermal insulation of the foundation you need to build a layer of not less than half a meter.
Perhaps the most modern material suitable for thermal insulation in the ground is now considered a polyurethane foam. This is one of the types of insulation liquid which is sprayed directly onto the monolith.
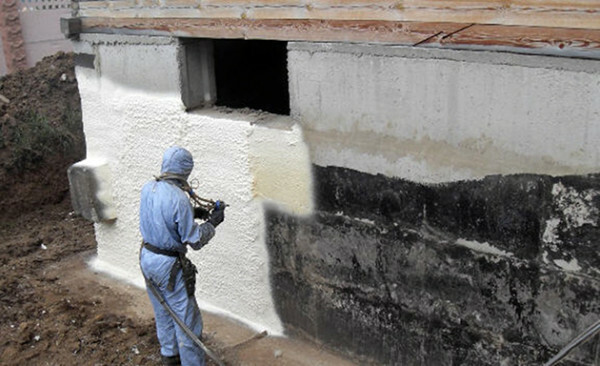
Spray polyurethane foam on the wall.
Polyurethane foam, all is good, thermal conductivity in a foam is one of the lowest, it does not transmit moisture and, therefore, no the need to equip a waterproofing, plus the producers claim in the ground polyurethane foam can stay for at least 50 years.
But in our case, all these advantages are crossed two minuses:
- Firstly, the price of polyurethane foam, to put it mildly, is not modest;
- Secondly, in this article we are talking about the warming of the hands, and to apply a foam need to call professionals with special equipment, or in any way.
Finally, we reached the main challenger. I, like the vast majority of experts believe that it is best suited for this purpose extruded polystyrene.
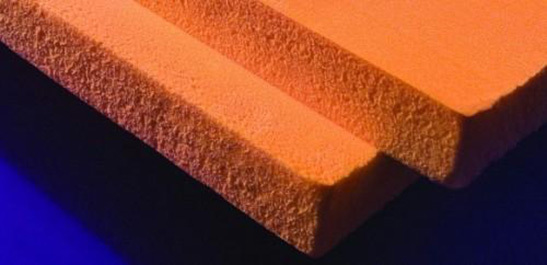
Sheets of extruded polystyrene foam.
This heater is a close relative of the foam, but it is made of a more advanced technology and has an entirely different structure. As a result, the performance of extruded polystyrene is much better than the foam.
Many people find such brands as "Penoplex", "TECHNOPLEX," "the Carbon" and other certain types of insulation. So keep in mind this is only brands, but the material itself is called XPS.
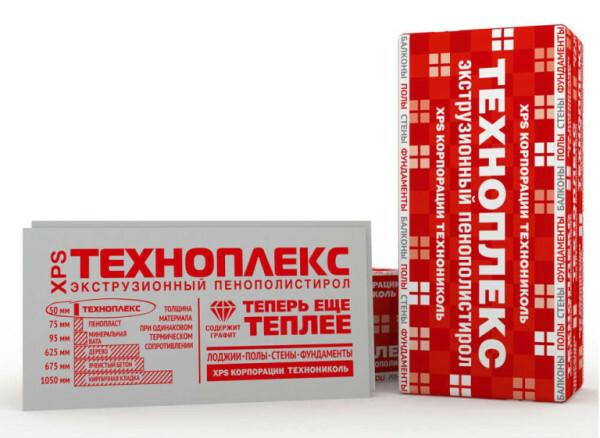
Extruded polystyrene from "TECHNOPLEX".
This type of insulation has a level of water absorption in the region of 0.04%, in fact it has waterproofing and 4 hundredths of one percent reflect the degree of water absorption at the site of the plate section, that is, where the seal is broken then. Here Penoplex can argue only polyurethane foam.
As for the ability to withstand a lot of pressure on the plane, then the material lay beneath betonku airfields and used for thermal insulation of the highway. Therefore ground onslaught is not critical for him.
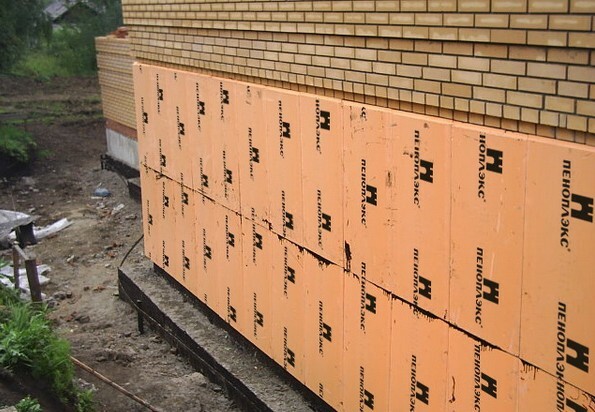
"Penoplex" on the walls of the foundation.
By the way, remember the future, if we insulate foundation Penoplex or any other representative of this direction, the density of the material should be at least 35 kg / m³. But, ideally, better to take 45kg / m³, with lower density materials are good, but they are intended for facade and roof insulation.
Where better to insulate the base from inside or outside
Indeed, there are 2 bases arrangement method - is the foundation insulation outside and inside insulation. In this case, it refers to the insulation inside the cellars and rooms in the ground floor.
Honestly, if you understand in detail the inside foundation insulate itself unreal.
Personally, I have never, and do not advise anyone to do so, there is more harm than good.
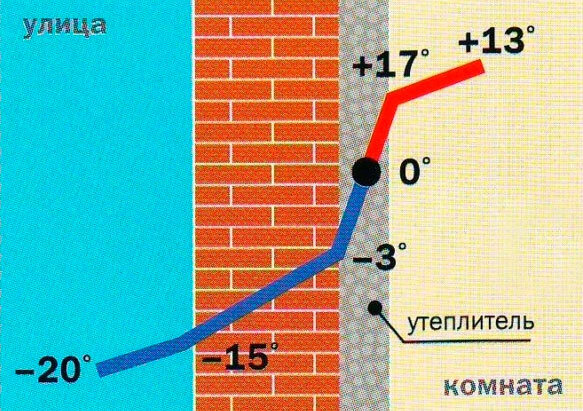
The dew point at an internal heater assembly.
- For internal insulation of insulation you will be mounted on the cold frozen wall. The temperature in the basement, of course, will increase, as well as the concrete monolith freeze and will freeze, with all the ensuing consequences;
- Whatever the quality was not a heater mounted on the inside, in any case, the concrete walls under it will produce condensation, respectively, sooner or later, it will start to grow wildly and mold fungus;
- Pressure heaving soils internal insulation in the winter you can not save;
- The only significant advantage is the speed and ease of installation. You do not need to dig around the outside of the foundation, a wall mounted heater and all, but I believe that this advantage is not worth the problems that arise on.
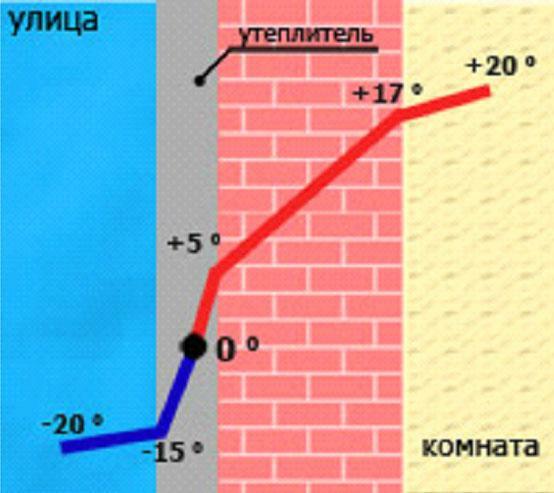
The dew point at the outer mounting heater.
If the insulation is performed outside the concrete foundation, the so-called dew point is moved to the heater layer, wherein the concrete monolith itself remains dry and warm. For those who do not know, the dew point is the location within the array with zero temperature, it was there and it turns into condensate.
Pressure heaving soils dry completely leveled buffer of insulation. Plus in areas with high water table will play the role of a multilayer insulation quality waterproofing.
Options for self-warming basics
Briefly summarize all previous information, the handyman is only 2 options is to use concrete block or make a high-quality thermal insulation of the foundation Penoplex own hands.
Monolithic foundation can warm three ways, horizontal, vertical and mixed.
- By horizontal is meant installation of insulated and waterproofed the blind area of the house perimeter. On dry soils, this method is quite viable arrangement of bases, the same place where periodically looms ground water, it is useless;
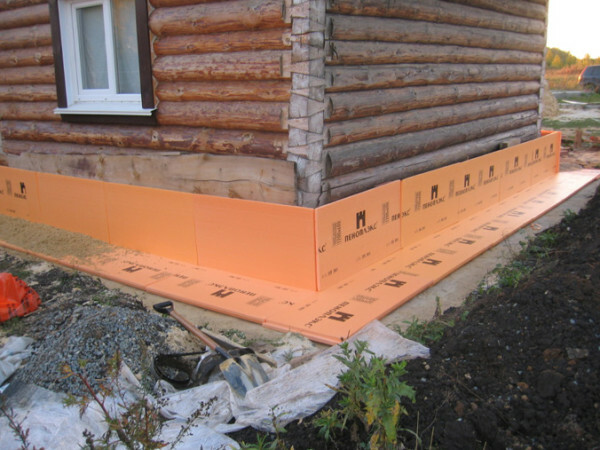
The surface warming of the blind area and a cap.
- When the vertical method, the insulation is mounted on the foundation of the entire outer area. The method can be called universal, it is suitable for all areas and if the right to mount the drainage sewers, the foundation will be in complete safety;
- As you can imagine, the mixed method is a symbiosis of the two previous ones and it was he who shows the best results.
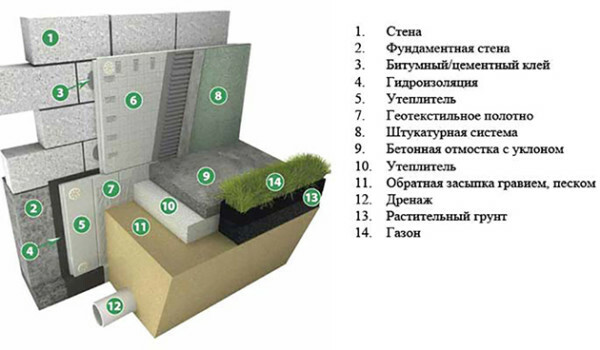
The circuit embodiment of the mixed arrangement.
Naturally all such designs better and more convenient to warm at the stage of construction of the house. In this case, it is possible to qualitatively insulate and seal the entire monolith from the base and to the walls.
If you had to warm the old house with a ground floor and a deep basement, then dig around foundation until the soles are not worth enough to reach to the bottom of the ground freezing in the area. Then mount integrated embodiment (vertical insulation and otmostka).
Option number 1: expanded clay as a more affordable material
As I have said, the main problem of expanded clay - is the ability to type in the moisture. In the past, expanded clay protected from water using clay shutter.
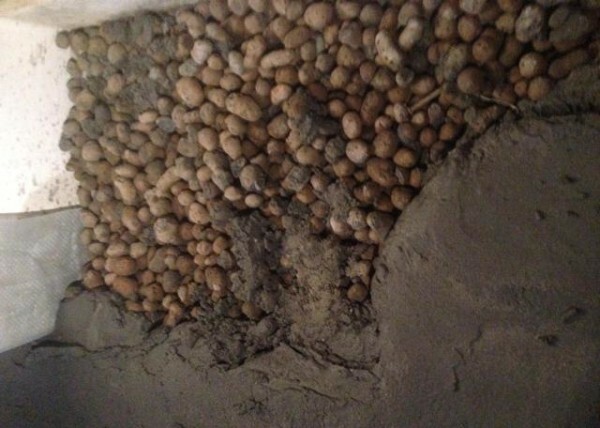
Expanded clay under the blind area.
That is, as the foundation itself and house wall trench perimeter daubed fatty clay layer is not less than 100 mm. Then in the pocket of clay was poured concrete block. Top is this "cushion" were covered with another layer of dense clay, which already equips the blind area of concrete or stone.
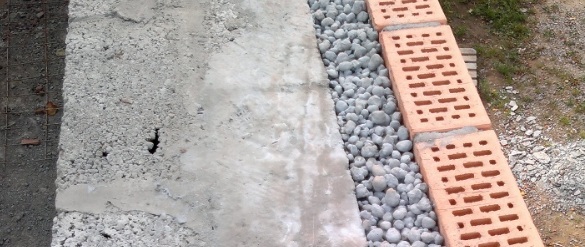
Option tab expanded clay between the foundation and the brick piers.
But this whole process is quite long, messy and difficult. My neighbors in the cottage did little wrong. Cottage they bought, and on it stood a brick house with a basement.
I do not know why, but people decided to insulate it is expanded clay:
- Initially, the owners obkopali house on the perimeter a little deeper lower freezing point. The width of the trench was about 0.7 - 1 m, generally, so that an adult male can relatively comfortable dig;
- Further smoothed base metal cord-brushes and 2 times firming covered ground;
- When strengthening soil is dry, the hosts plastered surface of mastic asphalt and immediately put it on the layer of roofing material. The result was a fairly high-quality waterproofing;
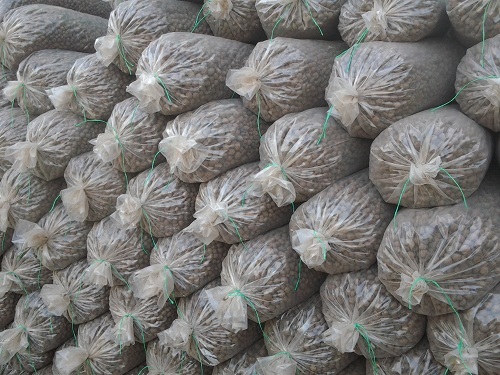
Expanded clay in plastic bags.
- I was surprised by its simplicity way of expanded clay backfill. People bought a certain number of technical durable bags polyethylene, further expanded clay poured into them and placed the bags on the perimeter. Bags packed dense, so when stacking virtually no gaps therebetween;
- After the single layer of bags has been laid up to the level of the blind area, it covered a layer of dense polyethylene and duplicated still time, i.e., number of bags laid to the top and covered their polyethylene layer. As a result, the thickness of the insulation out of the order of 70 cm;
- On the outside of all voids filled with sand. On top of a blind area poured sand and gravel bed, lightly stamped her and left a couple of months for the shrinkage. In late summer, the pillow again and stamped on top of poured reinforced concrete blind area.
I then inquired of the owner why he laid two vertical rows of bags, because in our region would be enough and one. He replied that if a certain amount of the outer layer of the bags leaking, and expanded clay in them gets wet, the second layer is certainly remain intact.
Option №2: extruded polystyrene insulation monolith
It so happened that in our country, perhaps the most well-known insulation in this niche is extruded Styrofoam on the brand "Penoplex", so we will continue to say how warm the house foundation Penoplex.
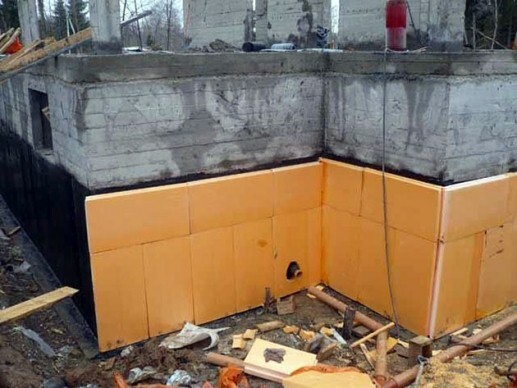
Warming of the monolith from the sole.
Of course, the extruded polystyrene boards are much more expensive than concrete block, but, first, this material is easier to work, and secondly, the quality of the insulation itself is immeasurably higher.
About Penoplex density I have already mentioned, it should not be less than 35 kg / m³. Now we have to choose a suitable plate thickness.
There are 3 types of 30 mm, 50 mm and 100 mm. For an average strip our country of 50 mm is sufficient. Thick slabs are used only in the north.
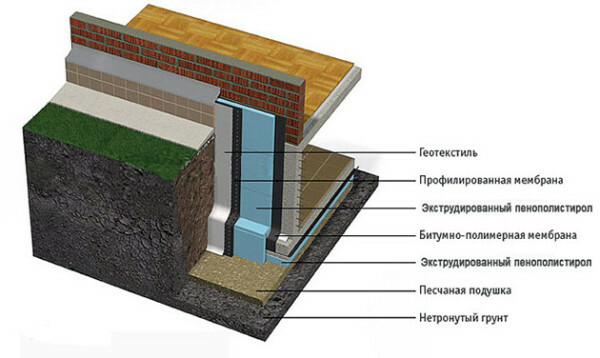
Thermal insulation structure laterally and from below.
If in your area there are no problems with groundwater, it is enough to buy a slab thickness of 50 mm and mount them in 1 layer. For wet soils and wetlands, I recommend to install on concrete slabs 2 layers.
That is for the middle band it will be 30 + 30 mm, and for the north of 50 + 50 mm.
- Let us assume that we are dealing with a new concrete monolith from which the formwork was removed recently. First and foremost, we need to check how smooth we surface. For this purpose, from corner to corner tightly stretch the cord and watch the amount of curvature;
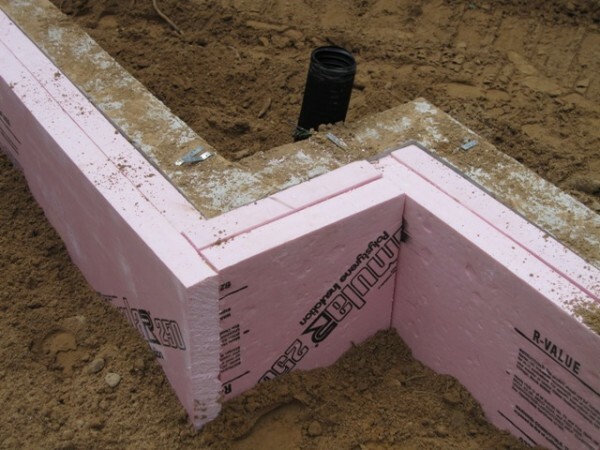
The two-layer embodiment of mounting plates.
- Allowable smooth curvature of 5 mm to 1m². Between boards formwork when pouring the concrete seeps sometimes such ridges should knock. Deep sinks and other such defects are aligned cement-sand mortar 1: 3, or a cement-based filler;
- Ignore the alignment of the monolith is not worth extruded polystyrene can withstand severe pressure on the plane, but from a strong point pushing it breaks through. Accordingly, if a sheet will sink, ground sheet dent in the shell;
- Although penoplex is waterproofing, but it is desirable to apply a further layer of waterproofing. As in the previous case, the wall is primed, and it is applied waterproofing;
- It is certainly possible to paste over concrete monolith expensive roll membranes, such as "Techno Nicole", but I personally do not see much sense, there is enough bitumen mastic or liquid rubber;
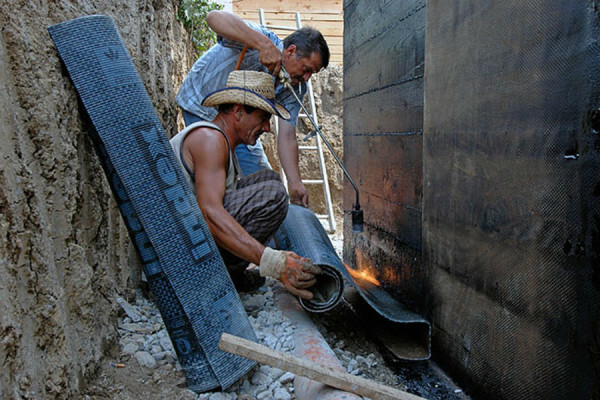
Construction of monolithic roll waterproofing.
As polystyrene and extruded polystyrene fear solvents, acetone, gasoline and so on. So, if the waterproofing, for example, bitumen mastic contains solvents, it is necessary to wait until this paste is completely dry, otherwise it porazedaet material.
- If you plan to install 2 layers Penoplex, then you can do without everything waterproofing, only the joints of sheets in two layers need not be the same;
- On the bare concrete primed penoplex glued building mixes «Ceresit CT83». But for waterproofing and insulation between them a better mount using foam;
- In the first case, dilute the mixture «Ceresit CT83» according to the instructions and apply it on the sheet with a notched trowel or simply "buns". Then apply the sheet to the wall and take away the squeezed out from under him glue. When finished row sheets must be further fixed by plastic dowels, umbrellas;
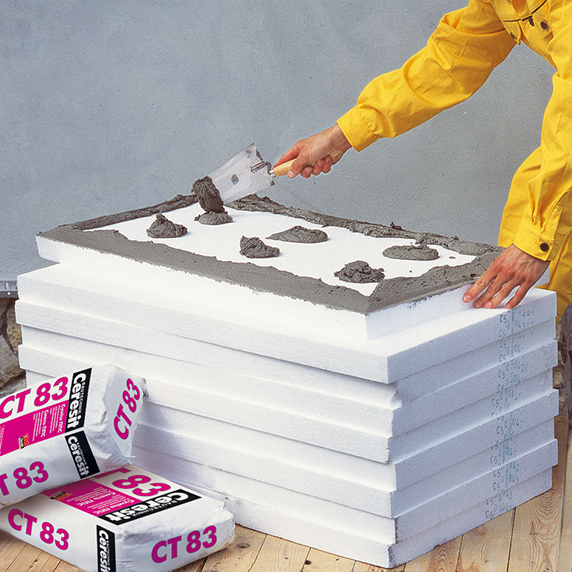
Spreading the adhesive onto the sheet "buns".
- How to work with foam is about the same. On the reverse side of the sheet is applied to an arbitrary picture out of foam and applied to the wall. But here, the sheets should immediately fix dowels umbrellas, otherwise the foam will begin to expand and penoplex move away from the wall;
- Plugs umbrellas simply mounted on average 1m² is necessary to drive at least 5 points of fixation. Perforator through said sheet Penoplex drilled blind hole in the concrete, inserting into it the umbrella rod and a hammer end chuck expansible central pin;
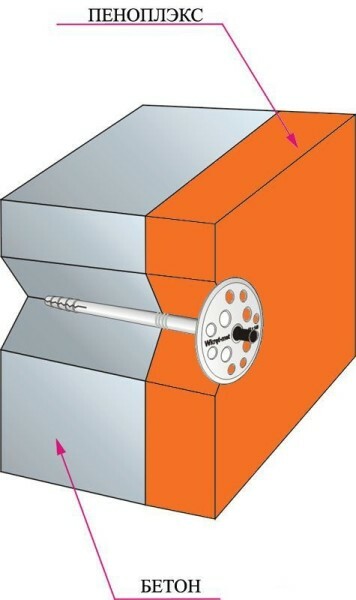
Scheme Penoplex fixing dowel-umbrella.
- Some sources recommend insulation extruded polystyrene foundation in addition to plaster. This is certainly correct, but I personally underground part of the construction never plasterers, this simply does not make sense;
-
As for the open basement of the structure, the plastering process runs something like this:
- Initially, the penoplex layer applied above said «Ceresit CT83» construction adhesive thickness of about 2 - 3 mm;
- While the adhesive is still crude in it with a metal spatula or a roller pressed-mesh construction serpyanka fiberglass;
- The mesh should not be visible, so often have to add on top mm layer of adhesive;
- When all of this is completely dry, you can proceed to the application of the finishing plaster layer.
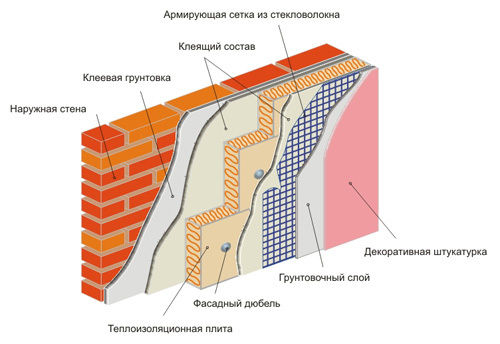
Principle plastering Penoplex.
- Warming otmostki Penoplex by mounting this design on concrete block differs only in that sand-gravel bed laid penoplex, and already filled with reinforced concrete to it blind area. Incidentally tilt the blind area is to be 2 - 3 cm to 1 meter.
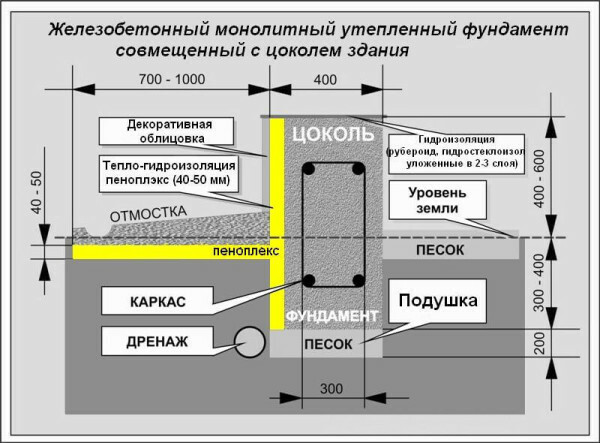
Scheme integrated Penoplex insulation.
Output
As you can see, foundation insulation Penoplex their own hands to do better than to do the same expanded clay. But concrete block will cost you much cheaper. The photo and video in this article shows the main points of the process. If you have any questions, please write them in the comments, let's talk.
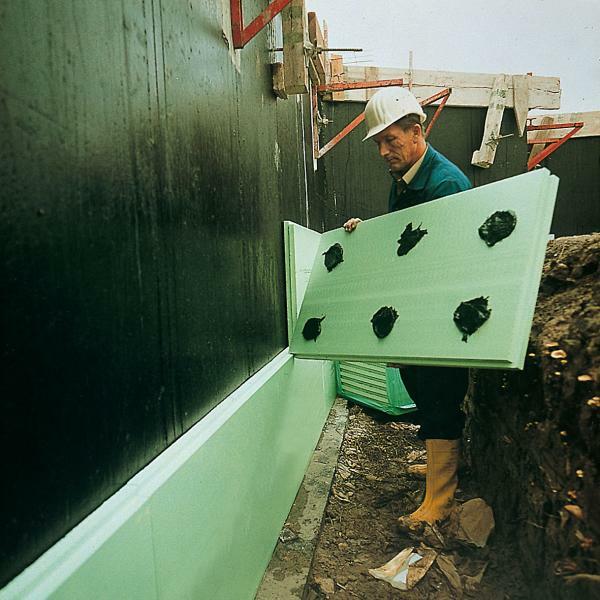
Bonding of insulation to the waterproofing.
