Circular saw bench - Review of ready-made solutions and recommendations for self-assembly
Table of contents
-
1 All you need to know about disk sawing equipment
- 1.1 Selecting a disc
- 1.2 What can be done at home
- 2 To summarize
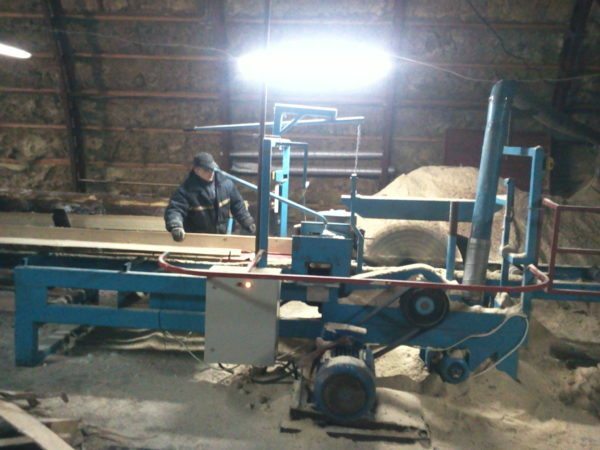
This seemingly simple equipment sawing wood with millimeter precision cutting - this setup you will be able to gather themselves for his workshop
It is necessary to saw logs into planks or longitudinally cut a little bar? You will need a special tool - the sawmill, equipped with the saw around. I'll talk about what's inside and how it works equipment. You will also learn how a small circular saw bench with his hands going at home.
All you need to know about disk sawing equipment
Circular saw bench - this stationary woodworking machines for sawing wood for lumber. Cutting tools - a gear drive, which is driven by the engine via a belt drive.
There are several types of sawing equipment, from simple desktop systems that can be done with his own hands, and ending with the industrial units.
| illustrations | Classification by type of cutting tool arrangement |
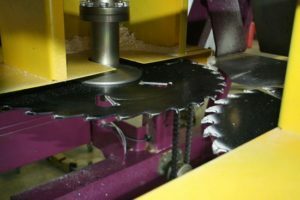 |
The horizontal circular saw bench. This equipment cutting tool is located in the horizontal plane. That is, use one or two discs. An apparatus with two disks more efficient because cutting tools in a single pass, allows greater width cut board. Disc horizontal saw has a drawback - the cutting is performed in one plane and sliced boards have further cut longitudinally. |
 |
Vertical disk sawmill. Such equipment has spread in the workshops of various craftsmen, since making the sawmill with his own hands, the easiest way to locate the drive is in the upright position. There is a circular sawmill, which used single vertically disposed toothed disc or double cutting tool. |
| combined sawmill. Such equipment is equipped with a substantially horizontal cutting tool and accessory Trimming unit, consisting of a vertical drive. | |
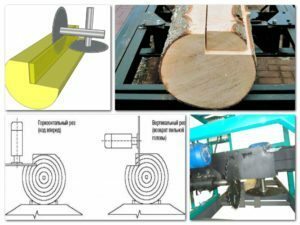 |
Angle Circular sawmill. This equipment used two disc arranged at right angles relative to each other. Thus, in one pass angular sawmill processes the beam in two dimensions: horizontal and vertical. The use of angular saws saves time in the production of timber without compromising the quality and accuracy of the finished product sizes. |
| illustrations | Classification by type of drive |
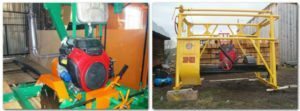 |
Aggregates driven by an internal combustion engine (ICE). Such installations have proliferated in small mills and are used mostly outdoors. The drive uses gasoline engines with a volume of 200 cm³ capacity up to 5 hp |
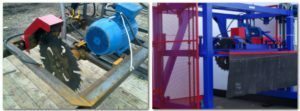 |
Units with motor-driven. Such units are most common since they, despite the lower power, can be operated in confined areas. |
| illustrations | Classification according to the degree of automation |
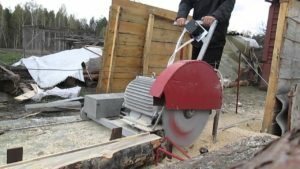 |
Installation Manual. This is the simplest equipment, in which the operator has to manually move the cutting tool along the log and their hands ready to select timber. |
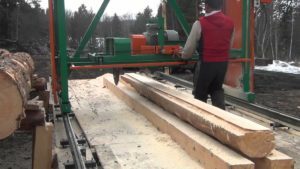 |
Units with semi-automatic control. This is the most common equipment, in which the operator manages the installation, but the timber movement is due to the additional electric motor. |
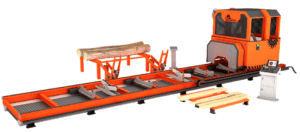 |
Installations with fully automated control. The operator of such sawmills is sufficient to introduce the values of the dimensions of finished lumber and equipment automatically execute cutting. |
Selecting a disc
Choosing disk, take into account the diameter of the pin, which will be assigned to the cutting tool and the maximum diameter of the disc. Parameters recommended for the equipment can be found in the data sheet. If the disk homemade sawmill and no passports, all measurements are made with a caliper.
The marking range of the saw, there are two numbers, the first - it is the maximum diameter of the disc, and the second - the pin diameter. A cutting tool with a diameter range up to 315 mm is used on household machines. Circle diameter of 400 mm and larger - size, intended for industrial sawmills.
A distinctive feature of the saw range - is the configuration of the teeth and the material from which they are made.
| illustrations | Classification according to the design of the |
 |
monolithic. These discs are made of a uniform solid plate. The teeth on these cutting tools is punched out, and then to get divorced and sharpened. Used the saw tooth type - for working with hard wood species and curved - sawing of softwood. |
 |
carbide. Of solid slabs in circles - the foundation, and it is on the basis of fusing the teeth of a particular configuration. The advantage of carbide discs - an increased service life. |
What can be done at home
Finally I tell you how to build a compact version of the saw blade. Everything is so simple that even the drawings are not needed!
| illustrations | Description of action |
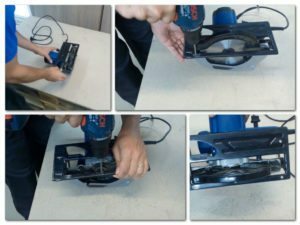 |
Prepare the saw. Along the perimeter of the sole of the circular saw drill least 6 holes with a diameter of 6 mm. Through these holes, the saw will be attached to the base of the machine. |
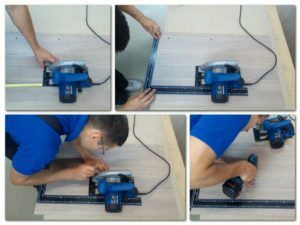 |
Doing markup by the cutting tool. We put the saw to the sole harvested countertop. Align sole on a square. In early-drilled holes in the base makes a mark. Central labels drill hole diameter of 2 mm. |
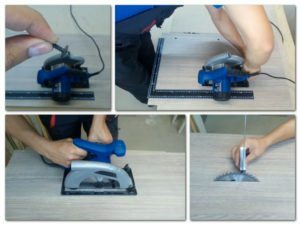 |
Mounting the cutting tool. We put on top of the saw bore holes and fasten the sole through the previously made hole the fastening screws. Immediately tighten the screws so that the tool on the table was tight and did not move. Turn on the saw and cut through the groove. We turn table top drive upward and square check disk arrangement angle - it should be straightforward. |
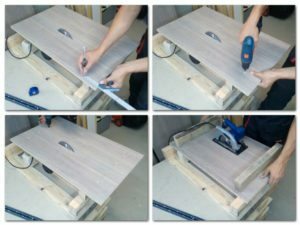 |
Mounting supports. As shown in the photo, from the edge of countertops retreat for 100 mm and draws a line. By marking made in increments of 50 mm and drill-holes of 2 mm diameter. Each hole is made sweat under the screw head. Under counter puts a section with bars 50 × 100 mm. Align the bars so that they were on the line of drilled holes and screws are screwed. As a result, from the inside countertops we should get two firmly fixed support. |
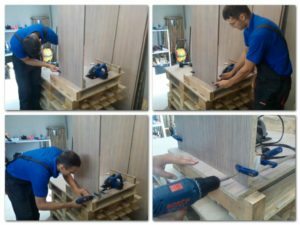 |
Mounting of the side walls. By putting a worktop supports a side wall and clamps them we catch. Each wall of the fix on the support screws 6-8. Screw the screws need so that they do not hit the screws that secure the support. To support rods were cracked, before screw screw, it is necessary to drill a hole with a diameter smaller than the thickness of the screw . |
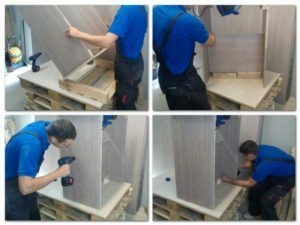 |
install the spacer. To rigidly secure the side walls, a spacer inserted therebetween, which are mounted across each wall a few screws. |
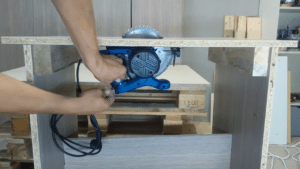 |
Lock the button cutting tool. Push the start button and it overtighten plastic clamp. |
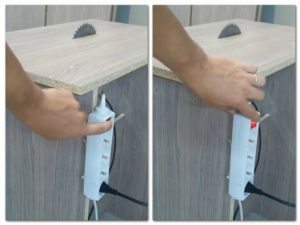 |
Trial run. Leads to the cutting tool and the power switch on the saw. For convenience, it is advisable to use a socket with pushbutton, as shown in the photo. |
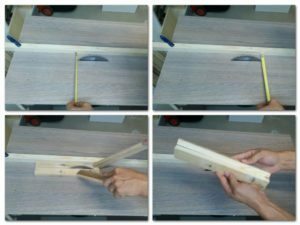 |
Set the limiter. Flat rail clamps fastened on the distance from the disc, which will be equal to the thickness of the finished board. It is important to set restrictive rail so that it is parallel to the saw blade range. |
To summarize
Circular saw bench - a useful tool that will not interfere in the home workshop. Now that you know what constitutes this machine and how to make it compact modification. If you have questions about the design of the cutting machine, write about it in the comments. Also, watch the video in this article, I am sure you will be interested.


