Window slopes - 4 modern finishing options
Table of contents
-
1 Finishes the window openings
- 1.1 Plastering
- 1.2 finishing drywall
- 1.3 plastic
- 1.4 metal
- 2 Output
In this article, I decided to tell you about the four modern finishes the window openings. The information will be useful to both the owners of apartments and private homes. Supplemented by photographs step by step instructions will allow you to independently carry out the work in any way liked.
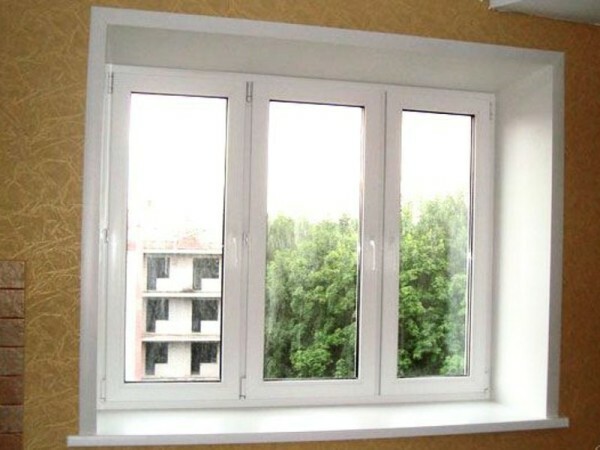
An example of modern decoration of the window opening
Finishes the window openings
So, to decorate the slopes in the following ways:

Modern types of slopes
Plastering
In recent years, the window openings becoming less plaster, but, nevertheless, this technology remains relevant. So let's start with it.
I must say that this work is dirty and quite complicated. Also, keep in mind that at the finish of the opening you need at least two days.
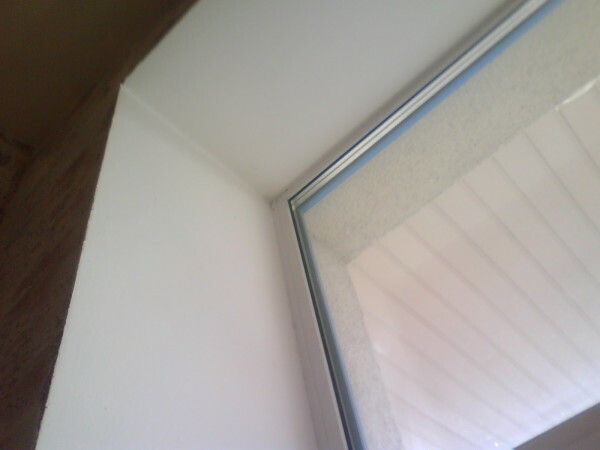
EXAMPLE finishing plastering window opening
So, to plaster the slopes, you will need these materials:
- cement plaster - it is desirable to use the finished mixture;
- Primer - the universal or deep penetration;
- starting and finishing putty;
- wooden slats;
- Lighthouse profiles;
- plastering corners.
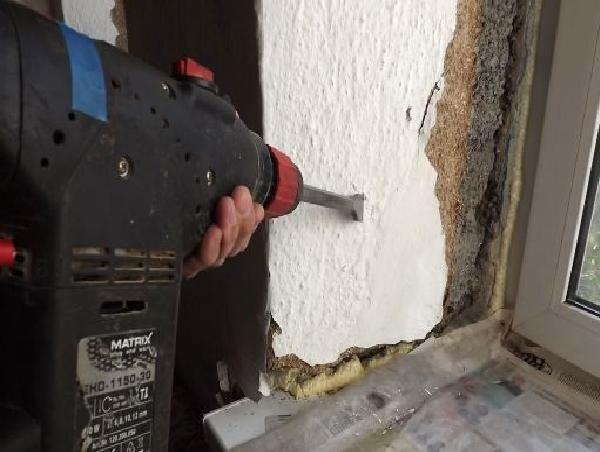
Removing old plaster
Before you start plastering window slopes, it is necessary to prepare the window opening with the following steps:
- first of all you need to remove the old plaster. To do this, "armed" with a nozzle-puncher chisel, turning it in the strike mode. You can also use an ordinary hammer and chisel;
- then the window opening must be cleaned of dust. To do this, wipe with a damp cloth;
- Now opening should be primed. Apply the product on the surface with a brush. After drying of the soil, repeat processing.
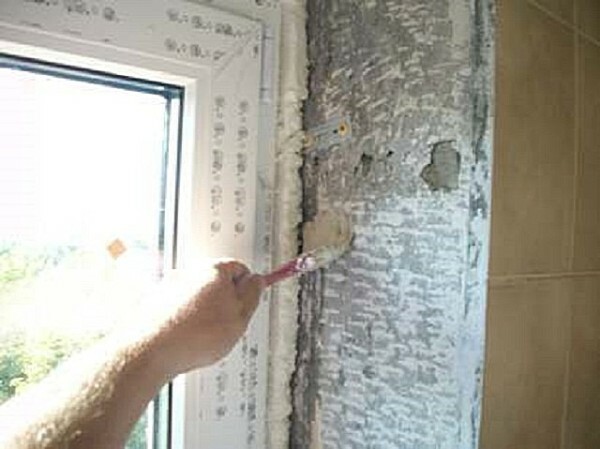
Priming slope
Now you can start plastering. Instructions for the implementation of this work is as follows:
- first of all need to install a metal guide profile on the perimeter of the frame, as shown in the diagram below. Glue profile can plaster lumps.
During the installation of the guide, observe the level that they are arranged vertically. The upper profile must be located, respectively, horizontally;
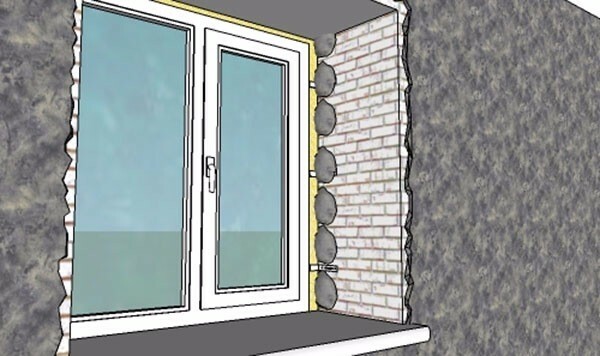
Lumps grout for bonding guide
- then you need to install the perimeter of the window opening slats are also exposing their level. Besides, keep in mind that the position of the slats depends on allotment of slopes, which should be symmetrical. Therefore, one should first provide a right angle between the frame and the rack, and then shift the rails the same distance.
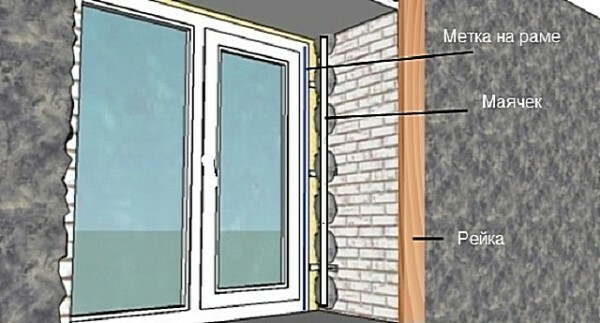
Driving mount beacon and guide profile
Fix the wooden rail on the wall is possible by means of nails or any other reasonable way for you. If the wall is a row of windows after the installation of the first upper limit, it should pull the thread, aligning it on the plate. It will serve as a beacon for the rest of mounting rails on the windows;
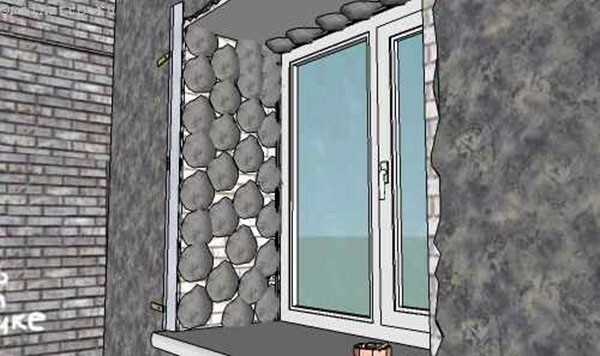
Applying a first layer of plaster
- now need to apply a first layer of plaster, which snaps with a trowel. The thickness of the first layer should not exceed one centimeter.
After drying the first layer, the second layer should be applied, unless it is needed. To align the slide surface of the plaster trowel or float along the guide rail and wood;
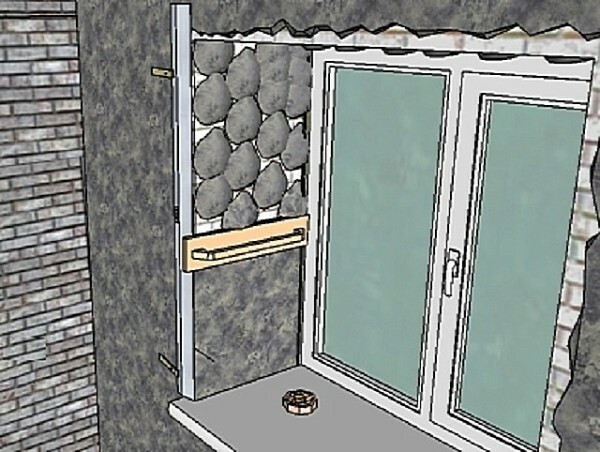
surface leveling
- after setting solution powertrowel surface float, making it more smooth;
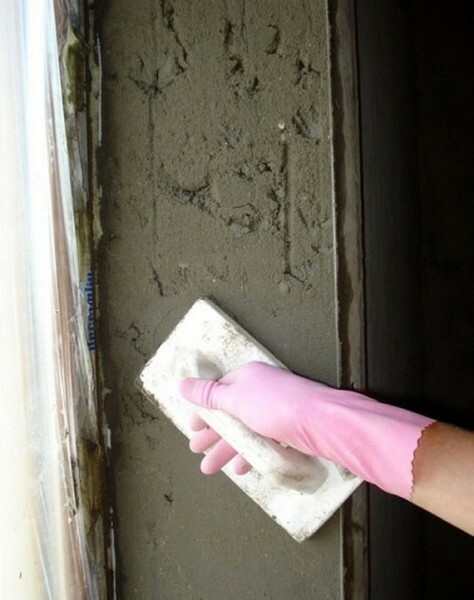
Wipe the surface
- according to this scheme oshtukaturte all slopes;
- After hardening the surface should be zashpatlevat plaster. Thus it is necessary to dismantle the wooden slats and glue on all outside corners plastering corners, aligning them with the level;
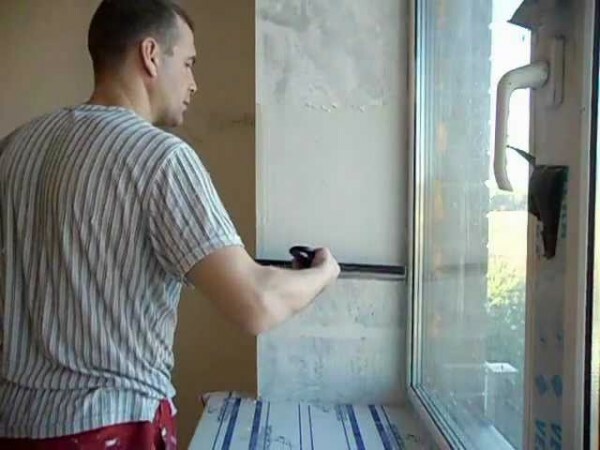
Shpatlevanie surface
- After drying putty, it must be sanded and primed;
- if necessary, apply a thin final coat of putty and then grind it with fine sandpaper abrasive. Then again, apply a primer.
The disadvantage of plaster is that it can crack over time. However, it can easily be repaired by shpatlevanija. The only top coat in this case, you need to update.
The surface is now ready for finishing slopes. As a rule, they are painted water-resistant latex paint.
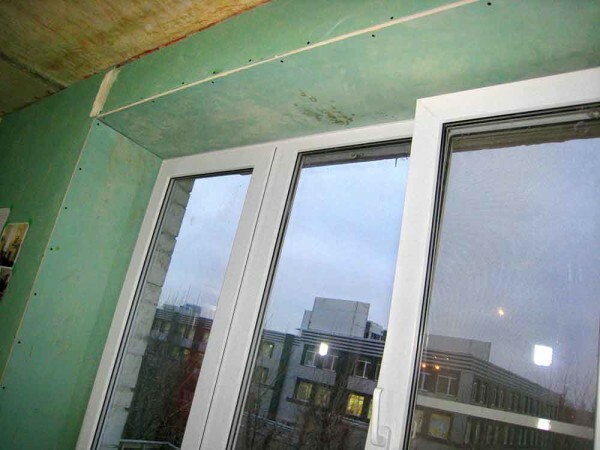
Decorated plasterboard soffits
finishing drywall
Finish window openings plasterboard done faster and easier than plastering. In this case, it is possible to insulate the opening. Because this technology in recent years is one of the most common.
To make the slopes of the drywall, we need these materials:
- moisture-resistant gypsum board;
- starting and finishing putty;
- starter profile;
- plastering corners;
- latex paint.
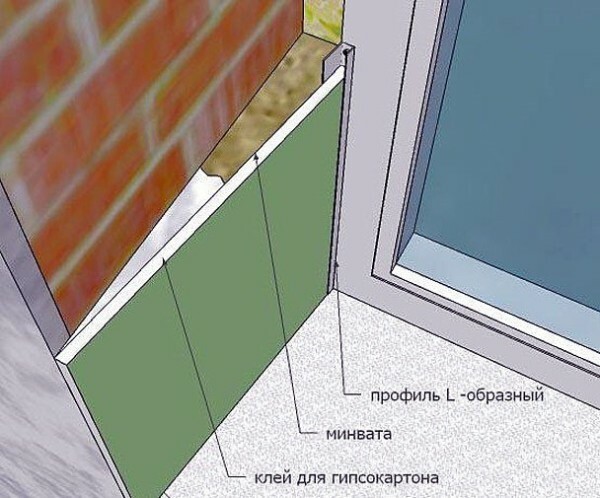
EXAMPLE finishing slopes plasterboard
Mounting slopes plasterboard performed in the following sequence:
- if on the old slopes there are areas with peeling or crumbling plaster, to get rid of them. However, complete removal of the plaster is not necessary. The only completely remove the old paint if it is available;
- if the window has recently been found, and it is necessary to get rid of excess foam that can be cut with a sharp knife;
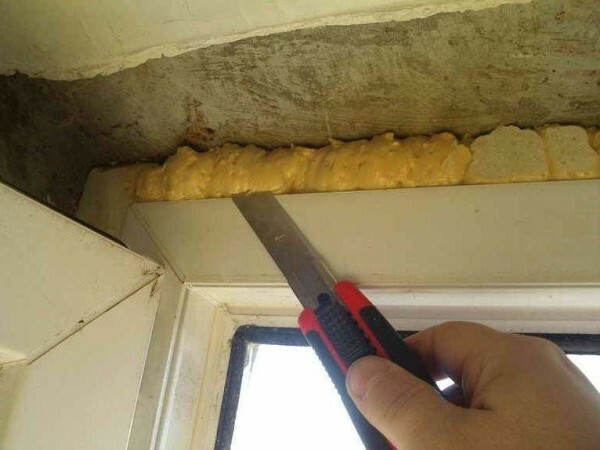
Removal of excess foam
- Now on the perimeter of the window frame must be installed starting profile with screws, pre-cut it into pieces of height and width of the window frame. During installation, be sure to use the profile level;
- then you need to measure the window opening. According to the data layout should be applied to a sheet of drywall, and it cut panels slope;
- more primed surface slopes necessary for the scheme described above;
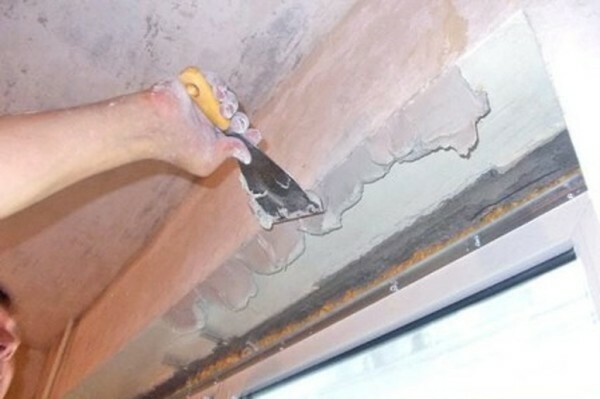
Application putty
- start the installation from the top of the slope. For this first Apply plaster to the outer corner, as shown in the above photo.
Then, insert the panel into the starting profile, and press down to putty. Previously in the space between the wall panel and lay the mineral wool. To lock the panel in this position until the putty grab, use props;
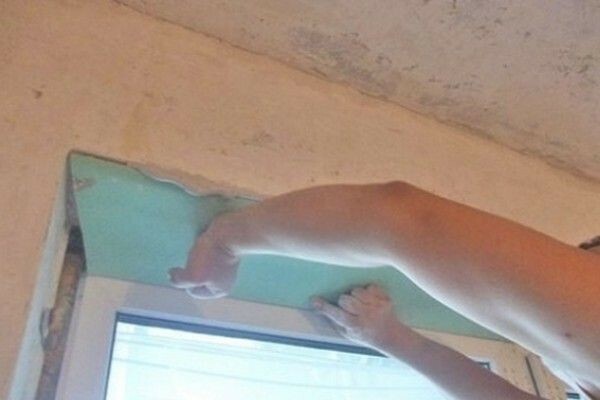
Set the upper slope
- after the top panel is pasted, set side slopes in the same way;
- now you need to perform a rough finish drywall. To do this, first of all cover the surface of the primer;
- then glue joints sheets serpyanku grid;
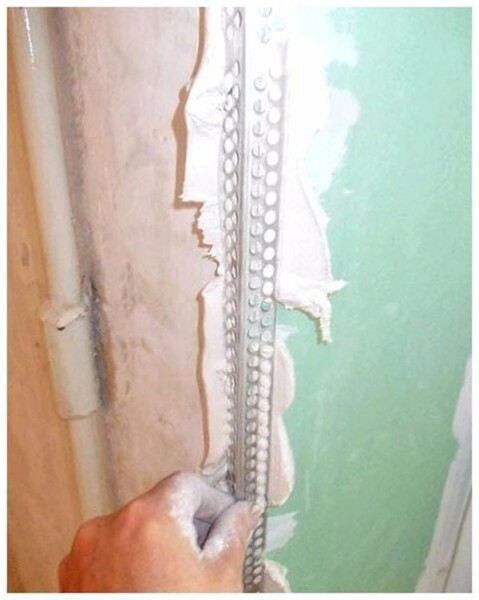
Bonding plaster corner
- thereafter starting slopes must cover layer of putty. At this stage, it is necessary also to glue plaster corners to the outer corners, as shown in the picture above;
- wait for further drying of putty, then grind it and cover with a primer;
- then apply a thin layer of finish putty, which after drying and must be sanded and primed;
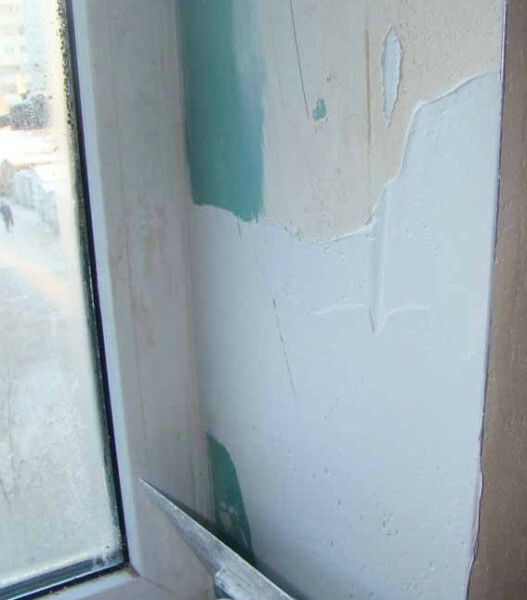
Shpatlevanie slope
- At the conclusion of the prepared surface color waterproof latex paint.
The installation slopes of plasterboard completed.
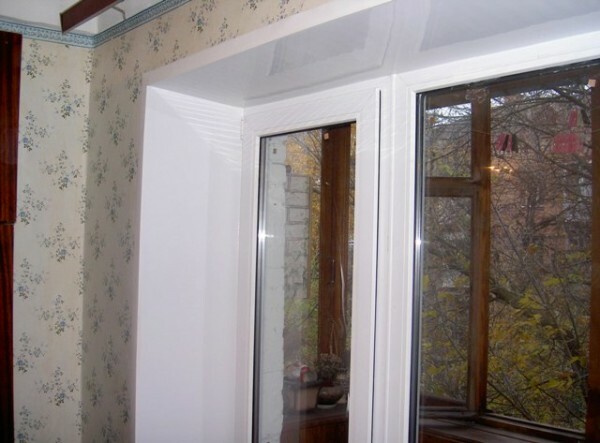
EXAMPLE finishing slopes plastic
plastic
Consider how to make the slopes after the installation of plastic windows made of plastic. It must be said that this method of finishing has a number of advantages to the technology described above.
In particular, the following points can be identified among the advantages:
- practicality of plastic - easy to clean, not afraid of moisture;
- Low price of plastic panels - from 150-200 rubles per 1m2;
- simplicity and high speed of installation, as completely absent wet work, including plaster.
True, not everyone likes the kind of plastic slopes. Also, keep in mind that cheap plastic can turn yellow over time.
Slopes of plastic should be installed after the walls will be finished. But openings drywall finishing must be carried out on the contrary - to finish the walls.
Trims for plastic slopes
So, to perform plastic slopes, you need to prepare the following materials:
- special plastic panels for the slopes;
- starting U-shaped profile;
- angular guide profile;
- trim plastic panels.
Plastic panels can be replaced with sandwich panels, which consist of two layers of plastic and insulation.
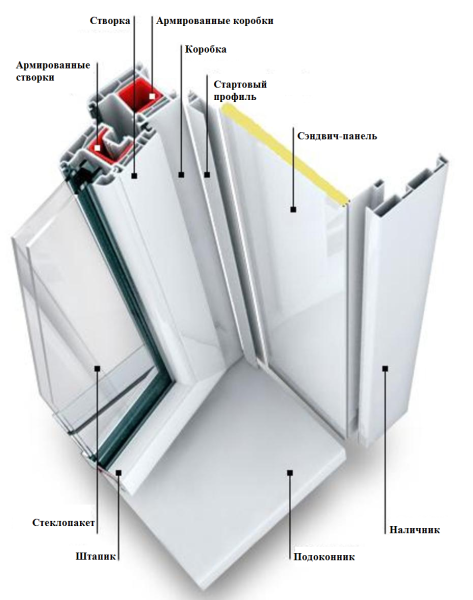
Driving device plastic slope
Installation of the plastic panels is as follows:
- first of all you need to prepare the window opening as well as for finishing drywall. In particular it needs to be primed or antifungal composition;
- If the window opening in the process of installation of new windows were heavily damaged by the perimeter of the opening should be fixed wooden slats;
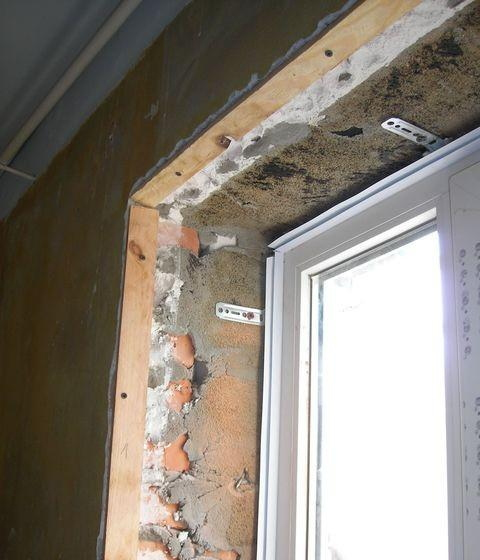
EXAMPLE installation of wooden slats and the guide profile
- further attach the perimeter of the window guide profile;
- then you need to prepare two angular profile. Their length should correspond to the depth of the slopes. These profiles are installed in the upper corners of the opening, as shown in the photo below;
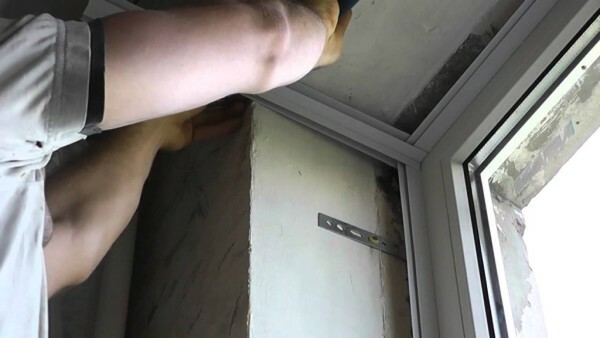
Installing the corner of the upper profile
- Now you need to prepare casings, cut to the height and width of the opening. Edge in the joints, it is necessary to kill a 45-degree angle.
- prepared casings need to be fixed on the perimeter of the opening. Process mounting casings is largely dependent on their type.
Some models are fixed by screws slopes or even a stapler, others from the wall using dowels, nails.
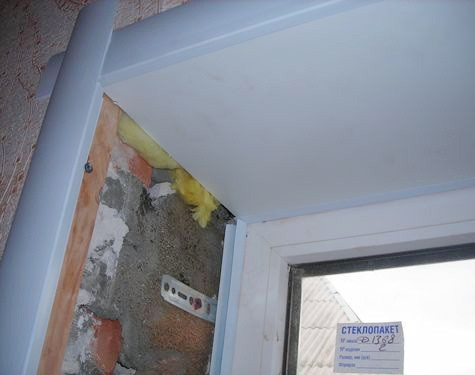
EXAMPLE installation platbands
- then prepare the plastic panels. As drywall, they must first mark, according to the size of the opening, and then cut. Cutting plastic panels can use the jigsaw, mounting a knife or hacksaw on wood with a fine tooth comb.
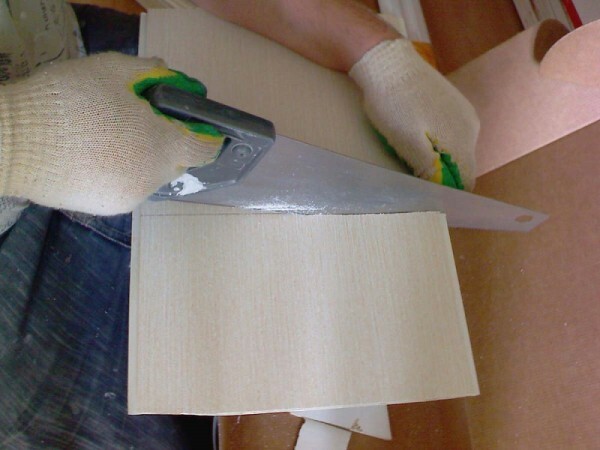
Cutting the plastic panel hacksaw
Keep in mind that the cut in the panel must be very careful, because they are not putty. Accordingly, this determines how neatly slopes will look at the windows;
- Now trained panel need only fill in the guide, and then put on the decorative caps on the trim, if any.
In this installation of slopes completed.
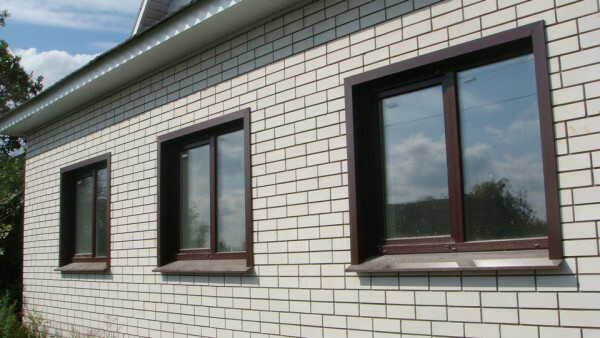
In the photo - an example of finishing slopes metal panels
metal
Widespread in recent years have received metal soffits for outdoor decoration. They can be used in combination with both metal siding, and to any other embodiments facade finishing.
For the installation of metal slopes, we need these materials:
- metal soffits themselves - are a set that includes all the necessary details;
- foam.
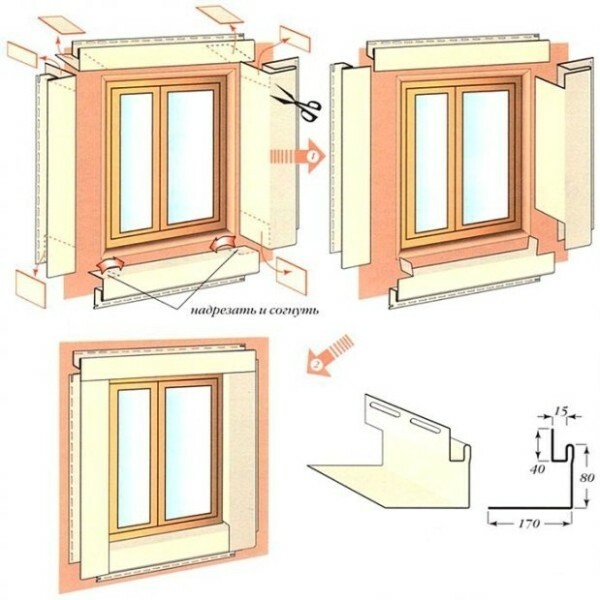
Installation diagram Metal slopes
Installation is carried out in the following sequence:
- Get started with surface preparation - flaking, remove the old finish, if available, and be sure to clean the surface from dust;
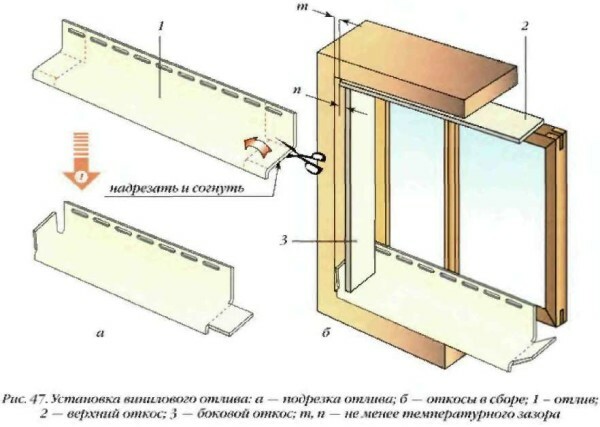
Installation diagram sill
- you now need to install a window sill. For this cut a panel so that its length is 10 cm greater than the width of the sill. Then trim it as shown in the diagram and bend the edges to either side turned volvulus 5 cm.
Further moisten surface onto which will be mounted the sill, and apply it to the foam core. Then, install a window sill, and attach it to the frame with screws;
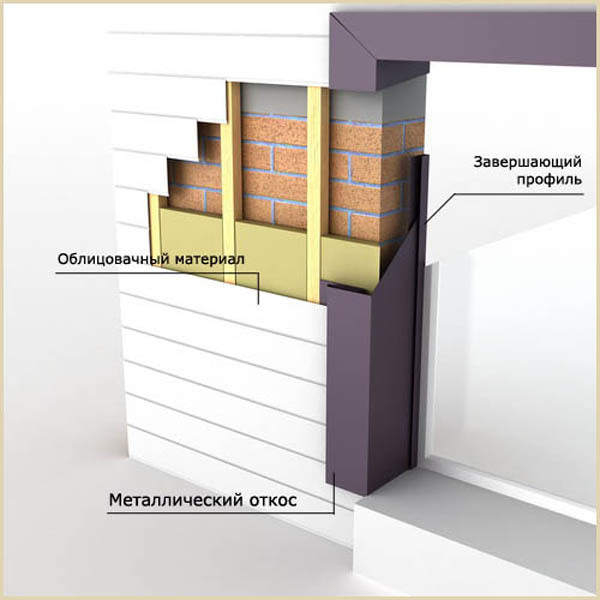
EXAMPLE mounting slopes using the guide profile
- you now need to set slopes. If the model has a guide, the installation begins with their attachment to the frame. As in previous cases, the profiles must be fixed with screws, after putting on a level;
-
then it is necessary to prepare a panel for vertical slopes. Their length should be at the height of the window opening, plus two casing widths. To the panel entered the doorway, they need to be trimmed to himself escarpment equaled the opening height.
Then, the top casing must be cut at 45 degrees;
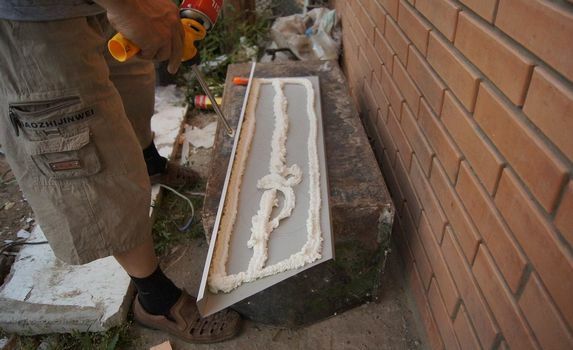
On the back side of the panel assembly foam inflict
- Now, apply the foam core, and insert them into the guides on the rear side panels. On the side panel trims are usually attached to the wall using dowels, nails or screws;
- now we need to just set the upper horizontal slope. Its length must also exceed the width of the opening into two casing width.
When decorating the window openings of the wooden house panel can be used with photo printing, simulating the texture of wood. As a result, they will not be visually different from wood.
At this assembly has been completed. I must say that the installation process, depending on the model, may be slightly different. However, in general, the principle remains the same.
Here, actually, and all the information on how to make the slopes with their own hands the most common methods today.
Output
As you can see, on the slopes of the windows simply are set, regardless of their type. Therefore, having determined their choice, you can safely get to work on their own, even if before such a procedure is not engaged. Also I recommend to watch the video in this article, and if after that you still have any questions, ask them in the comments and I will gladly answer.


