How are shelves of plasterboard (36 photos): necessary equipment, design and installation options for finishing
Table of contents
-
1 the necessary equipment
- 1.1 tool kit
- 1.2 Expendable materials
-
2 Mounting design
- 2.1 Mounting racks
- 2.2 Installation of carcass shelves
- 3 Options finishing shelves
- 4 conclusion
- 5 Photo Gallery
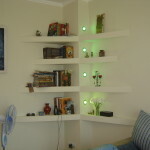
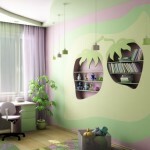
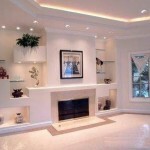
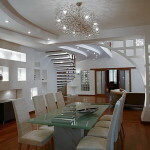
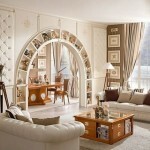
In many modern apartments and houses, you can see the external and built-in shelves of plasterboard - it is not only very beautiful, but also very convenient.

plasterboard shelves
And that's why:
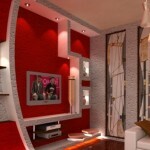
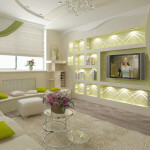
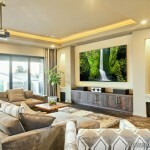
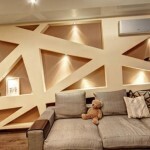
- During their installation, you can clearly plan what size or shape they should be, rather than to adapt to the existing solutions in stores. For example, you can easily make custom shelves in the wall under the TV plasterboard is with such parameters as you need.
- Colors and texture of this design can be any. In this case, in contrast to the standard furniture, shelves of GCR can always repaint in any desired color. And it does not need any special preparation works - simply make room, wipe the surface with a damp cloth and all - the design can be changed.
- The cost price, the price of basic materials to create even the most complex and large shelves - is quite low. And it says that if you want to make a complex shelf around the TV or standard in the hallway - their own, to buy materials for her can any. After all, as a rule, the bulk of the budget for this project - a designer royalties.
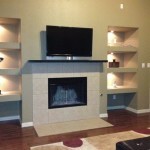
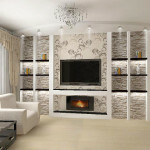
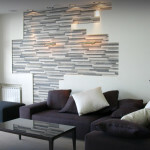
- Well-designed and made shelves without any problems can withstand even a very considerable weight. For example, the same regiment of plasterboard under the TV stand and it is another additional hardware.

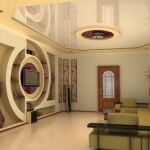
Shelf for TV
- In most cases, shelf installation takes a few days together with the finishing. That is not necessary, as in the case of ordering furniture designs, wait for the right colors and panels for weeks (or even months).
In addition, gypsum board design can be safely installed in the premises of any type - the materials used do not emit any toxic substances and odors.
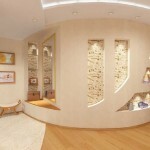
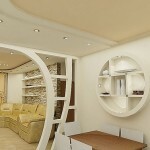
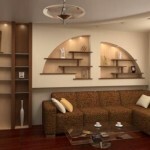
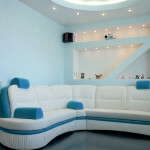
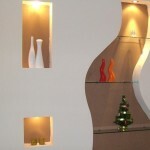
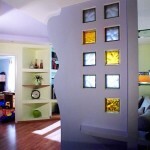
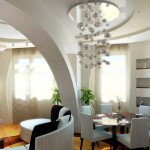
And the last point - the geometry of the shapes can be any! Design can be wall-mounted straight, angled, or even placed in a semicircle.
Let's look at what will be needed for installation.
the necessary equipment
Of course the universal "gentleman's set" in this case does not exist, so the list of required accessories is highly dependent on the objectives and the specific situation.
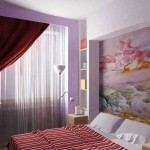
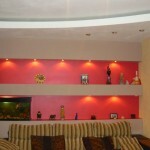
After all, for example, you can make simple shelves of plasterboard in the bedroom or other room, and it is possible to implement them with the light - and in this case need to have and "suitcase" electrician. Therefore, as an illustrative example, consider the most common situation - requiring no complex corner regiment or semi-circular, and the usual external shelf near the wall, which will resemble the familiar to all in its structure rack. (cm. also Article Niche plasterboard backlit own hands: decorate the ceiling light-emitting diodes)

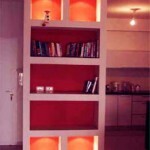
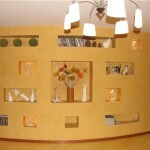
Wall with shelves and illuminated
To implement such a project needed standard equipment.
tool kit
Note!
If the walls in the house of the strong brick or concrete, it is necessary to take into account that to the list published below and will need another punch.
In general, such a tool is needed (excluding tool for plastering and painting)
- screwdriver and set of screwdrivers;
- hammer and scissors on the metal;
- upholstery cord with good paint, tape measure and pencil;
- Typically two-meter and a small level (50-70 cm.);
- square;
- plummet and a knife with a blade;
- water level.
Also it will not be superfluous to have and grinders - not always convenient to cut profile scissors.
Now about consumables.
Expendable materials
In order to collect the full frame will need the following:
- guide and support profile to mount partitions;

CW carrier profile
- Drywall sheets are not less than 12 mm. thick;
- Various self-tapping screws for metal;
- quick installation;
As you can see, everything is quite affordable, and if, for example, there is no way to buy power tools, it is quite possible to be rented. It is very convenient because it is inexpensive. After all the tools needed for a maximum of a few days.
So, you can proceed directly to work.
Mounting design
To the final result pleasantly please you for years and brought no surprises, please be patient and be careful as possible. It is better to double-check a few times, and only then screwed or cut off.
So, let's begin.
Shelves have to be placed near the wall from floor to ceiling. Therefore, we should as much as possible to clear the whole area around the job site, so that nothing hurt.
Let's define the depth of the shelves ...
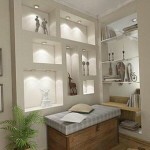
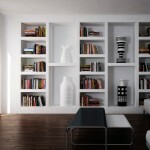
This value is always dependent on the fact that they will be placed. But suppose that we have a particular case and need standalone shelves drywall in the living room, for example, to store books and various accessories (not abut the side walls). Their depth is 50 cm, width 1.5 meters, and the distance between the shelves (height) shall also be two feet.
First you need to install the rack.
Mounting racks
- We note on the corner of the ceiling and walls of the two points at a distance of 1.5 meters from each other.
- From each of them back down on the ceiling plane 50 cm. focusing on the square, and draw a half-meter line.
- Is carried by the plumb line on the floor.
- On the wall upholstery cord connects the points raised in the first step.
The result is a 2 line on the wall, 2 on the floor and 2 on the ceiling. On them and will strengthen the guiding profile. Cut off with scissors or a grinder, metal pieces of the right size, take a hammer and fixed guides.

Guiding profile UW
Next, we need two stiles, carrying profiles, which we insert vertically along the edges already bolted rails and interconnected.
We now have two vertical rectangular rack between which subsequently will be placed horizontal shelves.

Uprights for shelves
But before you fasten themselves shelves, racks need to sheathe from both parties gypsum cardboard. Take knife roulette sheet pieces cut off along 50 cm. width and fasten them to the frame.
Note!
If adjustment is impossible to manage one single piece, in the joints of sheets inside the rack must be a jumper.
Otherwise, the filler in these places will crack.
Once the drywall is fastened, we need the half-meter pieces of the guide profile - we fasten them from the bottom up along the inner side of each leg every two feet. pieces of the grooves should be turned inwards to each other - because in them we are going to insert the horizontal supporting profile for shelves.
By the way, before you mount the pieces on the rack rails, take the water level and check out - even if it turns out the horizon of future shelves. It is absolutely all the labels to check the shelves in such a way is not necessary. It suffices to verify a lower level, and all the other marks can be delayed up to a tape.
So fasten horizontal slices cut guide profile in the right place right on top of the drywall - then you can proceed to the next step.

Rack Shelf
Installation of carcass shelves
- We measure the distance from one part of the inner rack to another.
- Cut off for each shelf supporting two profile corresponding size.
- A carrier profile inserted in the slots of guide pieces being moved towards the wall and is screwed to its plane and to the uprights.
- The second support section is inserted into the slots, and leave at the outer edge of the rack and fasten. It should look like the picture below.

Shelf profile in another non-insulated form GCR
- Now you need to make a jumper for each shelf (if the depth of the shelves would be less than 50 cm. we could well do without the jumper). We measure the distance between the parallel supporting profiles and cut off as the carrier profile pieces, as you need to arrange them every two feet.

Embedded jumpers shelves
- Insert the cut pieces into the future shelves and fasten them.
In principle, this assembly of the frame is completed, and all can be clad with plasterboard.
And finally, let's look at the simplest and most popular way to finish these designs and what to decorate them.
Options finishing shelves
The most common technique - it is certainly the standard finish drywall finishing putty with subsequent color plane.
Of course, it is necessary to first plasterboard well primed, and then to putty and paint. And by the way, before painting the dried putty necessarily carefully (very carefully) is also primed. After all, you will be constantly touching the shelves, and this means that the finishing layers will be subjected to constant mechanical stress. That is, simply put is a risk of scratches and chipped paint.
By the way, if you make a shelf in the bathroom plasterboard with their hands (or in any room with high humidity), do not forget that the use in such a case, you need only water-resistant sheets. And, probably, will not be superfluous to apply them in the attic - after all there are also very often the atmosphere is cold and wet, and frequent temperature changes.

Shelves in the bathroom
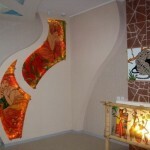
If you want to somehow "revive" the design, try to paint the shelves in one color and the other in the rack - it will be interesting and unusual.
By the way, the texture can also be made creative.
For example, if the entire fresh putty walk your fingers, after drying, you get a very interesting effect. Also this method will be applied perfectly by an acute angle shelves - after this treatment, he will be a smooth and safe for the environment.
If this does not suit you, it is very often do so: on the newly deposited plastered walls are dotted small spatula, like turning it around its own axis - are obtained very unusual and beautiful patterns.
And even with a conventional large brush can create an interesting design - gently tap it on top just poshpaklevannoy plane - get a kind of ripple.
As for what color, then, as a rule, is most often used acrylic or latex paint - and it dries quickly, and stays on the surface firmly.
Well, if you do not want to paint, then there is one good solution - pasting wallpaper shelves. The main thing here is firmly glue them, then everything will be fine.
If there was a dilemma to paint or wallpaper glue to the drywall - the shelf will actually look equally beautiful in both cases, if the work was done neatly.
conclusion
We hope that this brief guide and the information helped you and after reading the article, you can make a shelf of drywall in the bathroom without problems in the room or any other room.
Try it, do not be afraid to experiment, see more videos on our site - and all must succeed!
Good luck to you repair.
Photo Gallery